

Table of Contents Show
You might feel a bit nervous about cake decorating, but I’ll show you simple, easy techniques that help you make a cake you can be proud of. I’ll walk you through basic tools and straightforward tricks that deliver neat, attractive results, and you don’t need anything fancy.
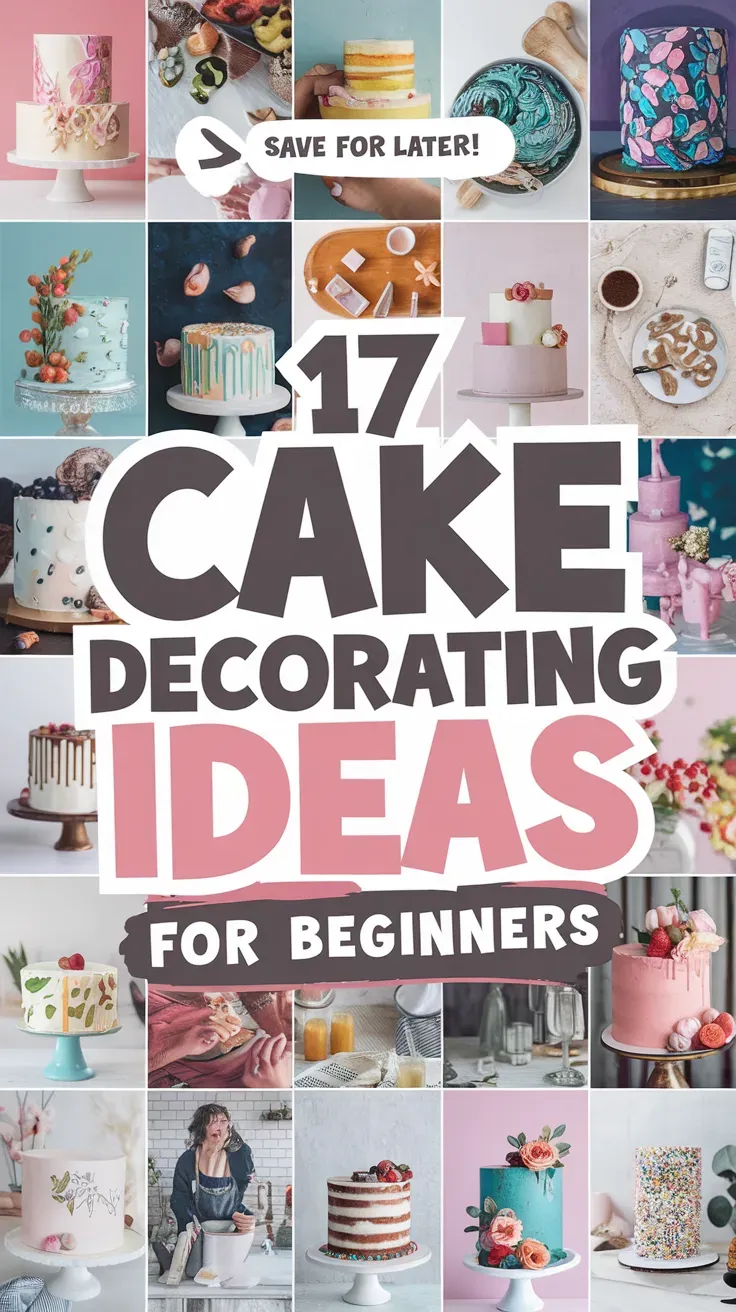
Follow along and you’ll learn how to build a smooth buttercream base, add playful details like polka dots or drips, and use simple piping and layering methods to lift your cakes. I really want decorating to feel clear and doable so you actually enjoy it and see steady improvement.
1. Start with a smooth buttercream base

I always start by crumb-coating the cake to lock in loose crumbs.
I grab an offset spatula and a bench scraper to spread and smooth the buttercream.
If I dip my spatula in warm water, it glides better and helps me get those clean sides and sharp edges.
2. Use an offset spatula for even frosting

I use an offset spatula to spread frosting smoothly and avoid smears.
Holding it like a pencil gives me control, and the bent blade keeps my hand off the cake.
It works for tops and sides, and I like small spatulas for cupcakes or tight spots.
3. Practice piping basic borders like shells and stars

I start with a simple star tip and steady pressure to pipe shells and stars on parchment.
I practice on wax paper until my shapes look even and my hand feels steadier.
Short, focused practice really builds control and confidence.
For People Who Love to Make Things ✂️
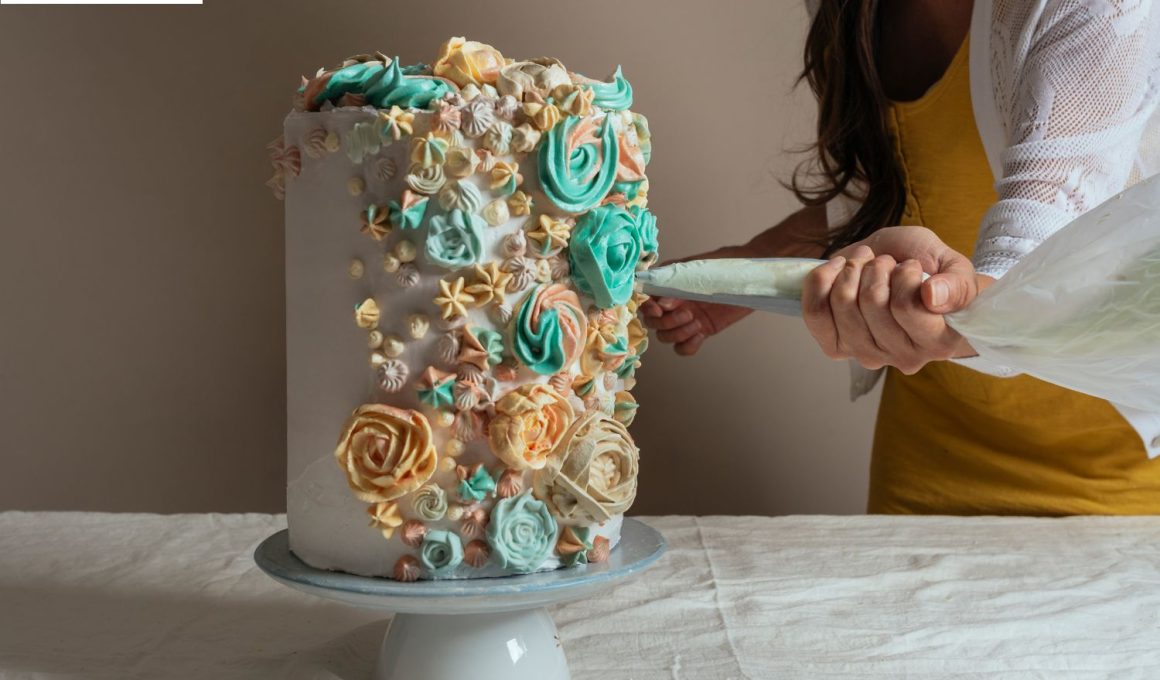
4. Create simple rosette patterns using a star tip

I teach rosettes with a closed star tip for steady, pretty swirls.
I start at the center, squeeze, and turn the bag in a circle until the rosette finishes.
It helps to practice on parchment first to get a feel for the rhythm and even pressure.
5. Add fresh fruit for natural decoration

I like using fresh fruit to make cakes look bright and fresh.
Seasonal fruit always tastes and looks better.
I arrange slices or whole berries on top for a clean look.
A thin glaze brushed onto the fruit keeps it shiny and fresh.
6. Use edible flowers for elegance

I like adding edible flowers to cakes because they lift the look with little effort.
I pick safe, food-grade blooms and rinse them gently before placing them.
I arrange flowers sparingly for a clean, elegant style.
Just a few petals or a small cluster gives a fresh, refined finish.
7. Layer cakes with colorful fillings

I love revealing bright layers when I slice a cake; it makes simple bakes feel special.
I fill layers with jams, curds, or colored buttercream for contrast and flavor.
I keep fillings thin and even so the cake stays stable and slices cleanly.
8. Apply a crumb coat before the final frosting layer

I spread a thin layer of frosting to lock in crumbs and give the cake a smooth base.
I chill the cake until the crumb coat sets, which stops crumbs from mixing into the final layer.
This step makes the final frosting way easier and cleaner.
9. Pipe polka dots for a playful look

I use a round piping tip to add polka dots quickly and neatly.
Small dots add charm, and larger dots make a bold statement.
I mix up colors and sizes for interest.
Dots work on buttercream or fondant and don’t require much in the way of tools.
10. Use stencil designs with powdered sugar or cocoa

I place a stencil on the frosted cake and dust powdered sugar or cocoa for a clear, crisp pattern.
I tap gently to avoid smudges and lift the stencil straight up for a clean edge.
This method gives quick, professional-looking details without much skill.
11. Create drip effects with ganache

I melt chocolate with cream to make ganache, then let it cool until it’s just thick enough.
I test a small drip edge and use a spoon or squeeze bottle to add drips around the cake.
If I need thinner or chunkier drips, I adjust the temperature. Mistakes? I just wipe them with a damp spatula.
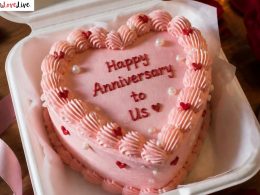
12. Practice writing simple messages with a round tip

I start with a round tip and steady pressure to write clear letters on practice sheets or cake scraps.
I keep messages short—names or just “Happy” work best—so my letters stay neat.
I practice spacing and pressure until my writing looks smooth and even.
13. Use a bench scraper to smooth cake sides

I use a bench scraper to get straight, even cake sides quickly.
I hold the scraper steady and turn the cake on a turntable, wiping the edge between passes.
This tool works for buttercream and ganache and gives a clean, professional finish.
14. Make homemade fondant decorations

I roll simple fondant shapes with cutters to add clean, polished details.
A tiny bit of shortening keeps fondant from sticking and helps smooth edges.
I usually make flowers, stars, and letters ahead so they set firm before putting them on the cake.
15. Add sprinkles strategically for texture

I place sprinkles just where I want contrast, like the cake edge or center.
I press gently so they stick without sinking into the frosting.
Mixing sizes and shapes adds depth.
I try not to overload one spot so the cake stays balanced.
16. Use chocolate shavings as decoration

I like adding chocolate shavings for a quick, elegant look.
They add texture and a mild chocolate flavor without much work.
I shave chocolate with a vegetable peeler or knife.
I sprinkle curls over frosting or press shavings onto the sides for a neat finish.
17. Create ombre frosting with gradient colors

I usually blend three to five shades of the same color to get a smooth gradient.
First, I stack bands of frosting around the cake, then smooth outward so the colors melt into each other.
If I notice a spot that looks off, I’ll tweak it with a bit more dye—just enough to even things out without turning everything into one color.