


Table of Contents Show
I often find myself with leftover fabric scraps that are too small to use for big projects but too good to throw away. Instead of letting them pile up, I look for creative ways to turn these pieces into something useful or decorative.
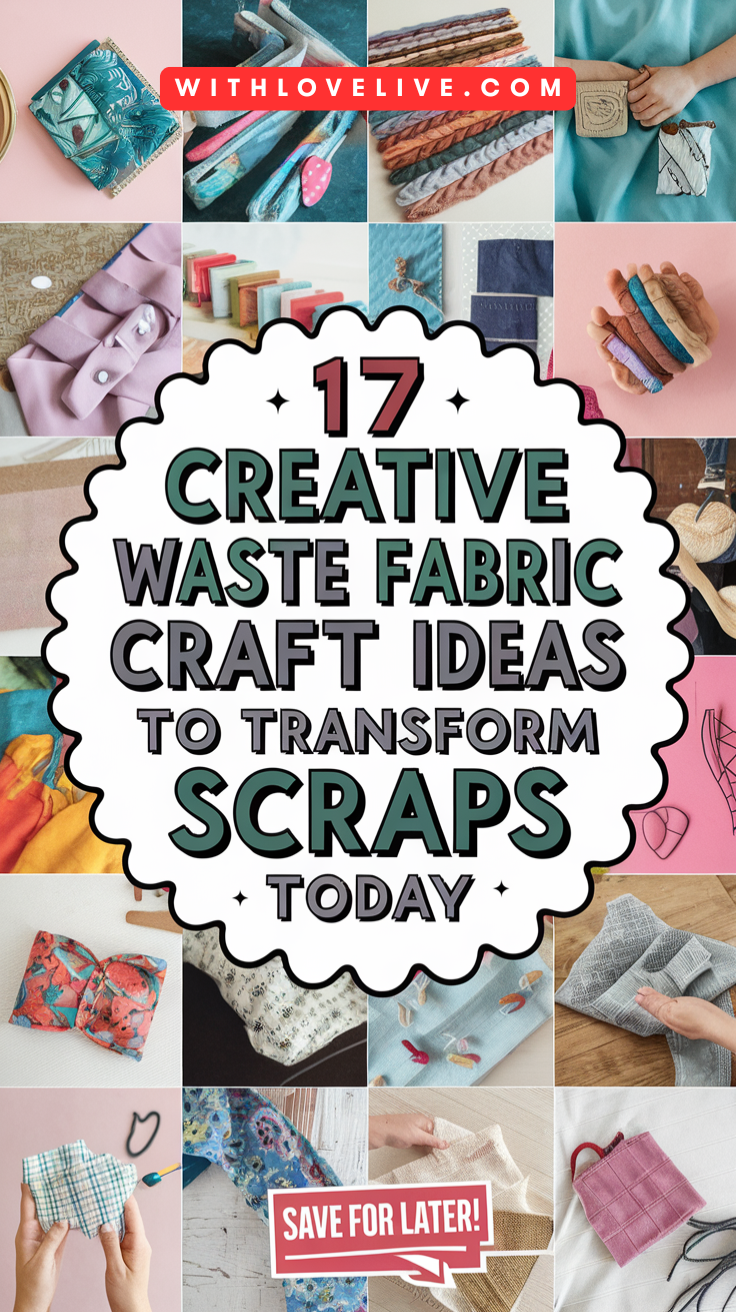
Waste fabric crafts are a great way to give new life to materials that might otherwise end up in the trash. These 17 creative waste fabric craft ideas show how you can reduce waste and make practical, fun items using scraps you already have.
They offer simple projects that anyone can try, whether you like sewing or prefer no-sew options. This makes it easy to find ideas that fit your skills and time.
1. Patchwork Quilt from Fabric Scraps

I like making patchwork quilts using leftover fabric pieces. It is a simple way to create something useful without wasting materials. I usually cut scraps into small squares or shapes. Then, I sew them together in a pattern to form quilt blocks.
This project works well with fabric pieces at least 1.5 inches square. Combining different colors and patterns makes the quilt interesting.
For People Who Love to Make Things ✂️
Patchwork quilting is beginner-friendly and helps reduce fabric waste. It also lets me use cherished fabrics I want to keep.
How to Make a Patchwork Quilt from Fabric Scraps
Materials Needed:
- A mix of fabric scraps (different colors, prints, or textures)
- Fabric scissors or rotary cutter
- Ruler or quilting square
- Pins or clips
- Sewing machine (or needle and thread if sewing by hand)
- Backing fabric (large enough to cover quilt size)
- Batting (for padding inside)
- Iron and ironing board.
Steps to create this:
- Step 1: Gather and Cut Your Fabric Scraps
Sort through your fabric scraps and pick pieces with patterns and colors that look nice together. Wash and iron them so they’re smooth. Cut them into equal-sized squares or rectangles (like 5×5 inch squares) using a ruler for accuracy. - Step 2: Plan Your Quilt Layout
Lay out the fabric pieces on a flat surface or floor. Play around with the arrangement until you find a pattern you like—alternate colors and prints so the quilt looks balanced. Take a photo of the layout to guide you later. - Step 3: Sew the Squares into Rows
Start sewing the fabric pieces together in rows. Place two squares right sides facing each other and stitch along one edge with a small seam allowance (about ¼ inch). Keep joining pieces until you have a complete row. Repeat this for all rows. - Step 4: Join the Rows Together
Once you have several rows, pin them together (right sides facing) and sew along the long edges to connect them. Press the seams flat with an iron as you go so the quilt lies neatly. Soon, you’ll have a large quilt top made of all your scraps. - Step 5: Add Batting and Backing
Lay the backing fabric on a flat surface (right side facing down), then place the batting on top, and finally your quilt top (right side facing up). Smooth everything out to avoid wrinkles. Pin or clip all layers together. - Step 6: Quilt the Layers
Sew through all three layers with straight lines or simple patterns (like diagonals or squares) to keep the layers in place. This step is called quilting, and it gives texture and durability. - Step 7: Finish with a Binding
Trim the edges so they’re even. Use bias tape or long fabric strips to bind the edges of the quilt, folding them over the raw edges and sewing securely.
2. Fabric Scrap Keychains in Floral Designs

I like making keychains from fabric scraps because they are simple and useful. Using floral patterns adds a nice touch and makes each keychain special.
To create these, I cut small flower shapes from leftover fabric. Then, I sew or glue them onto a base fabric piece.
Sometimes, I add buttons or stitching details to make the flowers stand out more. These keychains are light and easy to carry.
How to Make Fabric Scrap Keychains in Floral Designs
Materials Needed:
- Small fabric scraps (different colors/patterns)
- Scissors
- Needle and thread (or hot glue gun for a no-sew option)
- Keychain rings
- Small buttons or felt circles (for the flower centers)
- Fabric glue (optional).
Steps to create this:
- Step 1: Cut Petal Shapes
Choose bright fabric scraps and cut them into petal shapes (about 2–3 inches long). Cut at least 5–6 petals for each flower. - Step 2: Form the Flower
Take one petal, fold it slightly at the base, and stitch (or glue) it to hold its shape. Repeat with all petals, then join them together in a circle to form the flower. - Step 3: Add the Center
Place a small button, bead, or felt circle in the middle of the flower to cover the petal joins. Sew or glue it firmly in place. - Step 4: Attach the Keychain Ring
Cut a small strip of fabric, fold it into a loop, and secure it to the back of the flower. Slide a keychain ring through the loop so it hangs nicely. - Step 5: Secure and Finish
Check all stitches or glue points to make sure the flower is sturdy. Trim any loose threads or fabric edges, and your floral keychain is ready to use or gift!
3. Handmade Pet Toys Using Scrap Fabric

I use scrap fabric to make simple pet toys. Cutting fabric into strips lets me create braided or knotted toys that pets enjoy chewing and playing with.
Old clothes like denim or fleece work well. I trim edges with pinking shears to stop fraying, making the toys last longer. Sometimes, I add bells or squeakers to grab my pet’s attention. These toys reuse fabric scraps that would otherwise go to waste.
Making these toys is easy and does not require sewing. It’s a good way to upcycle fabric while keeping pets entertained.
How to Make Handmade Pet Toys Using Scrap Fabric
Materials Needed:
- Fabric scraps (durable cotton or denim works best)
- Scissors
- Needle and thread (or sewing machine)
- Stuffing (old fabric pieces, worn-out socks, or cotton filling)
- Rope or thick fabric strips (optional for tug toys)
Steps to create this:
- Step 1: Cut Fabric Strips or Squares
Choose sturdy scraps that can handle chewing. Cut them into strips (for braided toys) or squares/rectangles (for balls or stuffed toys). - Step 2: Make a Fabric Ball
Take a square of fabric, place some stuffing in the middle, and wrap it up into a ball shape. Secure the edges with stitching so the stuffing doesn’t fall out. You can cover it with another fabric layer for extra durability. - Step 3: Create Braided Tug Toys
For a tug toy, cut 3–4 long strips of fabric. Tie a knot at one end, braid them tightly, and tie a knot at the other end. Trim off loose edges. This makes a great chew-and-pull toy. - Step 4: Add Extra Strength
If you want the toy to last longer, double-stitch seams or use two layers of fabric. For balls, you can even cover them with additional stitched fabric pieces in a patchwork style. - Step 5: Test It Safely
Give the toy to your pet and watch how they play. Make sure there are no small parts (like buttons) that could be swallowed. If the fabric frays too much, replace the toy with a new one.
Note: These toys are not only eco-friendly but also fun to make and save you money on store-bought pet toys.
4. Scrap Fabric Coasters with Embroidery

I like making coasters from scrap fabric because they use small leftover pieces. You only need about a 5-inch square of fabric for each coaster.
I sew two pieces of fabric together, sometimes adding old towels for padding. This makes the coaster thick enough to protect surfaces.
Embroidery adds a nice touch. I use simple stitches to decorate the coasters by hand. Beads or small details can go on the edges for extra style. These coasters are quick to make and help reduce waste. They are practical and look good on any table.
How to Make Scrap Fabric Coasters with Embroidery
Materials Needed:
- Small fabric scraps (different colors and textures)
- Scissors
- Needle and embroidery thread
- Fabric glue (optional)
- Round base (felt circles, old coasters, or thick cardboard)
- Pins or clips
Steps to create this:
- Step 1: Cut Fabric Pieces
Choose colorful scraps and cut them into wedge shapes or strips, making sure they can fit together into a circle. Use a coaster or a cup as a size guide for your base. - Step 2: Arrange the Pattern
Place the fabric pieces on top of the base in a circular pattern, like slices of a pie. Mix colors and textures for a bright, patchwork look. Pin or glue them lightly to hold in place. - Step 3: Stitch the Pieces
Using embroidery thread, stitch along the edges of each fabric wedge. Simple running stitches or decorative lines add texture and strength while keeping the pieces secure. - Step 4: Finish the Edges
Wrap embroidery thread or yarn around the edge of the coaster, stitching or looping it through to cover raw edges and make it neat. This also makes the coaster sturdier. - Step 5: Secure and Press
Check all stitches and trim loose threads. If needed, press the coaster gently with an iron (low heat) to flatten it. Now it’s ready to use for cups, mugs, or even as mini decor pieces.
5. Reversible Fabric Scrap Tote Bags

I like making reversible tote bags from fabric scraps. They use two layers of fabric, so both sides look nice. This way, you get two bags in one. I usually pick fabrics that match or contrast well. It’s fun to mix colors and patterns. The size depends on what I want to carry.
Sewing these bags is easy once you know the steps. I cut two pieces of fabric for the outside and lining. Then, I sew them together, leaving an opening to turn it inside out.
Reversible bags save fabric and reduce waste. They are practical for shopping or daily use. I often give them as simple, handmade gifts.
How to Make Reversible Fabric Scrap Tote Bags
Materials Needed:
- Fabric scraps (enough to sew two outer panels and two lining panels)
- Matching or contrasting scraps for handles
- Scissors or rotary cutter
- Sewing machine (or needle and thread)
- Pins or clips
- Iron
Steps to create this:
- Step 1: Create the Fabric Panels
Sew small fabric scraps together in rows or blocks until you have two large panels (about 16×18 inches, or any size you prefer). These will form the outside of your tote. Press the seams flat with an iron. - Step 2: Cut the Lining
Choose other fabric scraps to make the lining. Cut two panels the same size as your outer panels. These will make the bag reversible. - Step 3: Make the Handles
Cut two long strips of fabric (about 4×18 inches). Fold each strip lengthwise, then fold the edges toward the center, and stitch along the edge to form sturdy handles. - Step 4: Sew the Outer and Inner Bags
Place the two outer panels right sides together and stitch along the sides and bottom. Do the same with the lining panels, leaving the top open. - Step 5: Attach the Handles
Pin the handles to the top edge of the outer bag, one on each side. Make sure they’re evenly spaced and facing downward into the bag before sewing. - Step 6: Assemble the Bag
Place the outer bag inside the lining (right sides facing each other). Pin along the top edge, matching seams. Stitch around the top, leaving a small gap for turning. - Step 7: Turn and Finish
Turn the bag right side out through the gap, then tuck the lining inside the outer bag. Press flat and topstitch around the edge to close the gap and give a neat finish.
6. Fabric Scrap Bunting for Home Decor

I like to use fabric scraps to make bunting for my home. It brightens up rooms with little effort. You only need small scraps cut into triangles or shapes.
Sewing the pieces onto a cord is simple. You can stitch by hand or use a machine. If you don’t sew, you can tie or glue the fabric to string.
I often mix colors and patterns for a fun look. Bunting works well for parties or everyday decoration. It’s a useful way to reuse scrap fabric and add charm.
How to Make Fabric Scrap Bunting for Home Decor
Materials Needed:
- Fabric scraps in different colors/patterns
- Scissors (pinking shears if you want zigzag edges)
- Needle and thread or sewing machine
- Bias tape, ribbon, or twine
- Pins or fabric glue (optional)
Steps to create this:
- Step 1: Cut Fabric Triangles
Choose your fabric scraps and cut them into triangle shapes (about 6–7 inches tall works well). Use a piece of cardboard as a template to keep all triangles even. - Step 2: Arrange Your Pattern
Lay out the triangles in the order you want them to appear on the bunting. Mix prints, solids, and colors to keep it lively. - Step 3: Attach to Ribbon or Twine
Place each triangle along the edge of bias tape, ribbon, or twine. Leave about an inch between each flag. Pin in place or fold the tape over the top edge of the triangles. - Step 4: Sew or Glue in Place
Sew along the edge of the tape to secure the triangles, or use fabric glue for a no-sew option. Make sure each piece is firmly attached. - Step 5: Hang and Enjoy
Trim loose threads, then hang your bunting on a wall, doorway, or outside for decoration. It’s reusable and easy to fold up when not in use.
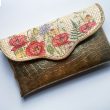
7. Decorative Fabric Scrap Book Covers

I use fabric scraps to make book covers that protect and decorate my books. Small pieces are enough to cover the front, back, and spine of a book. It’s a simple sewing project that adds personality to plain books.
Sometimes, I mix different fabric patterns for a patchwork look. This helps me use up various scraps and create unique designs. The covers also help keep books clean and safe from damage.
Making these covers is easy and fast. I sew the fabric to fit the book size, leaving space for the spine. No special tools are needed, just a needle, thread, or a sewing machine.
How to Make Decorative Fabric Scrap Book Covers
Materials Needed:
- Fabric scraps (various colors and prints)
- Scissors or rotary cutter
- Sewing machine or needle and thread
- Plain notebook or book
- Iron and ironing board
- Pins or fabric glue (optional for no-sew method)
Steps to create this:
- Step 1: Create a Patchwork Panel
Sew small fabric scraps together to make a panel that’s slightly larger than your book when opened flat. Press the seams flat with an iron so the surface is smooth. - Step 2: Cut Lining Fabric
Cut a piece of plain fabric (or another scrap panel) the same size as your patchwork panel. This will act as the inside lining of your cover. - Step 3: Add Side Flaps
Cut two smaller fabric pieces (about ⅓ the width of the cover). These will create flaps to slide the book covers into. Place one flap on each end of the patchwork panel, right sides facing in. - Step 4: Sew the Cover Together
Layer the patchwork panel (right side up), the flaps (right sides facing down), and then the lining (right side down). Pin everything in place. Sew around the edges, leaving a small gap for turning. - Step 5: Turn and Finish
Turn the cover right side out through the gap. Push out the corners neatly and iron flat. Topstitch around the edges to close the gap and give a clean finish.
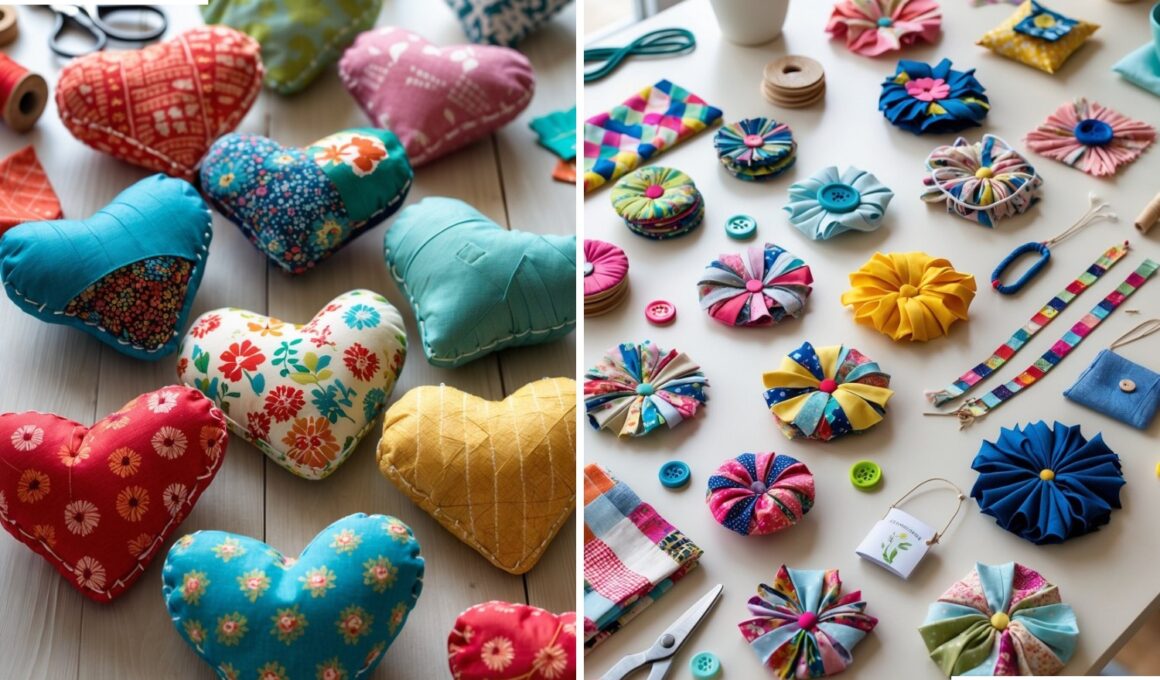
8. Fabric Scrap Flower Brooch Pins

I use leftover fabric scraps to create flower brooch pins. They are simple to make and add a nice touch to clothes or bags.
The process involves cutting fabric into petal shapes, layering them, and sewing or gluing pieces together. You can mix different colors and textures for variety.
These brooches recycle small fabric pieces that might otherwise be thrown away. Plus, they are lightweight and easy to wear.
I like using recycled felt or cotton scraps, but any fabric works. Adding a pin back lets me attach the flower to jackets or hats.
How to Make Fabric Scrap Flower Brooch Pins
Materials Needed:
- Fabric scraps (various colors and prints)
- Scissors
- Needle and thread (or hot glue gun for no-sew option)
- Small felt circles (for backing)
- Brooch pin backs or safety pins
- Buttons, beads, or fabric rosettes (for flower centers)
Steps to create this:
- Step 1: Cut Petal Shapes
Choose fabric scraps and cut them into petal shapes (about 2–3 inches long). You’ll need 5–8 petals for each flower, depending on how full you want it to look. - Step 2: Shape and Layer the Petals
Fold each petal slightly at the base and stitch or glue it to hold the shape. Arrange the petals in a circle, overlapping slightly, and stitch or glue them together. - Step 3: Add the Flower Center
Place a button, bead, or small fabric rosette in the middle to cover the petal joins. Sew or glue it securely. - Step 4: Attach the Backing
Cut a small felt circle and stitch or glue it to the back of the flower. This will give it a neat finish and add support. - Step 5: Add the Brooch Pin
Sew or glue a brooch pin back (or a safety pin) onto the felt circle. Make sure it’s secure so the brooch can be worn without slipping.
9. Upcycled Fabric Scrap Hair Accessories

I like using fabric scraps to make simple hair accessories. Small pieces can be turned into scrunchies, headbands, or bows. These are easy to create and help reduce waste.
To make scrunchies, I cut strips of fabric and sew or knot them. Headbands can be made by twisting strips or adding fabric flowers.
These projects do not need many tools. I often use leftover fabric from other crafts. They work well as gifts or for personal use.
How to Make Upcycled Fabric Scrap Hair Accessories
Materials Needed:
- Fabric scraps (cotton, denim, or jersey work well)
- Scissors
- Needle and thread or sewing machine
- Elastic bands or hair clips
- Pins or fabric glue (optional)
Steps to create this:
- Step 1: Cut Fabric Strips
For scrunchies, cut a rectangle of fabric (about 4×18 inches). For bows, cut smaller strips or rectangles depending on the size you want. - Step 2: Sew the Tube (for Scrunchies)
Fold the fabric rectangle lengthwise, right sides facing each other. Sew along the long edge to make a tube. Turn it right side out. - Step 3: Insert Elastic
Thread a piece of elastic (about 8–9 inches long) through the tube using a safety pin. Overlap the elastic ends and sew them securely. - Step 4: Close the Scrunchie
Tuck in the raw edges of the fabric tube, then sew the ends together to form a loop. This completes your scrunchie. - Step 5: Make Bows or Clips
For bows, cut a small rectangle of fabric, fold the sides toward the middle, and stitch or glue in place. Wrap a thin strip around the center and secure it. Attach the bow to a scrunchie, elastic band, or hair clip.
10. Fabric Scrap Covered Buttons

I like making fabric covered buttons to use up small scraps. You only need a button kit, scissors, and leftover fabric pieces. It’s easy and quick to do.
I cut fabric to fit the button shape, then press it around the button form. The result is a neat, custom button you can add to clothes or accessories.
Covered buttons add detail and color to simple projects. They are good for decorating bags, jackets, or even homemade cards.
This craft helps prevent waste and makes use of fabrics too small for bigger projects. I recommend trying it if you want a small, fun project.
How to Make Fabric Scrap Covered Buttons
Materials Needed:
- Fabric scraps (small pieces, about 2–3 inches)
- Buttons (flat or rounded, with or without shanks)
- Needle and thread (or fabric glue for no-sew option)
- Scissors
- Small felt circles (optional for backing)
Steps to create this:
- Step 1: Cut Fabric Circles
Choose a scrap piece and cut a circle about twice the size of the button. This extra fabric will wrap around the edges. - Step 2: Stitch Around the Edge
Using a needle and thread, sew a running stitch around the edge of the fabric circle. This will help you gather it tightly around the button. - Step 3: Place the Button
Put the button in the center of the fabric circle, then gently pull the thread to gather the fabric around it. Adjust folds so it looks neat. - Step 4: Secure the Back
Tie off the thread securely at the back of the button. For extra neatness, cover the back with a small felt circle using glue or stitches. - Step 5: Use Your Covered Buttons
Sew them onto clothing, bags, cushions, or even use them as decorative pieces on other fabric scrap crafts.
11. Fabric Scrap Stuffed Hearts for Gifts

I like using small fabric scraps to make stuffed hearts. They are simple to sew, and you only need two heart-shaped pieces of fabric.
I stuff the hearts with extra scraps or cotton to give them shape. These make thoughtful, handmade gifts that show care.
You can decorate them with buttons or lace for a personal touch. They also work well as ornaments or keychains.
How to Make Fabric Scrap Stuffed Hearts for Gifts
Materials Needed:
- Fabric scraps (bright or patterned fabrics work great)
- Scissors
- Needle and thread or sewing machine
- Pins
- Stuffing (cotton, fabric scraps, or pillow filling)
- Paper for heart template
Steps to create this:
- Step 1: Make a Heart Template
Draw and cut out a heart shape on paper. You can make it small for ornaments or larger for pillows. - Step 2: Cut Fabric Hearts
Fold your fabric scrap in half, pin the template on top, and cut around it. This gives you two matching fabric hearts. - Step 3: Sew the Edges
Place the two fabric hearts right sides together. Sew around the edges, leaving a small gap for stuffing. If you prefer a rustic look, sew with right sides facing out using a blanket stitch. - Step 4: Stuff the Heart
Turn the fabric right side out if needed, then fill the heart with stuffing until it feels firm and plump. - Step 5: Close the Gap
Sew the opening closed neatly. Add decorative stitches if you like for a handmade touch.
12. DIY Fabric Scrap Pouches with Zippers

I use leftover fabric scraps to make small pouches. These pouches are easy to sew and useful for organizing small items. A zipper makes them secure and practical.
I like cutting my fabric into pieces about 10 by 8 inches. Then, I add a zipper that fits well and sew the fabric together with lining inside. This makes the pouch more durable.
Using scrap fabrics from old clothes or thrifted materials saves money and reduces waste. Each pouch turns out unique because of the different fabrics.
I often decorate mine with simple patchwork or embroidery to make the pouch look neat. These pouches also make good gifts.
Making fabric scrap pouches helps me use up small fabric pieces that would otherwise be thrown away. It is a good way to keep fabric from going to waste.
How to Make DIY Fabric Scrap Pouches with Zippers
Materials Needed:
- Fabric scraps (for outer fabric and lining)
- Zippers (7–9 inches, depending on pouch size)
- Scissors or rotary cutter
- Sewing machine (or needle and thread)
- Pins or clips
- Iron
Steps to create this:
- Step 1: Cut Fabric Pieces
Cut two outer fabric pieces and two lining pieces to the same size (e.g., 8×6 inches). Make sure your zipper is slightly longer than the width of the fabric. - Step 2: Attach the Zipper
Place one outer fabric piece right side up, then position the zipper face down along the top edge. Place one lining piece on top, right side down. Pin or clip together and sew along the edge. Repeat for the other side of the zipper with the remaining fabric pieces. - Step 3: Press and Topstitch
Open the fabric so the outer fabric and lining are on opposite sides of the zipper. Press flat with an iron and topstitch along both zipper edges to keep the fabric from catching in the zipper. - Step 4: Sew the Pouch Together
Unzip the zipper halfway. Place the outer fabrics right sides together and the lining pieces right sides together. Pin all around. Sew along the edges, leaving a small gap in the lining for turning. - Step 5: Turn and Finish
Turn the pouch right side out through the gap in the lining. Push out the corners neatly. Sew the lining gap closed with a small stitch, then tuck it inside.
13. Fabric Scrap Wrapped Mason Jars

I like using fabric scraps to wrap around mason jars. It is a simple way to give old jars a fresh look. You can use glue or double-sided tape to attach the fabric.
The wrapped jars make good holders for pens, flowers, or small items. I often add small decorations like buttons or beads to the fabric for extra style.
This craft helps reduce waste by using leftover fabric. It is quick and does not need many materials. You only need jars, fabric scraps, and glue to start.
How to Make Fabric-Scrap-Wrapped Mason Jars
Materials Needed:
- Mason jars (any size)
- Fabric scraps (different colors and prints)
- Scissors
- Hot glue gun or fabric glue
- Ribbon, buttons, or twine (optional for decoration)
Steps to create this:
- Step 1: Cut Fabric Strips
Pick fabric scraps and cut them into strips wide enough to wrap around your mason jar. The length should be just enough to go around the jar once. - Step 2: Wrap the Jar
Place the fabric strip around the middle of the jar. Apply a little hot glue or fabric glue at the back to secure it in place. Smooth it down so it sits neatly. - Step 3: Layer or Mix Fabrics
If you want more color, layer two different fabric strips (a wide one and a narrow one on top). This adds extra texture and style. - Step 4: Add Decorative Touches
Glue on a button, bow, or wrap twine around the jar for a rustic look. You can even mix and match different scraps for a patchwork style. - Step 5: Fill and Display
Use the jars as vases for flowers, holders for craft supplies, or even as candle holders. They’re easy to swap out and reuse for different occasions.
14. Fabric Scrap Greeting Cards

I like using fabric scraps to make greeting cards. It is a simple way to reuse leftover fabric. These cards add texture and color that paper alone can’t give.
To start, I cut small pieces of fabric into shapes or patterns. Then, I glue or sew them onto card stock. Adding thread or buttons can make the cards look special and unique.
Making fabric scrap cards takes little time but looks creative. It is a good project to use small fabric bits that would otherwise get thrown away.
How to Make Fabric Scrap Greeting Cards
Materials Needed:
- Blank cards or cardstock paper (folded)
- Fabric scraps (different textures, colors, and patterns)
- Scissors
- Fabric glue or hot glue
- Needle and thread (optional for stitched designs)
- Ruler and pencil
Steps to create this:
- Step 1: Cut the Fabric Pieces
Choose your fabric scraps and cut them into small shapes—squares, rectangles, hearts, or any fun design. Make sure they fit neatly onto the front of the card. - Step 2: Arrange the Design
Place the fabric pieces on the card to create a simple patchwork, stripe pattern, or even a mini quilt effect. Try out a few layouts before gluing them down. - Step 3: Attach the Fabric
Glue the fabric pieces onto the card using fabric glue. Press them down firmly so they stick flat. If you want a textured look, you can lightly stitch around the edges instead of gluing. - Step 4: Add Details
Decorate with buttons, ribbons, or small embroidery stitches to give the card more character. A hand-drawn message or stamped design works great too. - Step 5: Let Dry and Gift
Allow the glue to dry completely before writing inside. Pair with a matching envelope, and you have a one-of-a-kind greeting card ready to give.
15. Fabric Scrap Appliqué Wall Art

I use small fabric scraps to create appliqué designs on plain canvas or fabric. This lets me turn leftover pieces into unique shapes like flowers or leaves.
I arrange the scraps into a pattern or image before stitching or gluing them down. It adds texture and color without needing big materials.
Appliqué wall art is easy to customize for any room or style. I find it a great way to reuse scraps and make something decorative.
How to Make Fabric Scrap Greeting Cards
Materials Needed:
- Blank cards or cardstock paper (folded)
- Fabric scraps (different textures, colors, and patterns)
- Scissors
- Fabric glue or hot glue
- Needle and thread (optional for stitched designs)
- Ruler and pencil.
Steps to create this:
- Step 1: Cut the Fabric Pieces
Choose your fabric scraps and cut them into small shapes—squares, rectangles, hearts, or any fun design. Make sure they fit neatly onto the front of the card. - Step 2: Arrange the Design
Place the fabric pieces on the card to create a simple patchwork, stripe pattern, or even a mini quilt effect. Try out a few layouts before gluing them down. - Step 3: Attach the Fabric
Glue the fabric pieces onto the card using fabric glue. Press them down firmly so they stick flat. If you want a textured look, you can lightly stitch around the edges instead of gluing. - Step 4: Add Details
Decorate with buttons, ribbons, or small embroidery stitches to give the card more character. A hand-drawn message or stamped design works great too. - Step 5: Let Dry and Gift
Allow the glue to dry completely before writing inside. Pair with a matching envelope, and you have a one-of-a-kind greeting card ready to give.
16. Fabric Scrap Christmas Ornaments

I like using fabric scraps to make Christmas ornaments. They are simple to create and use materials I already have. These ornaments can be made by cutting shapes from fabric and sewing or gluing them together. I often add ribbons or buttons for decoration.
Making these saves fabric from being thrown away. Plus, they are budget-friendly and perfect for gifts or my own tree.
How to Make Fabric Scrap Christmas Ornaments
Materials Needed:
- Fabric scraps (holiday prints, plaids, or solids)
- Paper for star or tree templates
- Scissors
- Needle and thread or sewing machine
- Stuffing (cotton, fiberfill, or leftover fabric bits)
- Ribbon or ornament hooks
- Buttons or beads (optional for decoration)
Steps to create this:
- Step 1: Make a Template
Draw simple star or tree shapes on paper and cut them out. This will be your guide for cutting the fabric. - Step 2: Cut the Fabric
Fold your fabric scrap in half, pin the template on top, and cut out two matching shapes for each ornament. - Step 3: Sew the Shapes Together
Place the fabric pieces right sides together and sew around the edges, leaving a small gap. If you prefer a rustic look, sew with right sides facing out using a blanket stitch. - Step 4: Stuff the Ornament
Turn the shape right side out (if sewn inside-out) and fill with stuffing until plump. Sew the gap closed with small stitches. - Step 5: Add a Hanging Loop
Attach a ribbon loop or ornament hook at the top. You can also sew on buttons, beads, or sequins for extra sparkle.
17. Fabric Scrap Poufs or Floor Cushions

I like making fabric scrap poufs because they use leftover fabric easily. You can stuff them with old clothes or small scraps to keep waste down.
These poufs work well as floor cushions or footstools. I find they add comfort and a personal touch to any room.
You don’t need fancy materials. Just fabric scraps, some stuffing, and basic sewing skills. Some designs even let you make poufs without sewing.
Making a pouf helps me clear out fabric scraps while creating something useful. It’s a simple project that saves waste and looks good.
How to Make Fabric Scrap Poufs or Floor Cushions
Materials Needed:
- Large fabric scraps (mixed prints for a patchwork look)
- Scissors or rotary cutter
- Sewing machine (or needle and thread)
- Pins or clips
- Stuffing (polyfill, old pillows, or fabric scraps)
- Heavy-duty thread
- Optional: zipper (if you want a removable cover)
Steps to create this:
- Step 1: Cut the Fabric Pieces
Decide on the size of your pouf (e.g., 20–24 inches across). Cut fabric scraps into wedge-shaped pieces (like pizza slices) or rectangles if you prefer a simpler patchwork style. You’ll need 6–8 pieces for the top and bottom. - Step 2: Sew the Top Panel
Join the wedge-shaped pieces together, sewing along the long edges to form a circle. Press seams flat as you go. Repeat the same process for the bottom panel. - Step 3: Add the Side Band
Cut long strips of fabric scraps to make the side panel (the height of your pouf, e.g., 10–12 inches). Sew them together end to end until it’s long enough to go around the top circle. Attach the strip to the top panel, right sides facing. - Step 4: Assemble the Pouf
Attach the bottom panel to the other edge of the side band, leaving a small opening for stuffing. If adding a zipper, sew it into the side band before attaching the bottom. - Step 5: Stuff and Finish
Fill the pouf with stuffing—old towels, fabric scraps, or pillows work great. Pack it firmly so it holds its shape. Stitch the opening closed securely.