
Table of Contents Show
Busy days, tiny attention spans, and a kitchen table that doubles as a craft studio—sound familiar? These quick, joyful projects are made for real families with real messes and real schedules. Each idea looks wow-worthy but stays simple enough for little hands to help.

Grab a snack, clear a corner of the table, and let’s make memories you’ll want to keep on the fridge forever.
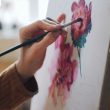
1. Sun-Catcher Color Collage

A bright, stained-glass effect that glows in the window. Kids love pressing bits of color into place and watching light shine through their artwork.
Materials Needed:
- Clear contact paper
- Tissue paper in bright colors
- Washi tape
How to make it:
- 1. Cut two equal squares of contact paper.
- 2. Peel one and place sticky-side up; invite kids to stick tissue pieces all over.
- 3. Seal with the second sheet, sticky-side down.
- 4. Trim to a fun shape and frame edges with washi tape; hang on a window.
2. Puffy Paint Cloudscape

Soft, fluffy clouds on a bold blue sky—puffy paint dries into a squishy texture that kids can’t resist poking.
Materials Needed:
- Shaving cream (foam)
- White school glue
- Blue cardstock
How to make it:
- 1. Mix equal parts shaving cream and glue in a bowl to make puffy paint.
- 2. Spoon or brush fluffy blobs onto blue cardstock.
- 3. Swirl with a craft stick to make cloud shapes.
- 4. Let dry overnight for a raised, pillowy finish.
3. Tape-Resist Name Art

Crisp, clean letters appear like magic when the tape peels off. It’s a gallery-worthy piece made with simple paint play.
Materials Needed:
- Painter’s tape or washi tape
- Watercolor paper
- Washable paints
How to make it:
- 1. Spell your child’s name on the paper with tape.
- 2. Brush or sponge paint across the whole page.
- 3. Add dots, stripes, or splatters for fun texture.
- 4. When dry, gently peel tape to reveal bold white letters.
4. Nature Crown Adventure

A fairy-tale crown made from real leaves and petals—collecting the decorations is half the fun.
Materials Needed:
- Cardstock strip
- Double-sided tape
- Leaves, flowers, small twigs
How to make it:
- 1. Measure and staple a cardstock strip to fit the child’s head.
- 2. Apply a band of double-sided tape around the outside.
- 3. Press on leaves, petals, and tiny twigs all the way around.
- 4. Gently secure loose bits with extra tape or glue if needed.
5. No-Sew Sock Pals

Chubby, squishy buddies you can make from a single sock—cute faces and plump bellies guaranteed.
Materials Needed:
- Clean sock
- Rice or dried beans
- Rubber bands
How to make it:
- 1. Fill the sock with rice until plump.
- 2. Tie off the top with a rubber band.
- 3. Add another band to section a small “head.”
- 4. Draw a face with marker and tie a ribbon scarf if you like.
6. Rainbow Pasta Necklace Bar

A jewelry station kids can “shop” from—vibrant pasta beads look like candy and thread easily.
Materials Needed:
- Dry pasta (ziti or rigatoni)
- Food coloring + vinegar in baggies
- Yarn or shoelaces
How to make it:
- 1. Dye pasta by shaking with a few drops of food coloring and a splash of vinegar in baggies; let dry.
- 2. Cut yarn to necklace length and tape one end to make a stiff “needle.”
- 3. Sort pasta by color into bowls.
- 4. String patterns, tie the ends, and wear your rainbow.
7. Magic Salt Watercolor Landscapes

Watch paint chase along sparkling salt lines for a dreamy, starry effect on simple scenes.
Materials Needed:
- Watercolor paper
- White glue
- Table salt
How to make it:
- 1. Draw simple lines or shapes with glue on the paper.
- 2. Sprinkle salt over glue and shake off excess.
- 3. Touch a wet paintbrush with watercolor to the salty lines.
- 4. Watch colors bloom; let dry flat.
8. Paper Plate Weaving Garden

A circular mini-loom turns yarn and paper flowers into a cheerful bloom you can hang.
Materials Needed:
- Paper plate
- Yarn
- Construction paper
How to make it:
- 1. Cut small notches around the plate edge and string a yarn “spiderweb” across.
- 2. Tape yarn tail to the back and start weaving over-under through the web.
- 3. Cut simple paper leaves and flowers.
- 4. Tuck flowers into the weaving and tape at the back to secure.
9. Fizzy Paint Cityscape

Bubbly paint textures make city skylines pop—science meets art in a quick, fizzy moment.
Materials Needed:
- Baking soda
- Vinegar in a spray bottle
- Washable paint
How to make it:
- 1. Mix paint with baking soda to a thick paste.
- 2. Paint simple building shapes on dark paper.
- 3. Lightly spritz with vinegar to create fizz and texture.
- 4. Let it settle and dry for a speckled city glow.
10. Tissue Paper Stained-Glass Votive

A cozy faux stained-glass glow using a plastic cup—perfect for a battery tea light.
Materials Needed:
- Clear plastic cup or jar
- Tissue paper squares
- Mod Podge or glue-water mix
How to make it:
- 1. Brush a thin glue layer on the outside of the cup.
- 2. Stick tissue pieces all around, overlapping colors.
- 3. Seal with another glue coat and smooth wrinkles.
- 4. Place a battery tea light inside for a warm glow.
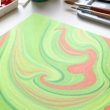
11. Marble-Roll Galaxy Art

Swirls and star trails appear as marbles roll paint across the page—pure kinetic fun.
Materials Needed:
- Shallow tray or baking pan
- Marbles
- Black or dark paper
How to make it:
- 1. Place paper in the tray and dab small pools of paint.
- 2. Drop marbles in and tilt the tray to roll them through paint.
- 3. Add a few white dots for “stars.”
- 4. Lift out to dry and admire the cosmic lines.
12. Bubble Wrap Jellyfish

Bouncy, translucent jellyfish that shimmer like they’re swimming.
Materials Needed:
- Bubble wrap
- Markers or paint
- Ribbon or yarn
How to make it:
- 1. Cut a dome shape from bubble wrap for the jellyfish head.
- 2. Color the bumpy side with markers or light paint.
- 3. Tape or tie ribbons/yarn to the flat edge for tentacles.
- 4. Add googly eyes or draw them on; hang with string.
13. Story Stones Starter Set

Handmade picture stones that spark bedtime tales—mix and match to make new stories.
Materials Needed:
- Smooth flat stones
- Paint pens or acrylics
- Clear sealant (optional)
How to make it:
- 1. Wash and dry stones.
- 2. Draw simple icons (sun, tree, cat, house, star).
- 3. Let dry and add a sealant if desired.
- 4. Store in a pouch and pull a few to tell a story together.
14. Cardboard Tube Kaleidoscope-Style Viewer

A pretend kaleidoscope that turns ordinary beads into sparkling views.
Materials Needed:
- Cardboard tube
- Clear plastic from packaging
- Sequins or beads
How to make it:
- 1. Cut two circles of clear plastic; glue sequins between to make a “lens.”
- 2. Tape the lens over one end of the tube.
- 3. Decorate the tube with markers or paper.
- 4. Point toward a window and slowly twist to see sparkles dance.
15. Painted Leaf Print Banner

Nature textures turn into crisp prints—string them up for a seasonal garland.
Materials Needed:
- Leaves with strong veins
- Washable paint
- Twine
How to make it:
- 1. Paint the back of a leaf thinly.
- 2. Press onto paper and lift to reveal the print.
- 3. Cut prints into triangles or flags.
- 4. Tape or punch and string along twine to hang.
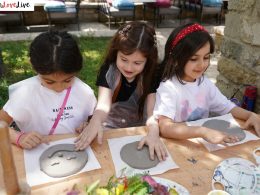
16. Clay Thumbprint Trinket Dish

A tiny dish stamped with your child’s thumb—sweet, simple, and keepsake-worthy.
Materials Needed:
- Air-dry clay
- Acrylic paint
- Mod Podge or clear varnish
How to make it:
- 1. Roll a clay ball and press into a shallow dish shape.
- 2. Have your child press a thumbprint pattern around the rim.
- 3. Let dry fully, then paint and add a metallic rim if you like.
- 4. Seal with Mod Podge and dry before using.
17. Shape Shadow Puppet Theater

Simple cutouts come to life on a glowing screen—instant bedtime show.
Materials Needed:
- Cereal box
- Parchment paper
- Craft sticks
How to make it:
- 1. Cut a window in the box and tape parchment over the opening as a screen.
- 2. Cut shapes (animals, stars, houses) from dark paper.
- 3. Tape shapes to craft sticks to make puppets.
- 4. Place a lamp behind the screen and perform a mini play.