

Table of Contents Show
Sometimes our desks feel a little plain, even when we’ve got all the pens and markers we need. Painting your own pen holder is a relaxing way to try simple art without needing a big canvas or a lot of space.
These ideas are beginner-friendly, but they still look cute and display-worthy.
Pick one style you like, and let’s paint something that makes your desk feel more “you.”
1. Pastel Rainbow Stripe Pen Cup
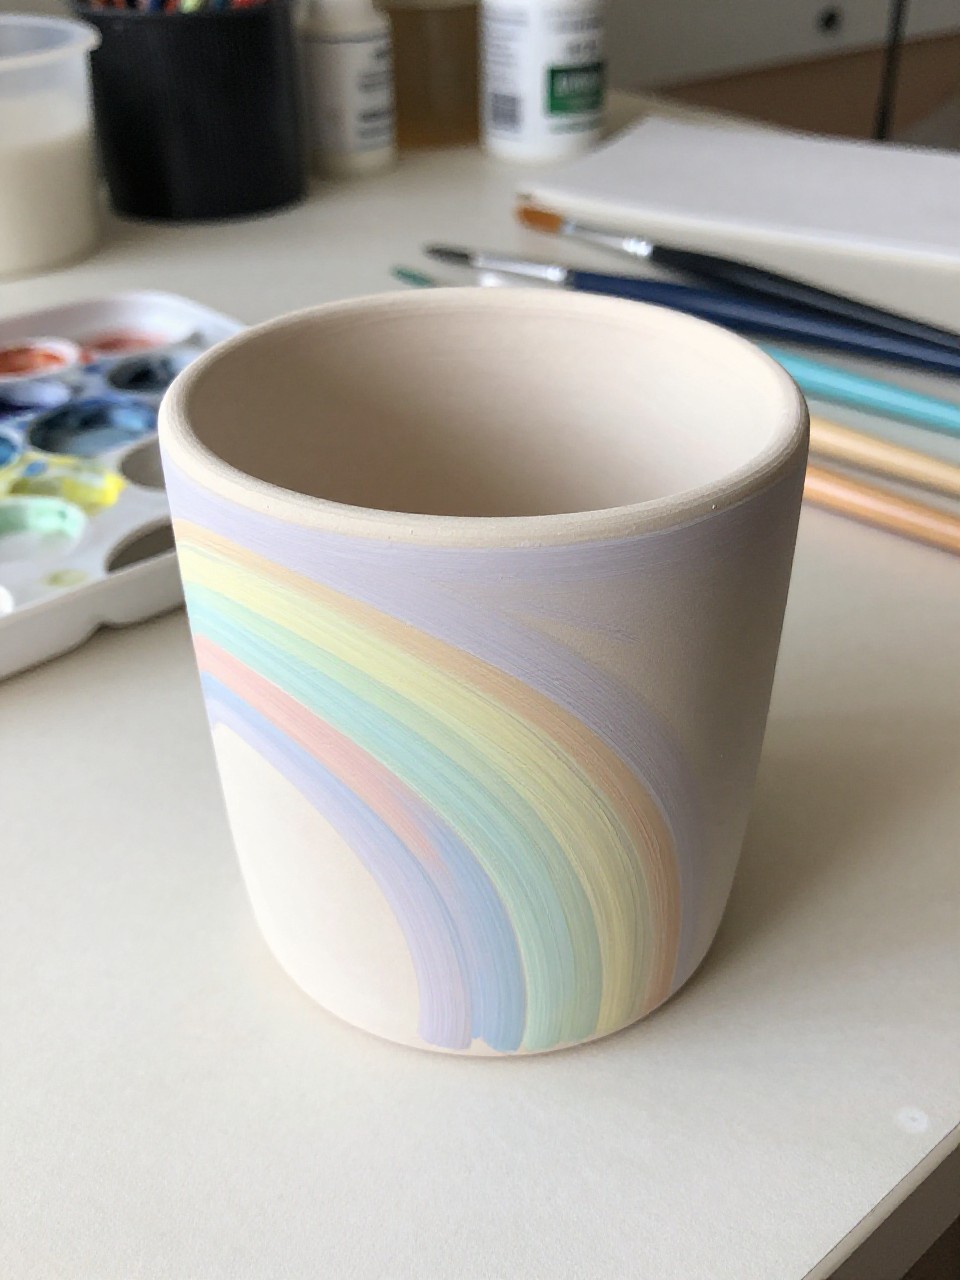
The finished pen holder looks like a smooth band of soft rainbow stripes wrapped around a simple cup. It’s satisfying because stripes are easy to plan, and you can keep it neat or a little wavy for charm. This one is great for beginners who want a clean, cheerful desk look.
Materials Needed:
- Ceramic pen holder cup
- Acrylic paint
- Paintbrushes in multiple sizes
- Palette or paint tray
- Painter’s tape
- Optional sealer or varnish
Steps to Make:
- Clean the ceramic cup and let it dry fully.
- Wrap painter’s tape around the cup in even bands to guide your stripes.
- Paint each open band a different pastel color, following the cup’s curve.
- Peel the tape once the paint feels set, then touch up any edges with a small brush.
- Let it dry overnight and add a clear sealer for extra durability.
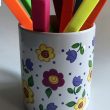
2. Tiny Daisies on a Sky Blue Pen Holder
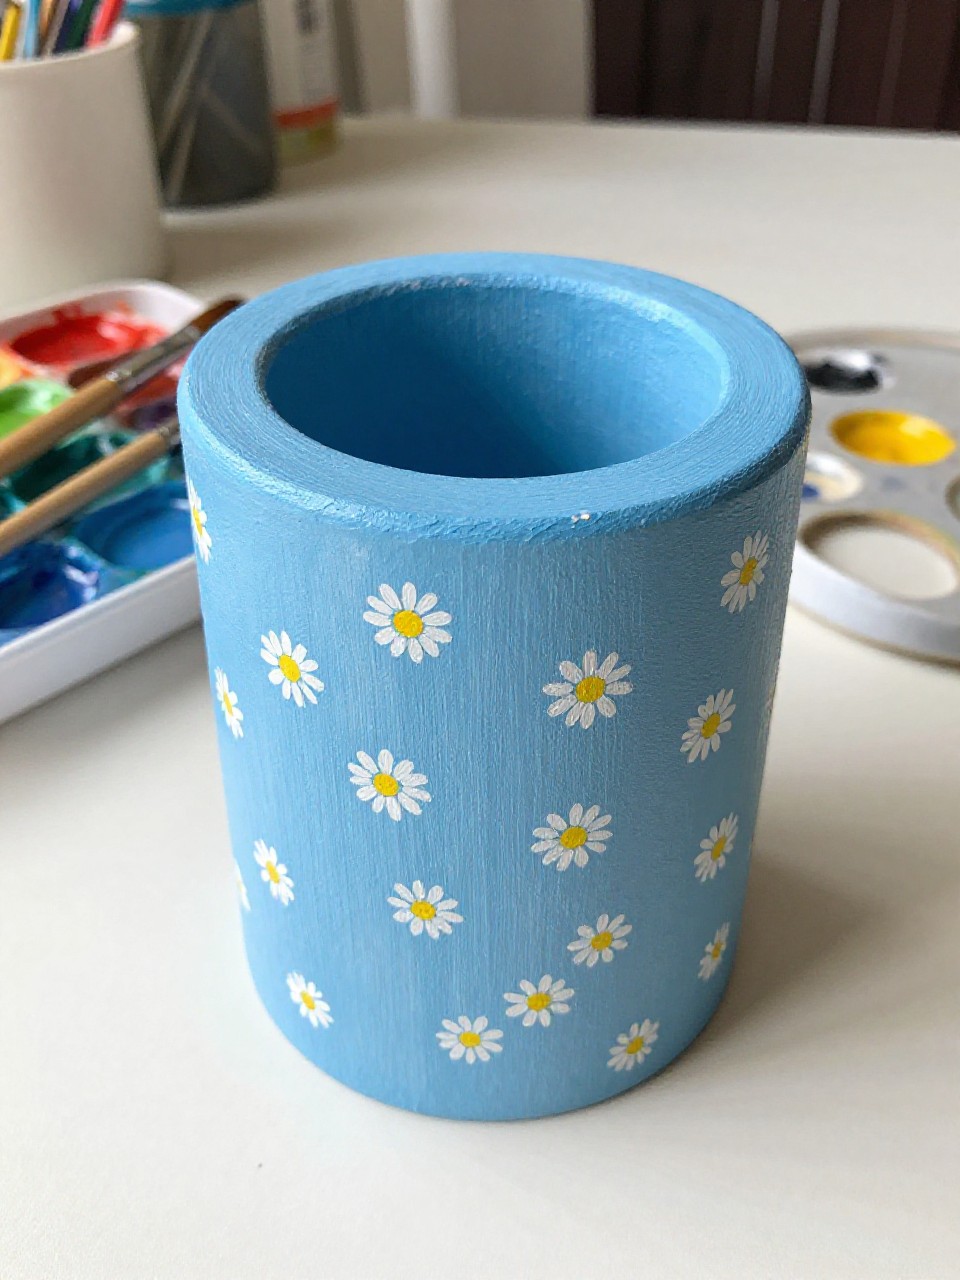
This pen holder looks like a bright sky-blue cup covered with small white daisies and sunny yellow centers. It’s calming to paint because the flowers are simple dots and short strokes, so you can’t really mess it up. It’s perfect for a sweet, cottage-style desk.
Materials Needed:
- Wooden pen holder (cylindrical or cup style)
- Acrylic paint
- Paintbrushes in multiple sizes
- Palette or paint tray
- Optional sealer or varnish
Steps to Make:
- Lightly sand the wood if it feels rough, then wipe away dust.
- Paint the whole pen holder sky blue and let it dry.
- Use a small brush to add tiny white petals scattered around the cup.
- Dot yellow centers and add a few thin green stems or leaves.
- Seal with a clear varnish so the flowers don’t scuff with daily use.
3. Smiley Face Color-Block Pen Holder
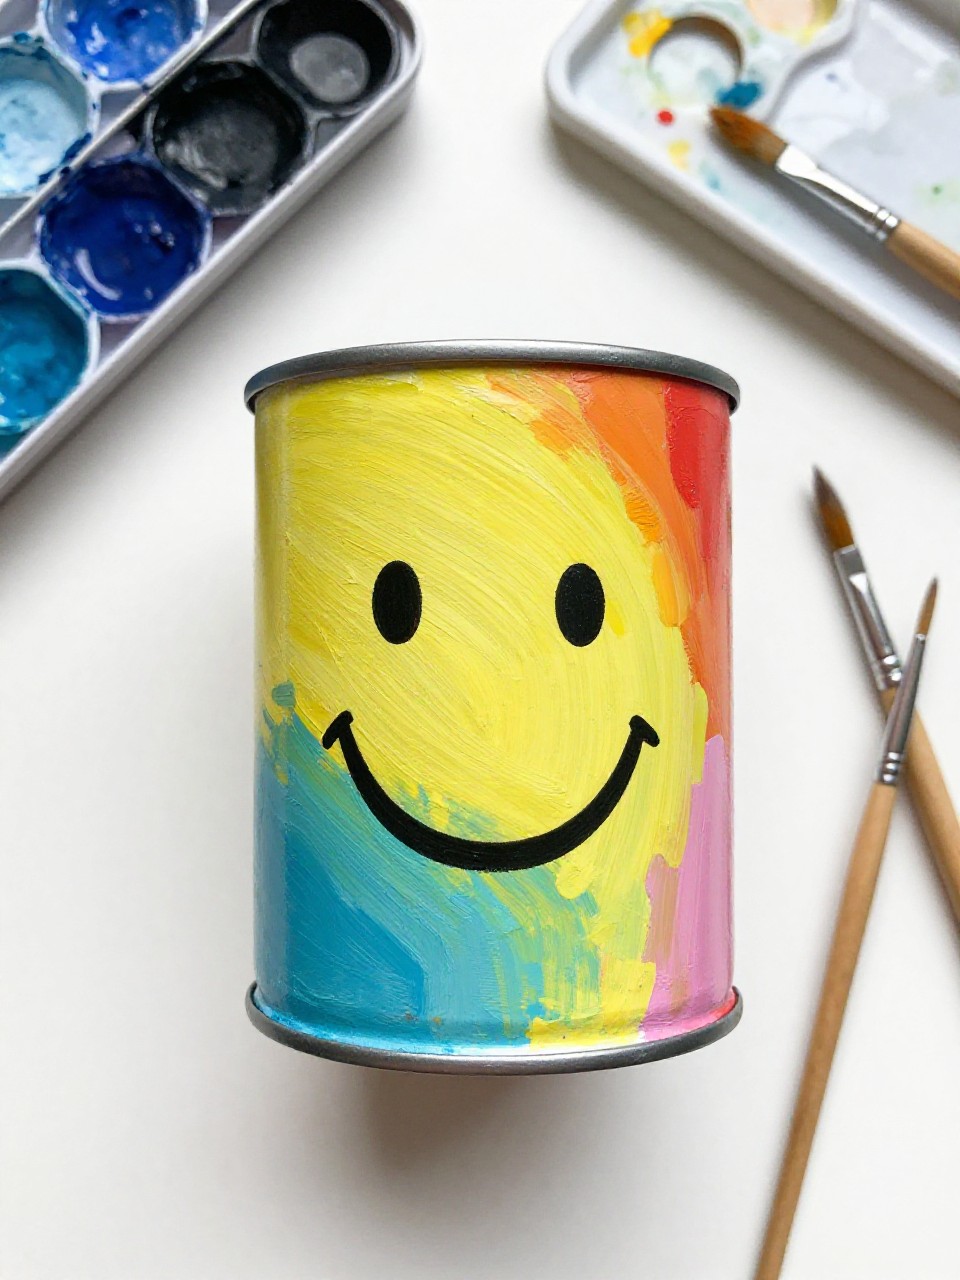
The finished piece looks like bold color blocks with a simple smiley face on the front, like a happy little desk buddy. It’s great for beginners because straight edges can be taped, and the face is just a few confident strokes. It also makes a fun gift for students and coworkers.
Materials Needed:
- Tin can pen holder (clean, label removed)
- Acrylic paint
- Paintbrushes in multiple sizes
- Palette or paint tray
- Painter’s tape
- Optional sealer or varnish
Steps to Make:
- Wash the can, dry it well, and lightly scuff it with fine sandpaper if needed.
- Tape off two or three sections and paint each block a bright color.
- Remove tape and repaint edges if they look uneven.
- Add a simple smiley face with black paint near the center front.
- Let everything dry, then seal to help the paint handle daily grabbing.
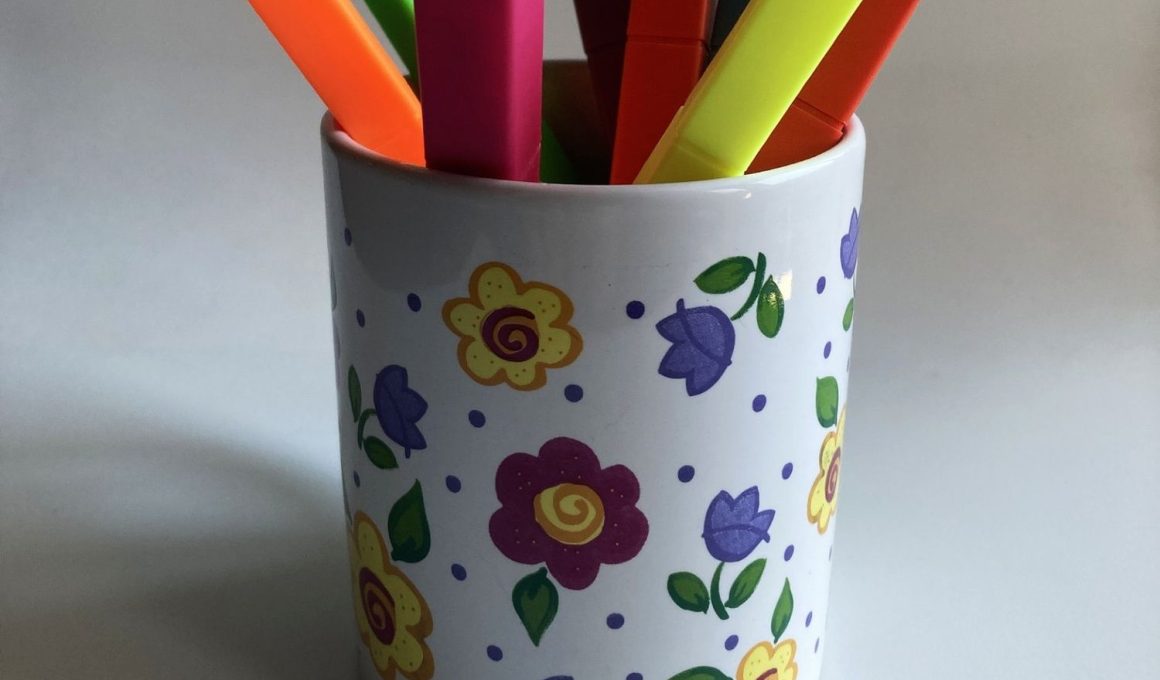
4. Strawberry Patch Pen Holder Cup
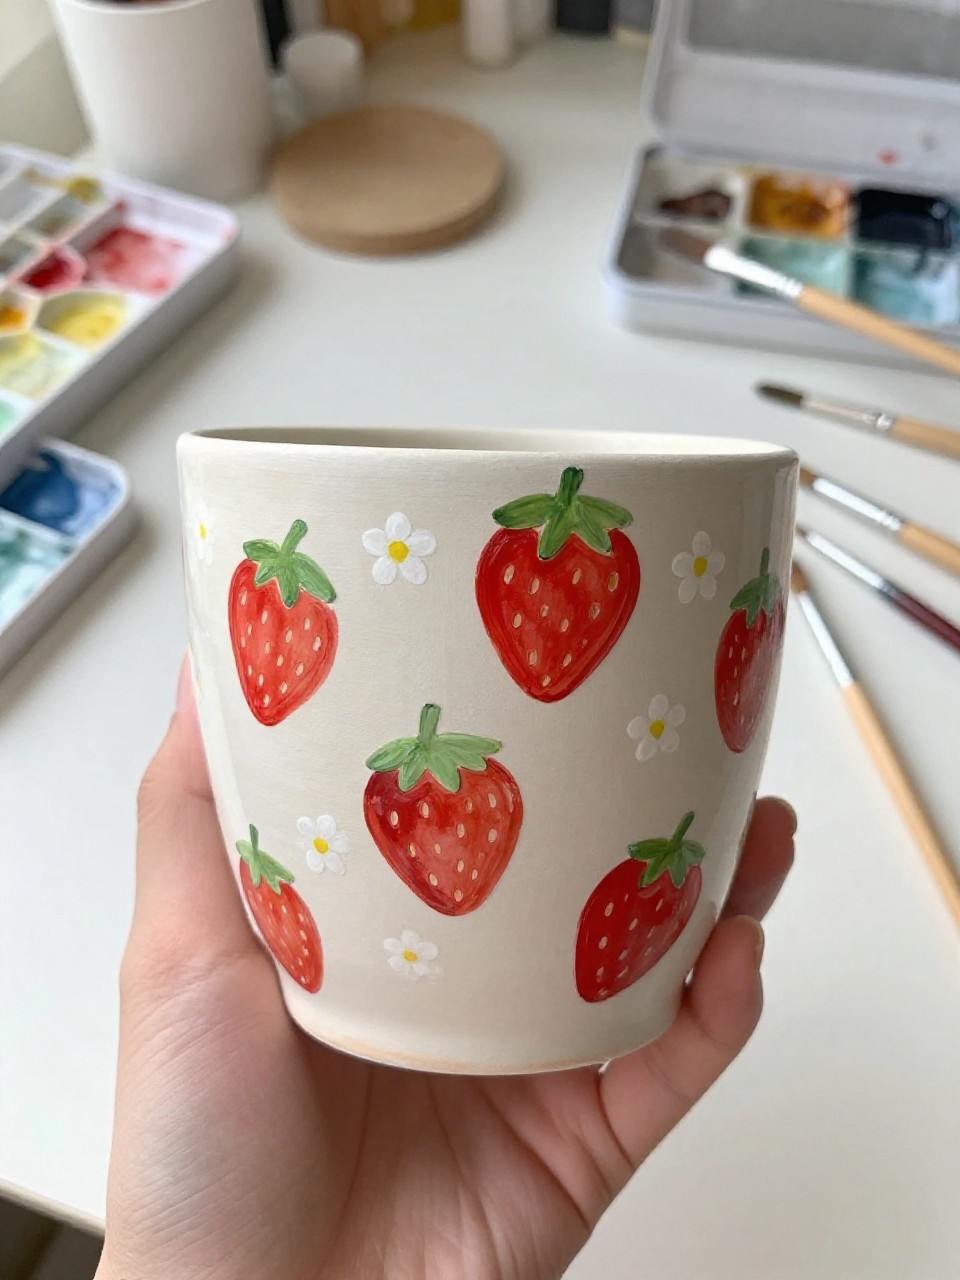
This pen holder looks like a cute strawberry patch, with red berries and tiny white flowers painted all around the cup. It’s relaxing because you repeat the same small shapes, and each strawberry can be a little different. It’s a perfect match for a cheerful, colorful desk setup.
Materials Needed:
- Ceramic pen holder cup
- Acrylic paint
- Paintbrushes in multiple sizes
- Palette or paint tray
- Pencil for light sketching
- Optional sealer or varnish
Steps to Make:
- Clean the ceramic and paint a light green background layer.
- Lightly sketch a few strawberry shapes around the cup to space them out.
- Paint the strawberries red, keeping the shapes curved to match the cup.
- Add tiny yellow seeds, green tops, and a few white flowers between berries.
- Dry completely, then seal so the bright reds stay fresh-looking.
5. Minimal Black-and-White Checker Pen Holder
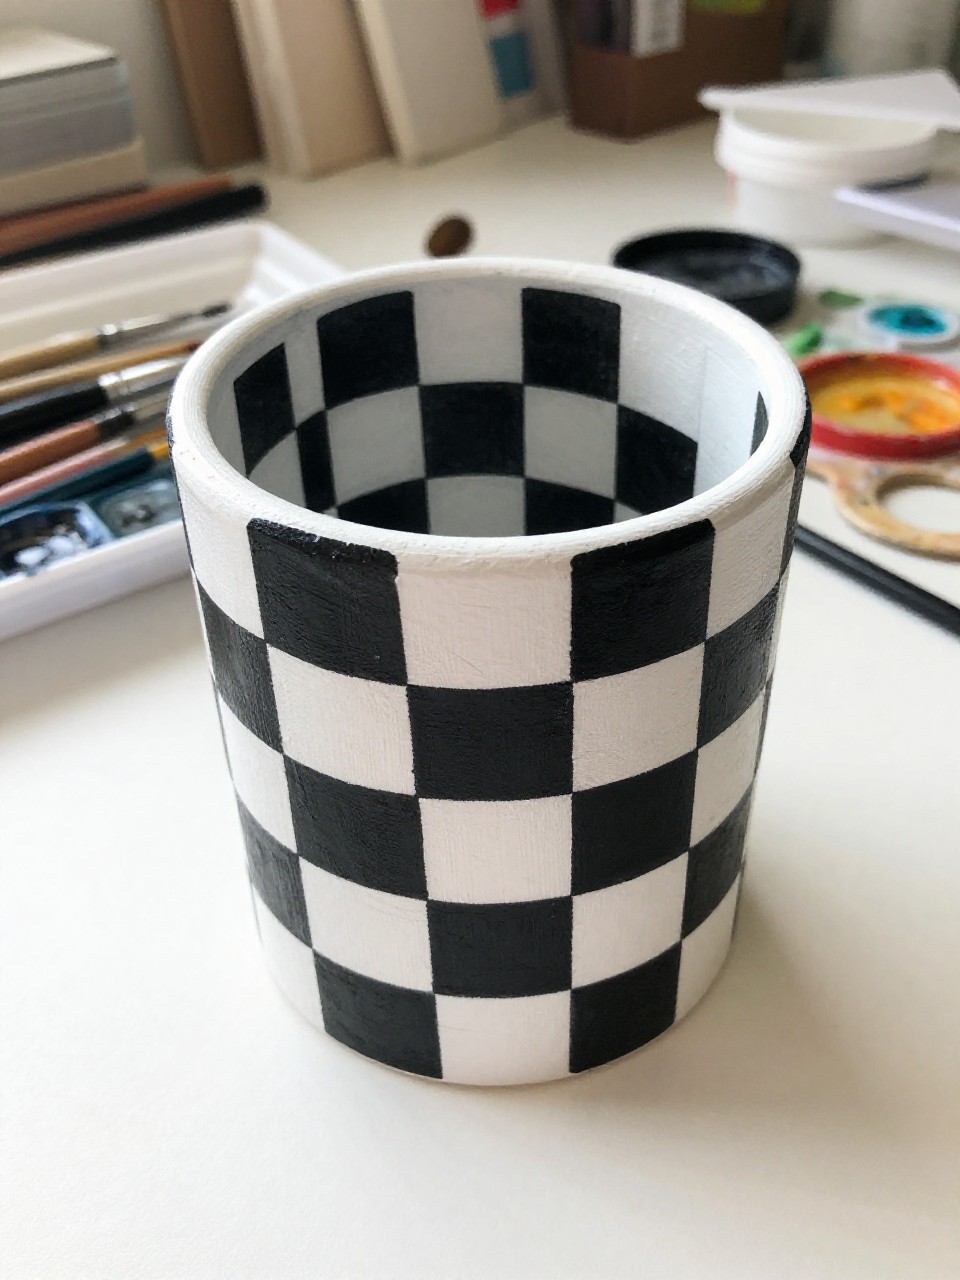
The finished pen holder looks crisp and modern with hand-painted black-and-white checker squares that wrap around the cup. It’s satisfying because it feels graphic and bold, but it’s still just repeating squares. Slight wobbles actually make it look more handmade and artsy.
Materials Needed:
- Plastic pen holder cup
- Acrylic paint (with primer if needed)
- Paintbrushes in multiple sizes
- Palette or paint tray
- Ruler (optional)
- Optional sealer or varnish
Steps to Make:
- Wipe the plastic clean and add a white base coat to help paint stick.
- Lightly mark a grid around the cup with pencil or a faint guide line.
- Paint every other square black, following the curve as the grid wraps around.
- Touch up edges with a small brush so the checker pattern feels balanced.
- Let it dry and seal to prevent scratches from pens and scissors.
6. Night Sky Stars and Moon Pen Holder
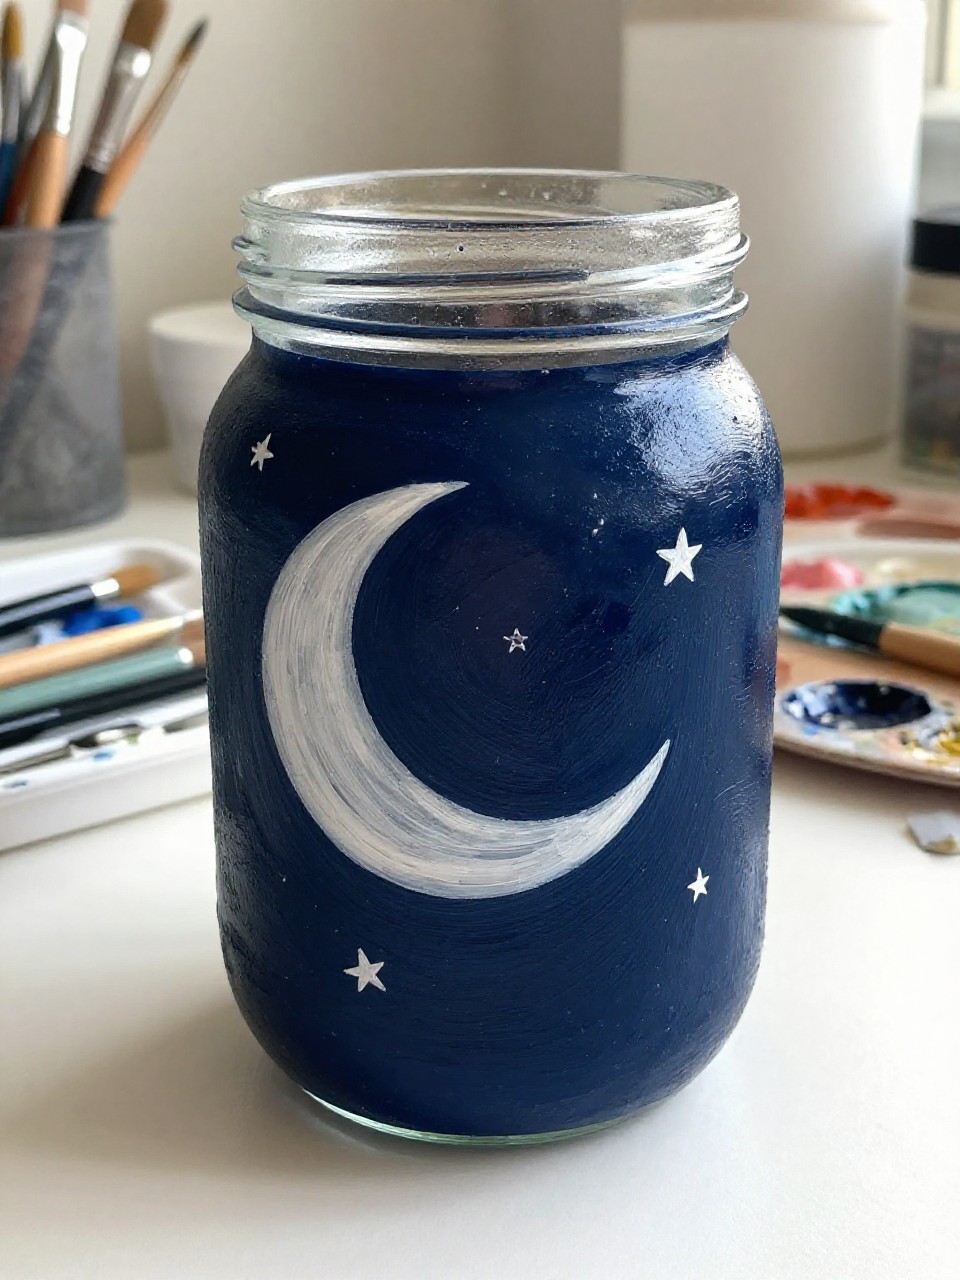
This pen holder looks like a deep navy night sky with a glowing crescent moon and scattered stars. It’s a relaxing project because you can blend dark blues and add dots, splatters, and tiny sparkles. It’s great for anyone who wants a calm, cozy vibe on their desk.
Materials Needed:
- Glass jar used as a pen holder
- Acrylic paint (multi-surface)
- Paintbrushes in multiple sizes
- Palette or paint tray
- Sponge (optional for blending)
- Optional sealer or varnish
Steps to Make:
- Wash the glass jar and dry it, then paint a dark base coat.
- Blend in a little purple or lighter blue with a sponge for a soft night-sky look.
- Paint a crescent moon with pale yellow or off-white, keeping edges slightly textured.
- Dot on stars with a small brush, and add a few tiny paint splatters for sparkle.
- Dry fully and seal so the paint doesn’t chip when you move the jar.
7. Cute Cat Faces Pen Holder
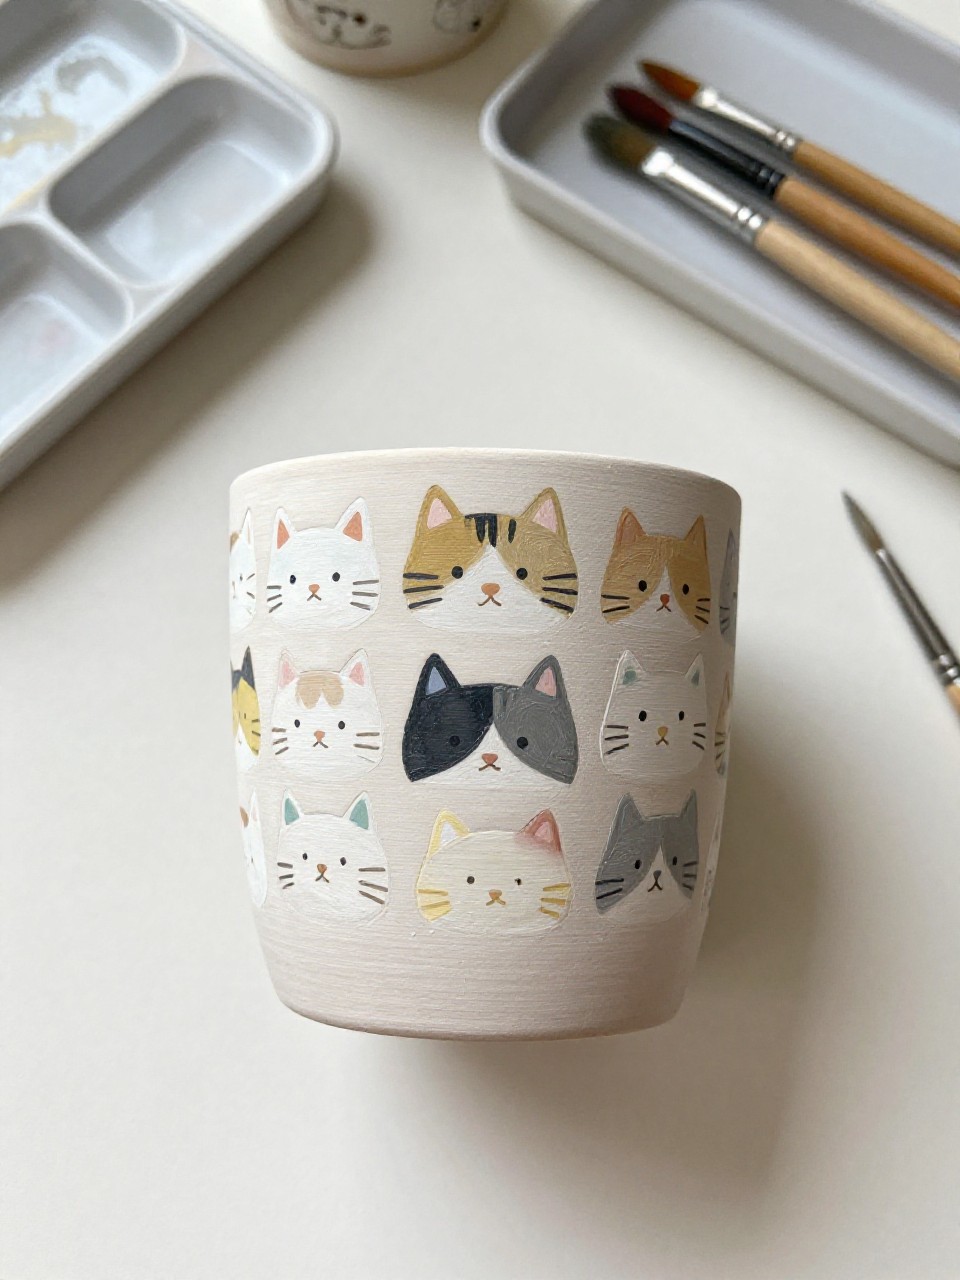
The finished pen holder looks like a row of simple cat faces all the way around the cup, each with different little expressions. It’s fun because you can keep the shapes basic—dots, triangles, and whisker lines—yet it still looks adorable. This is a great beginner project for animal lovers.
Materials Needed:
- Ceramic pen holder cup
- Acrylic paint
- Paintbrushes in multiple sizes
- Palette or paint tray
- Pencil for sketching
- Optional sealer or varnish
Steps to Make:
- Paint the cup a light neutral color like cream or pale gray and let it dry.
- Lightly sketch cat face circles around the cup to space them evenly.
- Paint ears, eyes, and noses with simple shapes, changing expressions as you go.
- Add whiskers and tiny blush marks with a fine brush for extra cuteness.
- Let dry completely, then seal so the faces stay bright and clean.
8. Lavender Field Pen Holder with Soft Stems
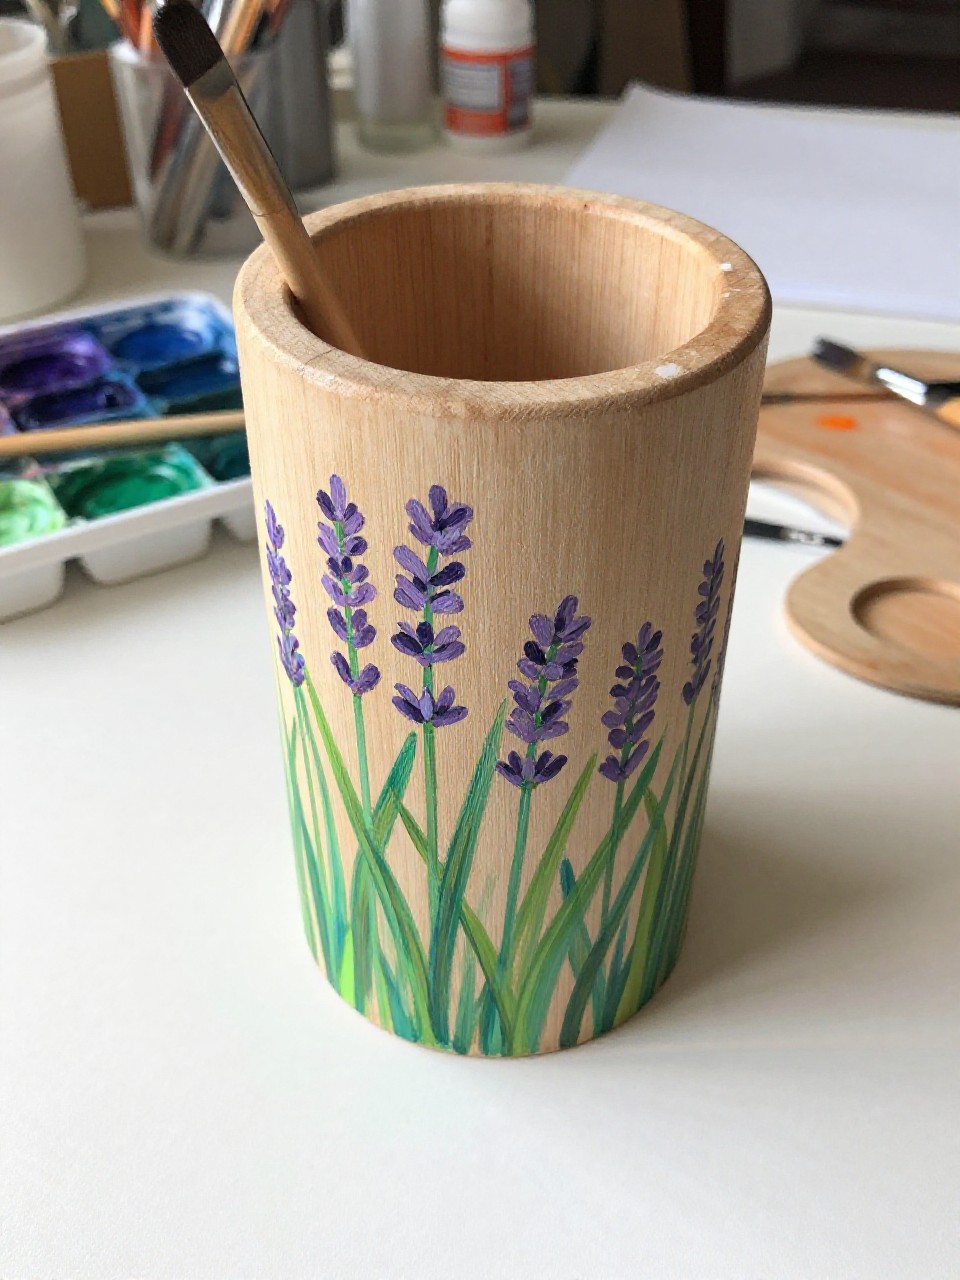
This pen holder looks like a gentle lavender field, with thin green stems and purple flower spikes rising up from the base. It’s soothing to paint because the strokes are loose and feathery, and it doesn’t need perfect symmetry. It’s a lovely choice for a calm, tidy desk corner.
Materials Needed:
- Wooden pen holder cup
- Acrylic paint
- Paintbrushes in multiple sizes
- Palette or paint tray
- Small detail brush
- Optional sealer or varnish
Steps to Make:
- Paint the wooden holder a warm white base coat and let it dry.
- Use a thin brush to pull upward green stem strokes around the cup.
- Add lavender blooms by dabbing small purple marks along the tops of stems.
- Layer in darker purple dots for depth and a few pale highlights for softness.
- Seal after drying so the thin painted stems don’t rub off over time.
9. Watercolor-Style Ombre Pen Holder
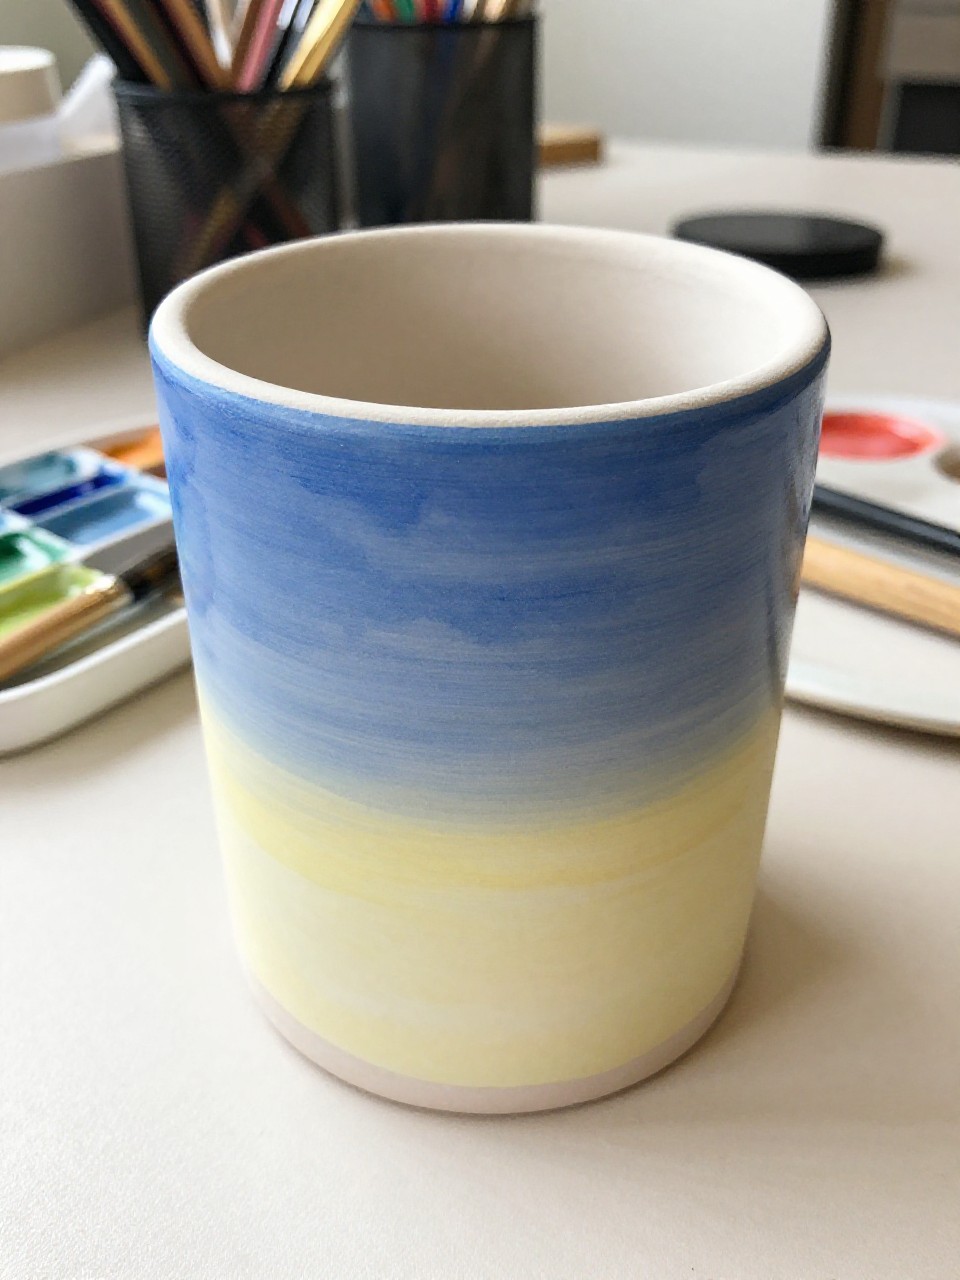
The finished pen holder looks like a soft ombre blend from one color to another, like a watercolor wash wrapped around the cup. It’s satisfying because you get to play with blending and layering, and the streaks look artistic instead of “wrong.” It’s perfect for beginners who want a simple but pretty result.
Materials Needed:
- Ceramic pen holder cup
- Acrylic paint (thinned with water)
- Paintbrushes in multiple sizes
- Palette or paint tray
- Water cup and paper towel
- Optional sealer or varnish
Steps to Make:
- Clean the ceramic and choose two colors that look good together.
- Paint the top half with the first color, using watered-down paint for a light wash.
- Paint the bottom half with the second color, then blend where they meet using gentle strokes.
- Add a second thin layer to deepen the ombre while keeping brush texture visible.
- Let it dry and seal to protect the soft blended finish.
10. Polka Dot Confetti Pen Holder
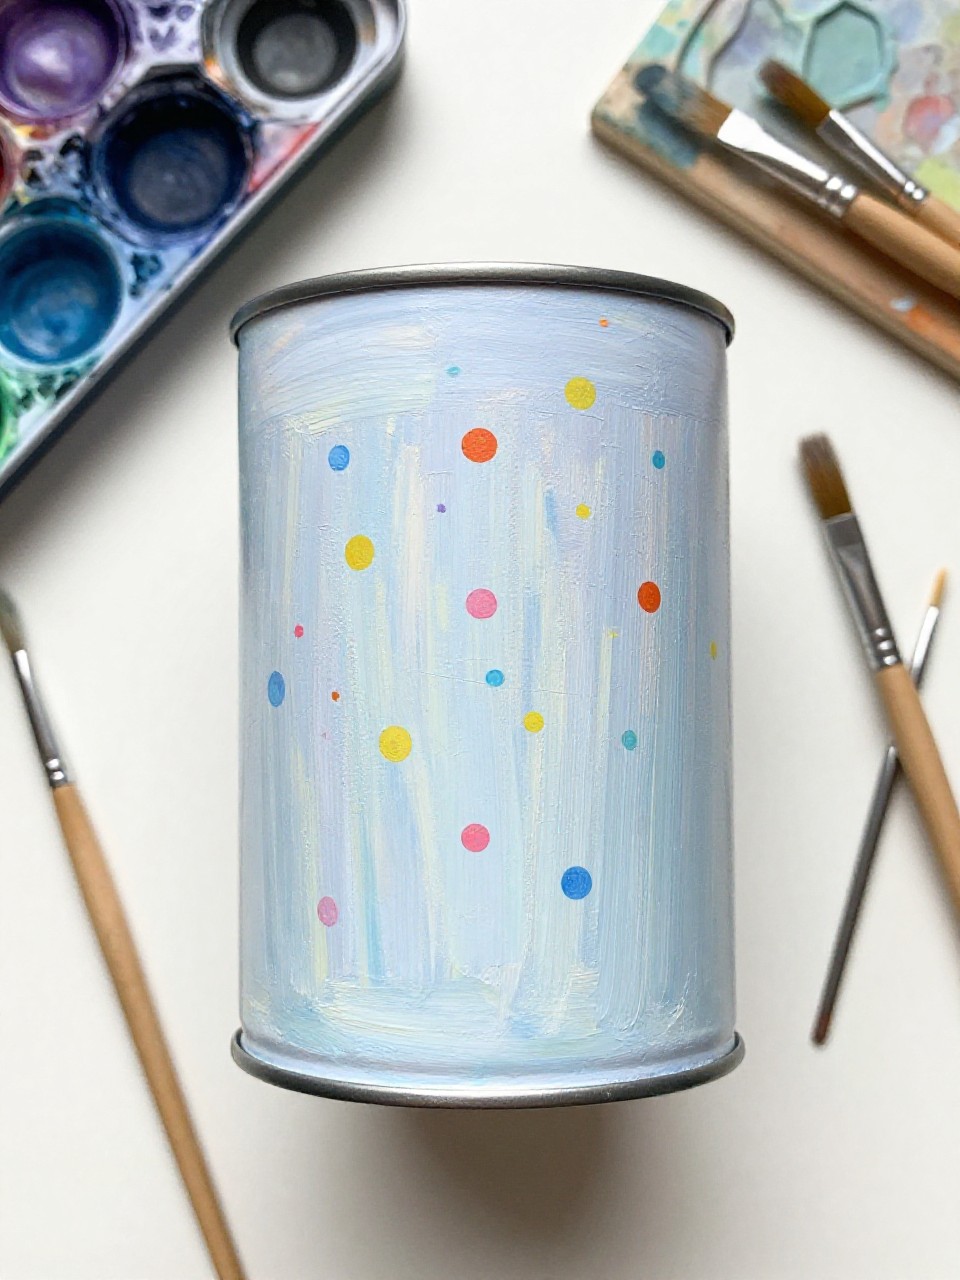
This pen holder looks like a party of colorful dots scattered all around, like confetti frozen in paint. It’s relaxing because you can dot and dab without worrying about straight lines, and it comes together quickly. This is a great “paint while watching a show” kind of project.
Materials Needed:
- Tin can pen holder
- Acrylic paint
- Paintbrushes in multiple sizes
- Palette or paint tray
- Round sponge dauber or cotton swabs
- Optional sealer or varnish
Steps to Make:
- Paint the can a solid background color and let it dry fully.
- Dip a dauber or cotton swab into different paint colors and stamp dots around the can.
- Vary dot sizes by using different tools or adding a second layer for thicker texture.
- Fill empty spaces with a few metallic or white dots to brighten the pattern.
- Dry and seal so the dots don’t chip when pens bump the sides.
11. Sun-and-Clouds Pen Holder
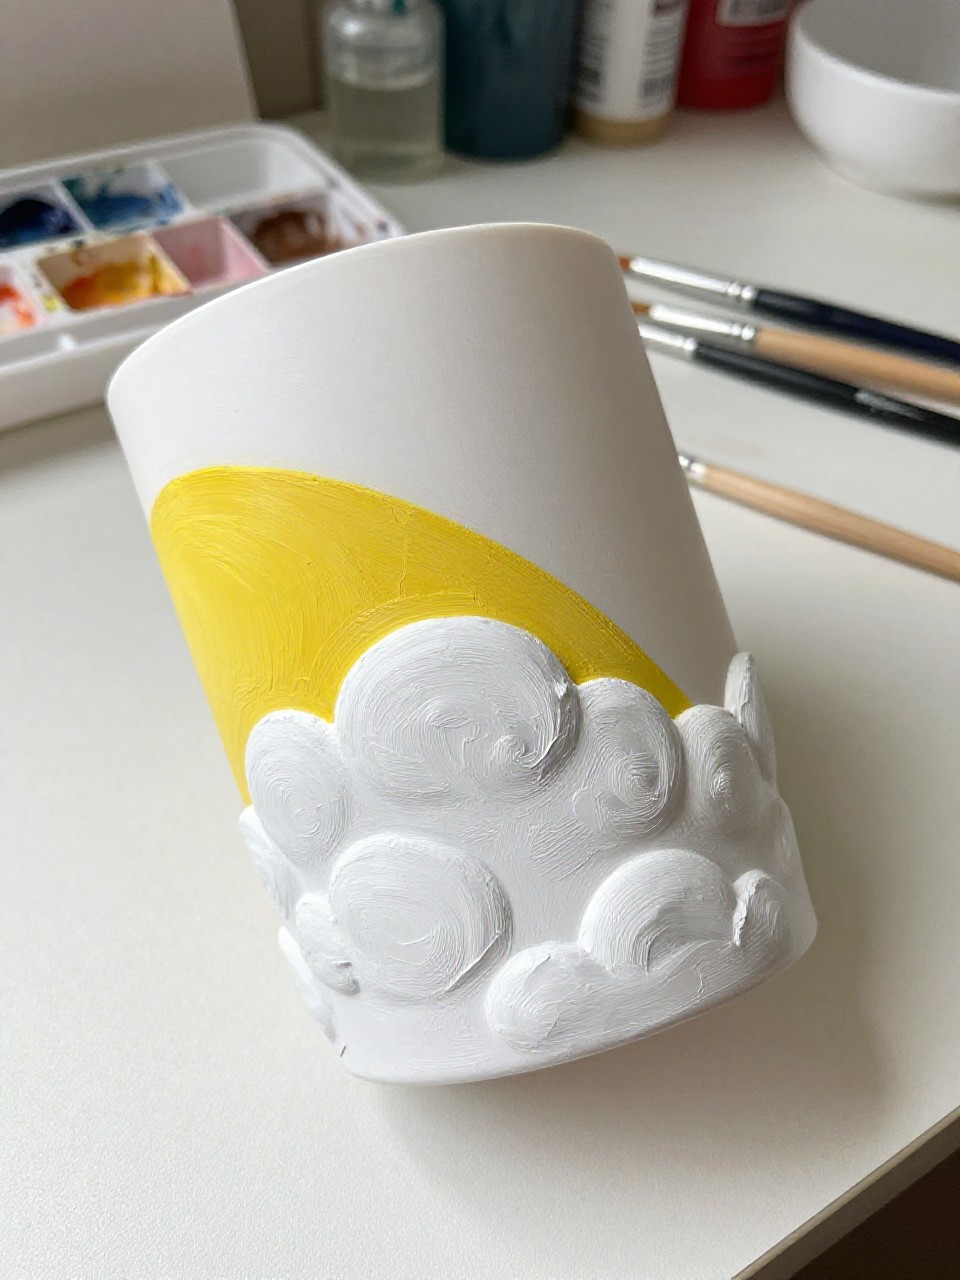
The finished pen holder looks like a happy sky scene, with puffy white clouds and a warm yellow sun wrapping around the cup. It’s satisfying because you can build the clouds with thick paint for real texture, which makes it feel extra handmade. It’s a sweet design for a bright morning desk vibe.
Materials Needed:
- Plastic pen holder cup
- Acrylic paint (with primer if needed)
- Paintbrushes in multiple sizes
- Palette or paint tray
- Sponge (optional)
- Optional sealer or varnish
Steps to Make:
- Wipe the plastic clean and paint a light blue base coat; let it dry.
- Use a round brush to paint cloud shapes around the cup with thick white paint.
- Add soft gray or pale blue shadows under parts of each cloud for depth.
- Paint a simple sun with short rays that follow the curve of the holder.
- Dry completely and seal so the thicker cloud texture stays protected.
12. Kawaii Milk Carton Pen Holder (Painted Box Style)
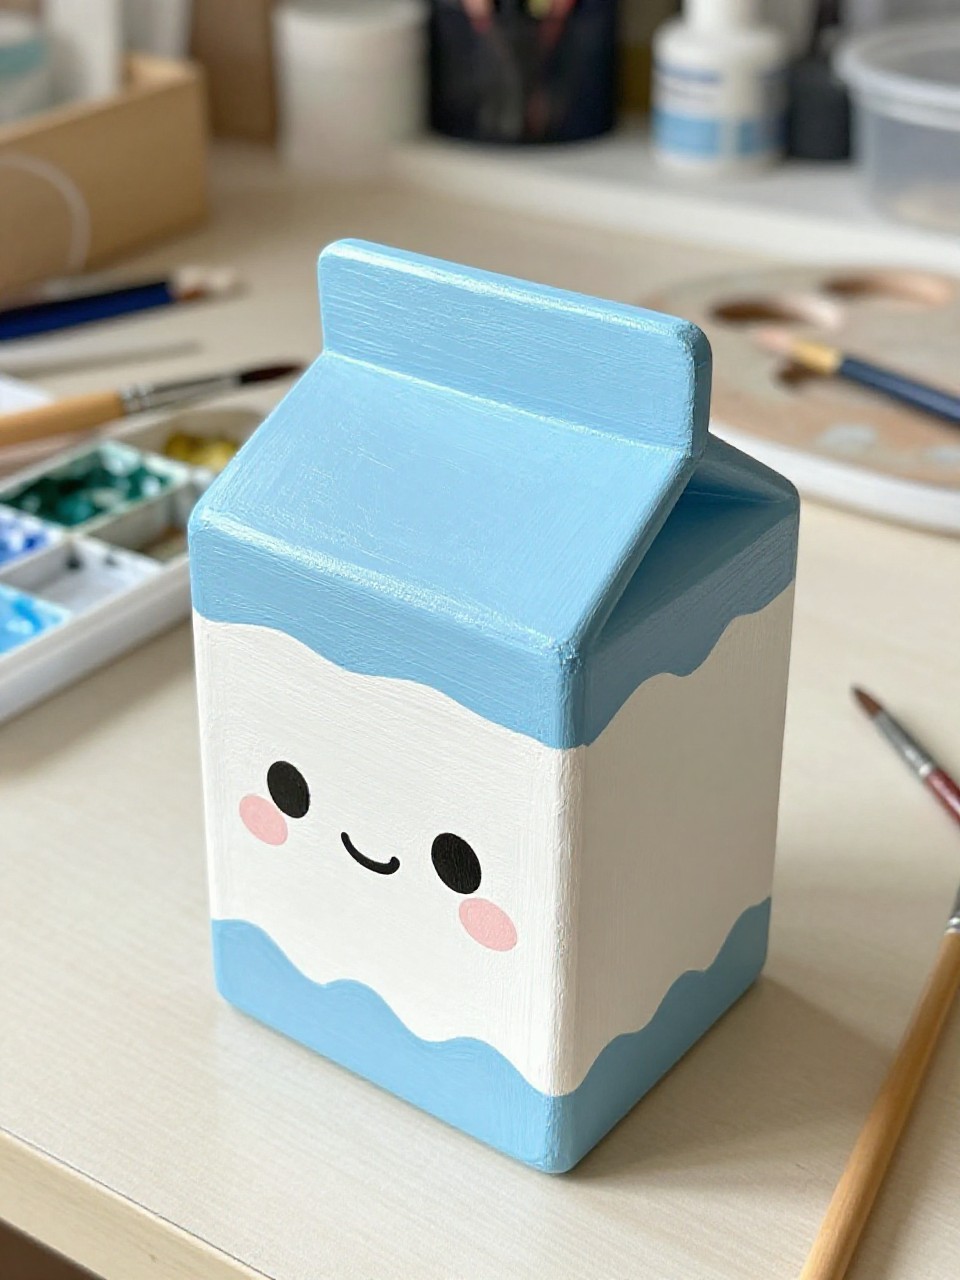
This pen holder looks like a tiny milk carton with a cute face, painted on a small wooden box-style holder. It’s fun because it feels like you’re making a character, and the straight sides make it easy to paint clean shapes. Beginners can keep details simple and still get a charming result.
Materials Needed:
- Wooden box pen holder (square or carton-like shape)
- Acrylic paint
- Paintbrushes in multiple sizes
- Palette or paint tray
- Pencil for sketching
- Optional sealer or varnish
Steps to Make:
- Paint the whole box white and let it dry for a clean “milk” base.
- Sketch the milk carton panels and top flap lines lightly with pencil.
- Paint light blue accents and a label area on the front panel.
- Add a simple kawaii face with black eyes and a tiny mouth, plus pink cheeks.
- Let it dry and seal, especially on the edges that get handled most.
13. Brushstroke Hearts Pen Holder
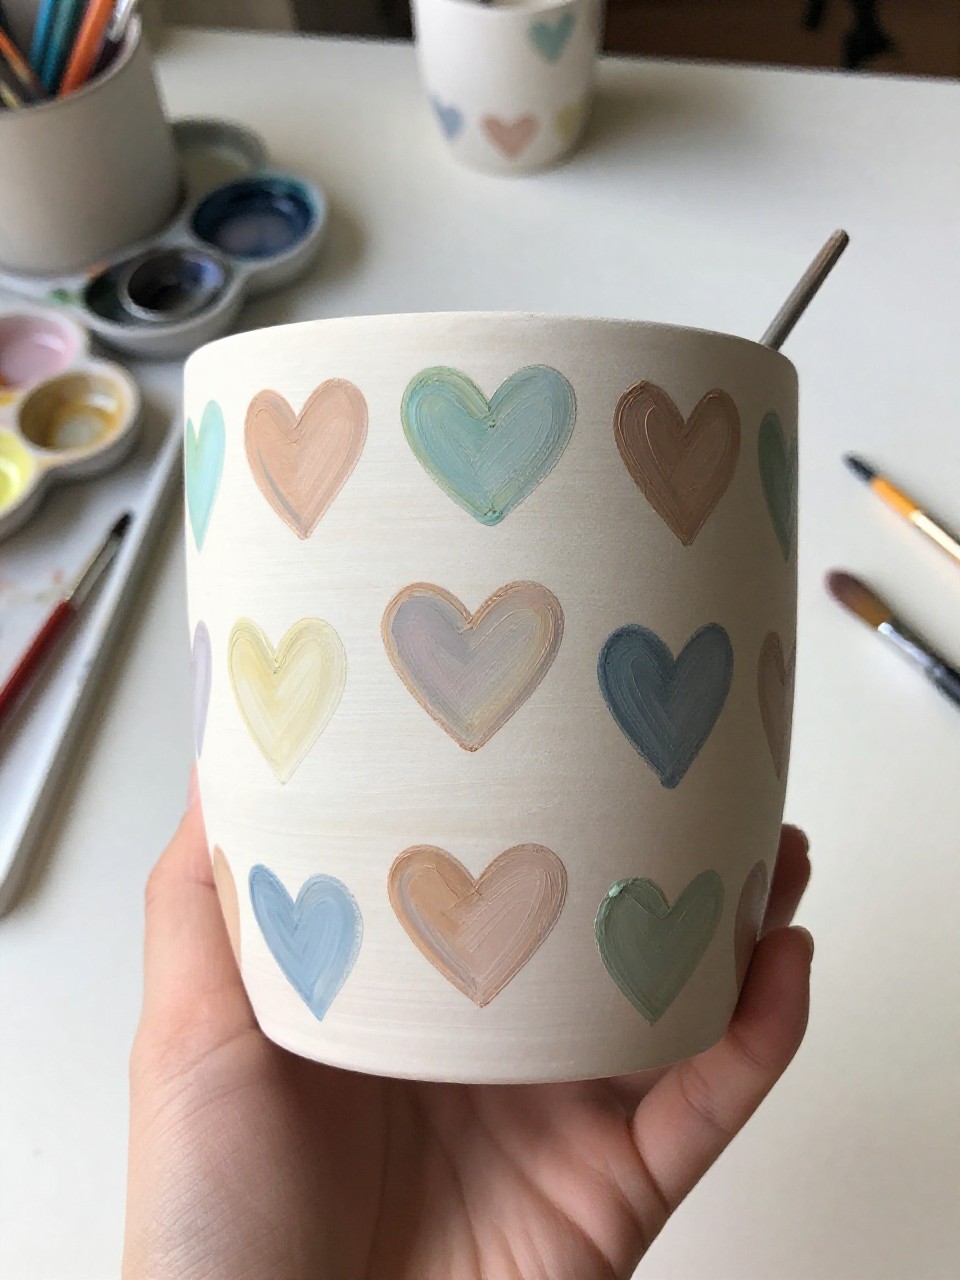
The finished pen holder looks like a scatter of hand-painted hearts made from loose brushstrokes, with some thick paint edges and some see-through strokes. It’s relaxing because each heart is quick, and the imperfect shapes make it look more artistic. It’s a sweet, simple design for any age.
Materials Needed:
- Ceramic pen holder cup
- Acrylic paint
- Paintbrushes in multiple sizes
- Palette or paint tray
- Water cup and paper towel
- Optional sealer or varnish
Steps to Make:
- Paint the cup a solid base color like blush, cream, or light gray.
- Load a medium brush with paint and press two curved strokes to form heart shapes.
- Repeat hearts around the cup, changing colors and sizes to keep it playful.
- Add a few tiny dots or thin outline marks to fill gaps and balance the pattern.
- Dry fully and seal so the raised brushstroke texture stays protected.
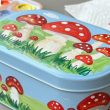
14. Little Mushrooms and Ferns Pen Holder
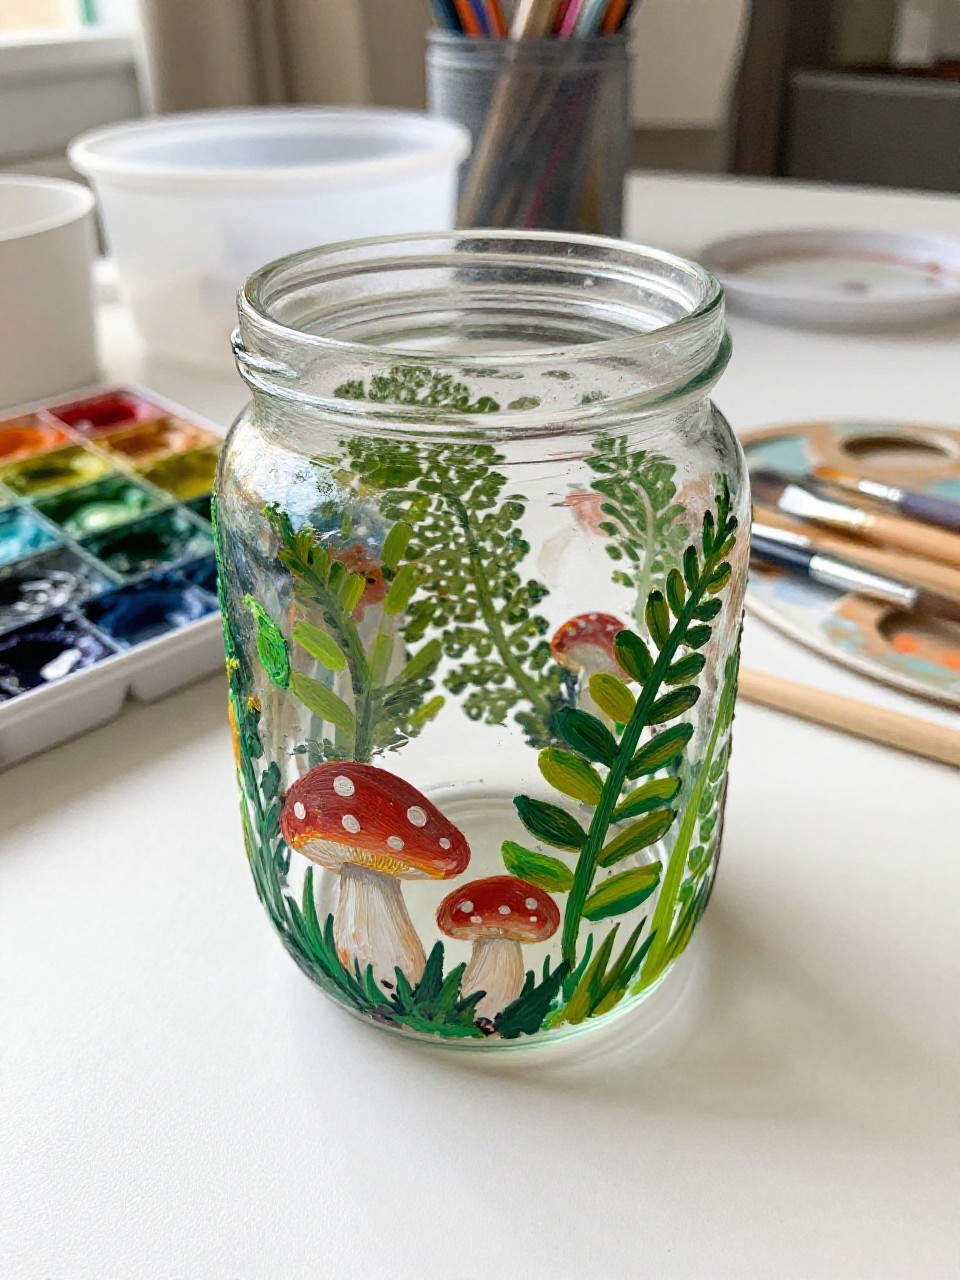
This pen holder looks like a mini forest scene with tiny mushrooms, fern fronds, and little dots of “forest floor” texture. It’s satisfying because you can build the scene slowly, adding one small detail at a time. It’s a great beginner project if you like nature and cozy colors.
Materials Needed:
- Glass jar pen holder
- Acrylic paint (multi-surface)
- Paintbrushes in multiple sizes
- Palette or paint tray
- Fine detail brush
- Optional sealer or varnish
Steps to Make:
- Wash and dry the jar, then paint a warm beige or pale green background.
- Sketch a few mushroom caps around the jar so the spacing feels natural.
- Paint mushroom stems and caps, then add fern shapes with thin, quick strokes.
- Dot in tiny speckles and highlights to give the forest details more depth.
- Let dry and seal to help the design hold up to daily desk use.
15. Peachy Citrus Slices Pen Holder
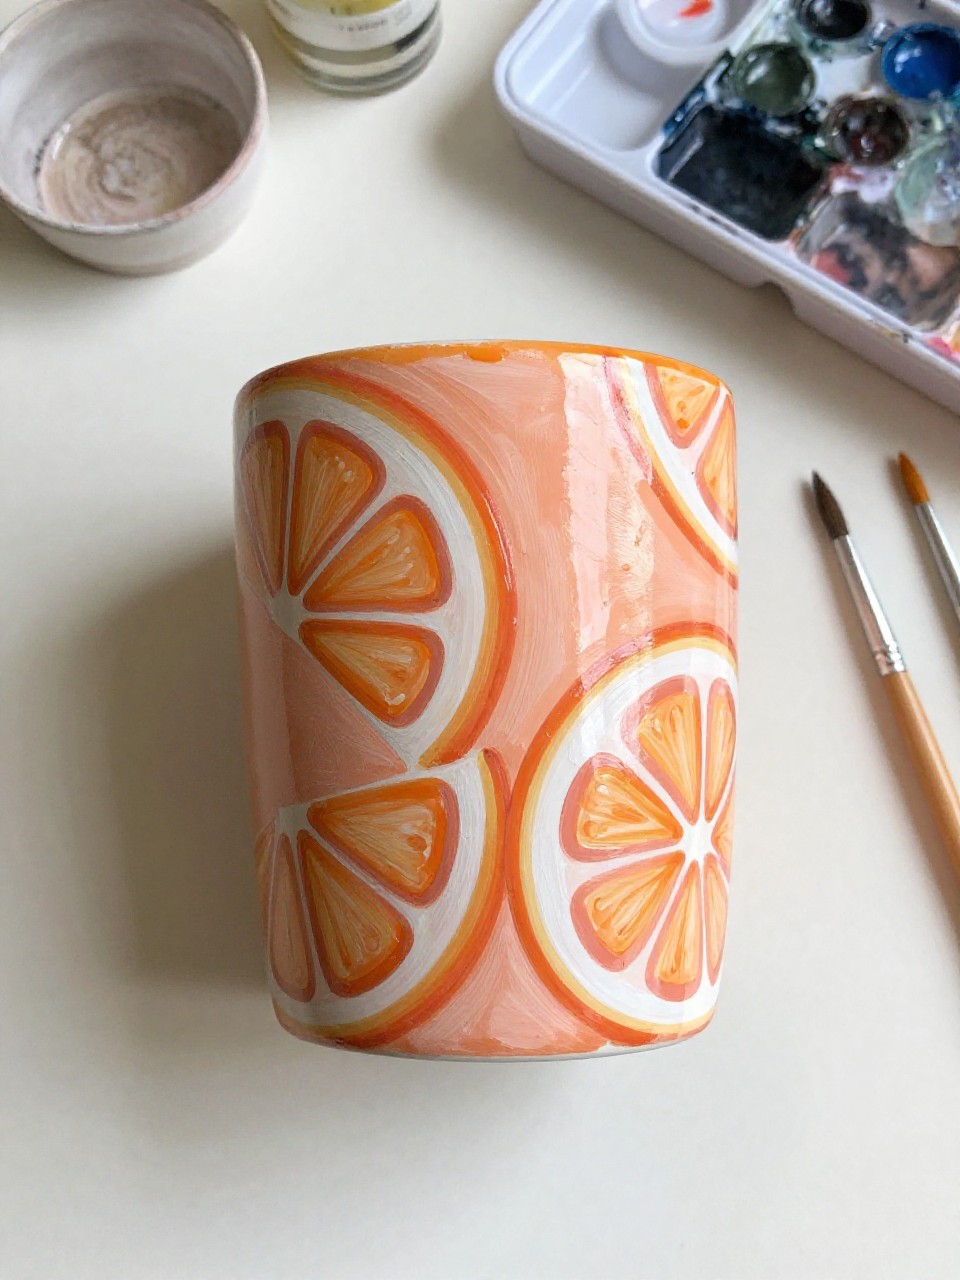
The finished pen holder looks like juicy orange and pink citrus slices painted around the cup, with little wedges and bright highlights that make them pop. It’s fun for beginners because circles and wedges are easy, and layering lighter paint makes the fruit look fresh. This one instantly warms up a desk.
Materials Needed:
- Ceramic pen holder cup
- Acrylic paint
- Paintbrushes in multiple sizes
- Palette or paint tray
- Pencil for light sketching
- Optional sealer or varnish
Steps to Make:
- Clean the cup and paint a pale peach background; let it dry.
- Lightly sketch citrus circles and half-slices around the cup to plan the wrap.
- Paint the slices in orange, coral, and pink, keeping edges slightly textured.
- Add thin wedge lines and small white highlights to show juicy segments.
- Dry completely and seal for a smooth, durable finish.