


Table of Contents Show
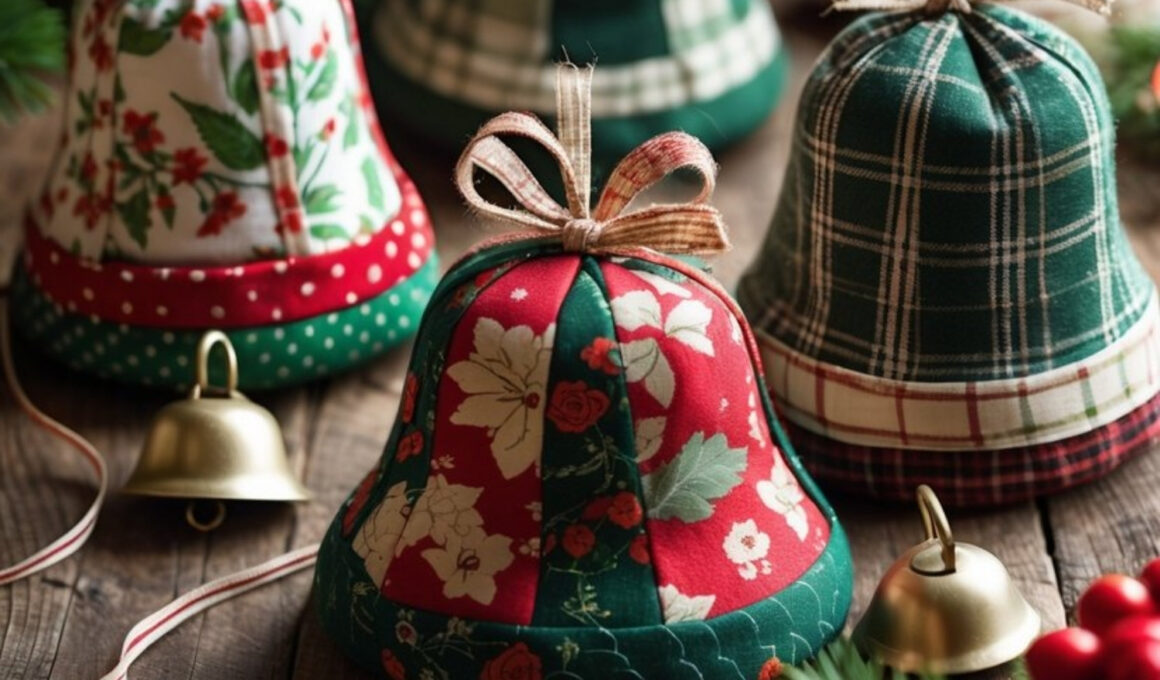
Patchwork fabric bells are a charming way to use up fabric scraps while adding a soft, homespun feel to your holiday decor. Combining cozy textures and classic Christmas patterns like plaid, florals, or polka dots, these fabric bells capture the essence of a handmade Christmas.
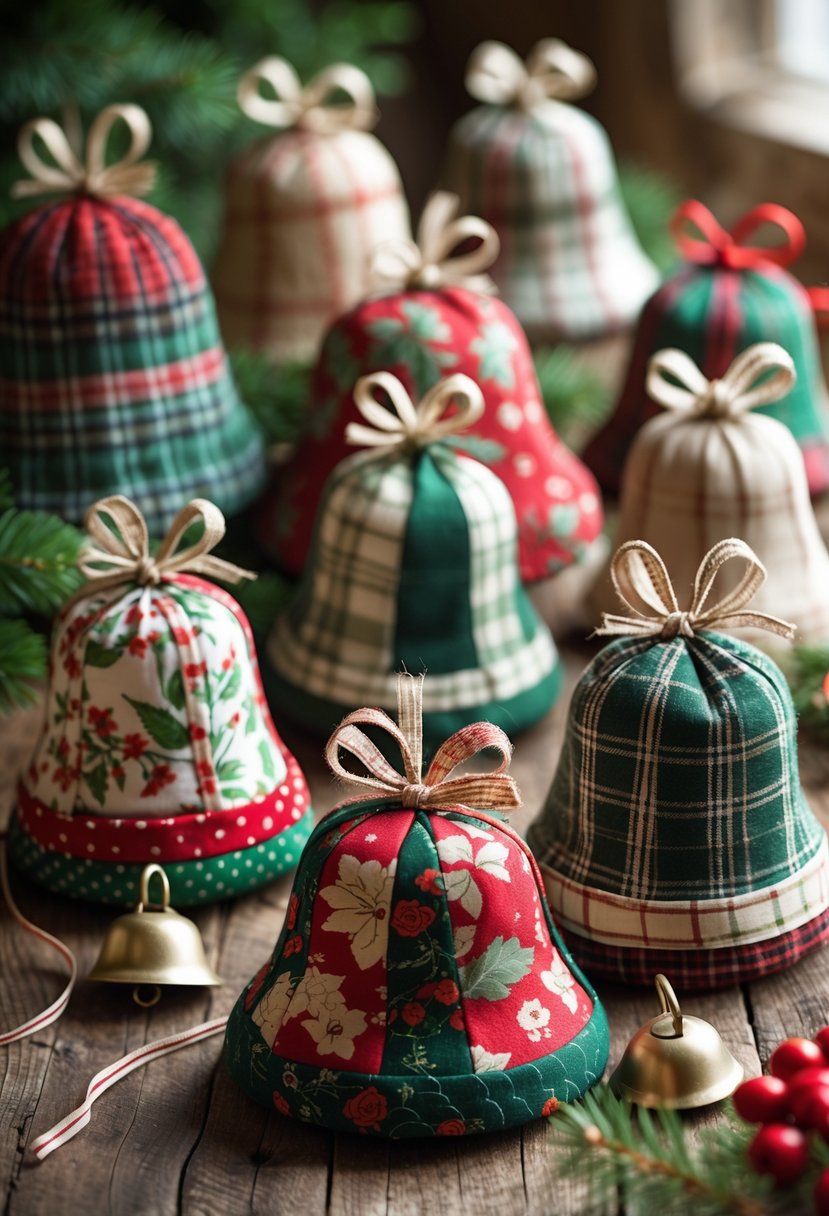
They can be displayed on your tree, in a festive bowl, or along a garland — and they make wonderful handmade gifts too.
Each bell is made by stitching together small pieces of fabric, giving you endless options to mix patterns and colors. You can add bows, ribbons, or even tiny jingles for that extra festive touch.
How to Make Patchwork Fabric Bells
It’s a satisfying craft for anyone who loves sewing or quilting and wants to make something warm, nostalgic, and meaningful.
Materials
- Assorted fabric scraps (cotton or flannel in holiday colors)
- Paper for the bell template
- Scissors or rotary cutter
- Sewing pins or clips
- Needle and thread or sewing machine
- Stuffing (fiberfill or cotton)
- Ribbon or jute twine for bows
- Small bells or beads (optional)
- Hot glue gun (optional for finishing touches)
Shop the materials


NOTE: We’ve received a few complaints that the steps aren’t clear enough, If you’re unsure about anything, please leave a comment below, and we’ll respond as soon as possible with a solution.
-WLL Team ❤️
The steps
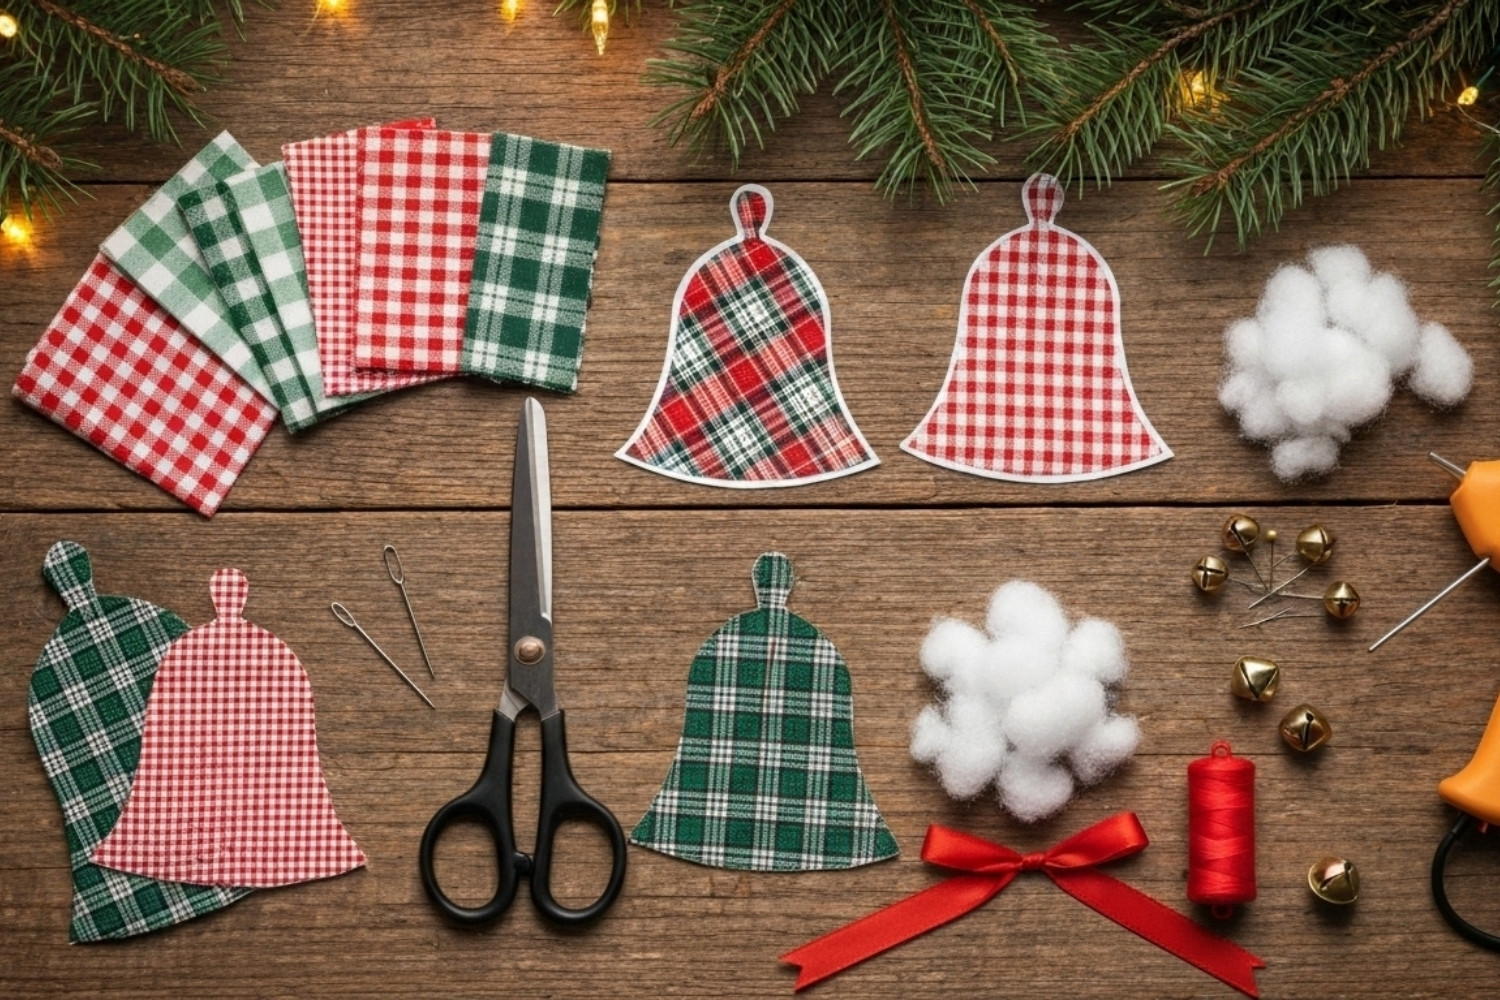
Step 1: Create Your Bell Template
Start by drawing a simple bell shape on paper and cutting it out. This will serve as your template. Use it to trace the pattern onto your fabric scraps.
You’ll need 4–6 pieces per bell, depending on how many sections you want to stitch together. Mixing prints like plaids and florals gives a lovely patchwork look.
Step 2: Cut and Arrange Your Fabric Pieces
Cut your fabric pieces along the traced lines and lay them out in the order you’d like to assemble them.
Try alternating light and dark patterns or solids and prints for visual balance. Iron the pieces if needed to remove wrinkles — this helps them align neatly when sewing.
Step 3: Sew the Panels Together
With right sides facing each other, stitch two panels together along one edge using a ¼-inch seam allowance. Continue adding panels one at a time until you have a rounded shape.
Leave a small opening at the top for turning and stuffing. Turn the bell right-side out and gently press with an iron.
Step 4: Add Stuffing and Shape
Stuff your bell lightly with fiberfill or cotton until it’s full but still soft enough to shape. Sew the top opening closed with small hand stitches.
If desired, insert a small jingle bell inside before closing for a subtle festive sound.
Step 5: Add Bows and Finishing Touches
Tie a small bow from ribbon or jute twine and attach it to the top of the bell using hot glue or thread. You can also add a hanging loop or decorative buttons for extra detail.
Once finished, arrange your fabric bells in a bowl, hang them on the tree, or gift them as cozy handmade ornaments.
These patchwork fabric bells bring a warm, vintage charm to any space and remind everyone of the beauty in handmade holiday decor.


These are darling! However its not clear to me how you get the bottom section of the bell shape without adding a flat circle? Do you have a video on youtube? Please advise, I would like to make these!
I’m so happy you like them! You’re right—the bell shape can be a little tricky.
The bottom section is actually curved fabric panels sewn together, so there’s no flat circle at the base. That’s what gives it that rounded bell look. I don’t have a video tutorial yet, but it’s definitely on my list! For now, you can try using a soft fabric with light stuffing to help keep the shape.
Thanks for stopping by 🙂
So for the bottoms of the bells?? are we adding more to the bell shape to wrap around to the bottom? Or do you sew half of the bottom on the bell shape with each panel added? The bell shape with the flared bottom edges you show in the picture does that work for this? Seeing some clarity on this would love to make them!
Great questions! The bell shape you see in the photo is made from curved fabric panels, and the flared bottom is part of each panel’s pattern — so there’s no separate flat circle added.
You simply sew the panels together one by one, and as they join, the shape naturally curves and creates that rounded bottom edge. Once all the panels are sewn, you turn it right-side out and add a little stuffing to help it hold the bell shape. No extra bottom piece needed!
Jasmine xx
So the template of the bell shape in your picture is that what you used? And is the bottom solid or hollow like a real bell??
Yes, the bell-shaped template shown in the post is the same style used to create the bells in the picture. Each bell is made from multiple curved panels, and when they’re sewn together they naturally form that rounded, flared shape. The bottom isn’t solid — it’s slightly hollow, just like a soft fabric bell.
After sewing and turning it right-side out, you add a bit of stuffing to help it keep its shape, but there’s no solid base inside. Hope that helps!
I still don’t get your instructions for the bottom. The picture shows strips of fabric in addition to the upper bell part. Have you done the video yet? These are so cute but I don’t want to start and struggle through.
I totally understand — the bottom can look a bit confusing at first! The ‘strips’ you’re seeing in the picture are actually just the lower part of each panel. They’re sewn in as part of the same piece, not added separately.
When all the panels come together, they form that flared bell shape on their own. I haven’t made a video tutorial yet, but it’s definitely something I want to add because so many people have asked.
For now, just know there’s no extra bottom piece — it’s all built right into the curved panel pattern. I hope that helps a bit, and I’m so glad you love them!
Would you show the inside of the finished bell? In step 3 it instructs turning right side out. That is very confusing to me. The bells are very cute.
Thank you! I’m so glad you like the bells.
I know that part can be a little confusing. Turning it right-side out in step 3 just means flipping the sewn panels so the seams end up on the inside and the pretty fabric shows on the outside — just like when you sew a pillow.
The inside will look like neat joined seams from all the panels coming together. Hope this helps.
Hello. These are beautiful. I just spent 2 hours cutting and assembling, and it is the biggest failure !! The bottom does not come together, raw edges are left open at the bottom and the entire “bell” stays open, top and bottom. I’m so confused 😅
Oh no, I’m so sorry you spent all that time and it didn’t come together the way you hoped – that’s so frustrating, I totally get it 😅
For the bottom, there shouldn’t be a big open gap. Each bell is made from curved panels that are sewn from the very top point all the way down around the curve at the bottom, so when all the panels are joined you end up with a closed “cone” shape (only the tiny opening at the top is left for the hanger).
If you’re seeing raw edges at the bottom, it usually means:
I don’t have a video for these bells yet, but I’m making a note to add more step photos/clarification to the post since you’re not the only one who’s gotten stuck here. Thank you for sharing your experience – I hope this helps you rescue the one you started instead of scrapping it. 💚🎄