


Table of Contents Show
Preschoolers love bugs—until they see the real ones on the playground! These simple, eye-catching crafts let kids explore butterflies, beetles, and bees without any creepy-crawlies. Each project looks “wow” but uses basic supplies you likely have at home or in the classroom.

Try one during a rainy afternoon, or set up a mini “insect lab” craft station for curious little makers. Low mess, high delight, and perfect for tiny hands.
1. Bubble Wrap Honeycomb Bees

Kids press paint through bubble wrap to reveal a satisfying honeycomb pattern, then add a chunky bee on top. The texture does the heavy lifting, so the final piece looks polished without tricky steps.
Materials Needed:
- Bubble wrap
- Yellow and black paint
- White paper (plus a glue stick)
How to make it:
- 1. Paint yellow over a piece of bubble wrap.
- 2. Flip it onto white paper and press to print the honeycomb.
- 3. Cut and glue a simple oval bee from yellow paper; add black stripes and wings.
- 4. Draw a dotted flight path with a marker.
2. Cupcake Liner Flutter Butterflies

Ruffled cupcake liners open into pretty wings, creating colorful butterflies in seconds. The layered look feels delicate but is totally beginner-friendly.
Materials Needed:
- Cupcake liners (assorted colors)
- Craft sticks
- Markers or paint
How to make it:
- 1. Flatten two cupcake liners and pinch each into a bow shape for wings.
- 2. Color a craft stick for the body and draw a smiley face.
- 3. Glue wings to the back of the stick, top and bottom.
- 4. Add paper antennae or draw spirals above the head.
3. Leaf Print Beetles

Real leaves turn into shiny beetle shells with a swipe of paint. Each print looks striking and unique—like nature made the art.
Materials Needed:
- Leaves (oval or round work best)
- Washable paint
- White or black cardstock
How to make it:
- 1. Paint the underside of a leaf and press it onto cardstock to print a “shell.”
- 2. Repeat for a pair of wings or a larger beetle body.
- 3. Draw a head, legs, and antennae with a marker.
- 4. Add dots or lines to make different beetle species.
4. Pipe Cleaner Dragonflies with Bead Bodies

Shiny pony beads stack into rainbow bodies, while pipe cleaners twist into long, elegant wings. The result hangs beautifully in a window or plant.
Materials Needed:
- Pipe cleaners
- Pony beads
- Googly eyes
How to make it:
- 1. Thread beads onto a pipe cleaner for the body; fold ends to secure.
- 2. Twist another pipe cleaner into a figure-eight for wings.
- 3. Wrap the body around the center of the wings to attach.
- 4. Glue on eyes and bend a tiny smile.
5. Tissue Paper Stained-Glass Butterfly

Tissue paper squares glow like stained glass when taped to a plastic sheet behind a bold black butterfly outline. It looks fancy on any window, yet is easy for little fingers.
Materials Needed:
- Clear plastic sheet (from packaging) or laminating pouch
- Black paper for outline
- Tissue paper squares
How to make it:
- 1. Cut a thick butterfly outline from black paper (leave open wing sections).
- 2. Stick the outline onto the plastic sheet.
- 3. Fill wing sections with tissue paper squares, overlapping colors.
- 4. Tape to a window to see it glow.
6. Pom-Pom Caterpillar on a Leaf

Soft pom-poms lined up on a cut-out leaf make an adorable creeping caterpillar. Kids love choosing color patterns, and the end result is photo-ready cute.
Materials Needed:
- Pom-poms
- Green cardstock
- Glue
How to make it:
- 1. Cut a simple leaf shape from the cardstock and draw veins.
- 2. Glue a row of pom-poms along the center as the caterpillar body.
- 3. Add a tiny paper face or draw eyes on the first pom-pom.
- 4. Curl a paper strip for a leaf stem if you like.
7. Rock Ladybugs with Leaf Beds

Smooth stones turn into glossy ladybugs, then “sleep” on paper leaves. The shine and weight make them feel like real treasures.
Materials Needed:
- Red and black paint
- Smooth rocks
- Green paper
How to make it:
- 1. Paint rocks red; let dry.
- 2. Add a black head, center line, and dots.
- 3. Cut a big green leaf from paper and draw veins.
- 4. Place your ladybug on its leaf bed.
8. Fingerprint Fireflies in a Jar

Glowing fireflies appear with fingerprint dots and a drawn mason jar. Add a hint of glitter for a twinkle that kids adore.
Materials Needed:
- Washable yellow paint
- Black marker
- Optional fine glitter
How to make it:
- 1. Draw a simple mason jar outline on white paper.
- 2. Dip a fingertip in yellow paint and dot “lights” inside the jar.
- 3. When dry, draw tiny wings and heads over the dots.
- 4. Dab a little glitter on a few for sparkle.
9. Accordion-Fold Paper Snail
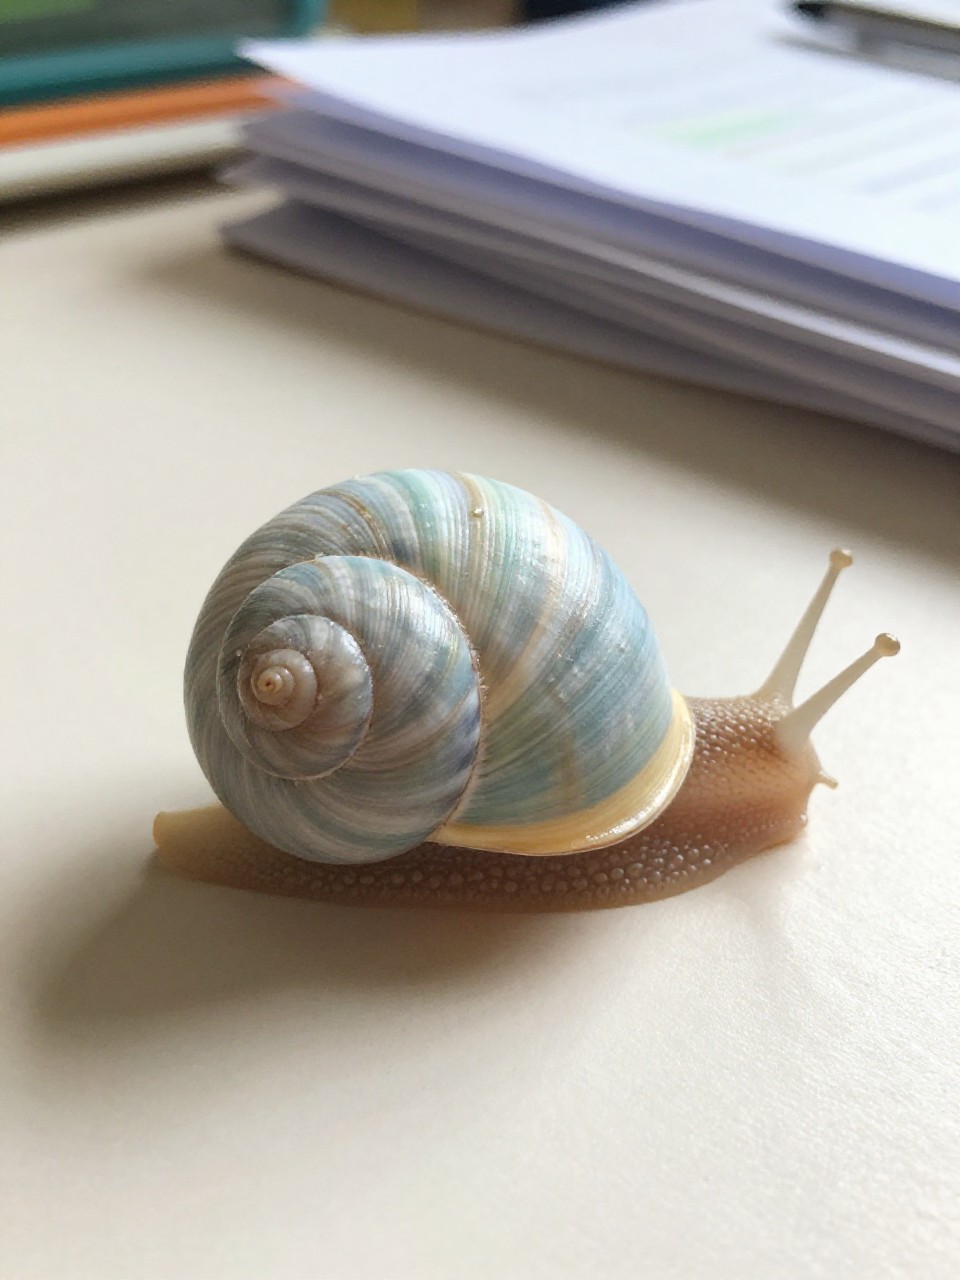
A chubby paper shell made from a quick accordion fold makes this snail look sculptural and sweet. Great for practicing folding with tiny hands.
Materials Needed:
- Colored paper
- Glue stick
- Marker
How to make it:
- 1. Cut a long strip of paper and accordion-fold it.
- 2. Roll the folded strip into a spiral and glue the end to hold.
- 3. Cut a simple snail body and glue the shell on top.
- 4. Draw eyes and a smile; add a dot trail if you like.
10. Paper Plate Wiggly Worm Garden

Kids paint a plate like dirt and grass, then weave a yarn worm through slits so it “pops up” to say hello. It’s interactive and giggle-inducing.
Materials Needed:
- Paper plate
- Brown/green paint
- Yarn
How to make it:
- 1. Draw a simple mason jar outline on white paper.
- 2. Dip a fingertip in yellow paint and dot “lights” inside the jar.
- 3. When dry, draw tiny wings and heads over the dots.
- 4. Dab a little glitter on a few for sparkle.
11. Clothespin Butterfly Clips
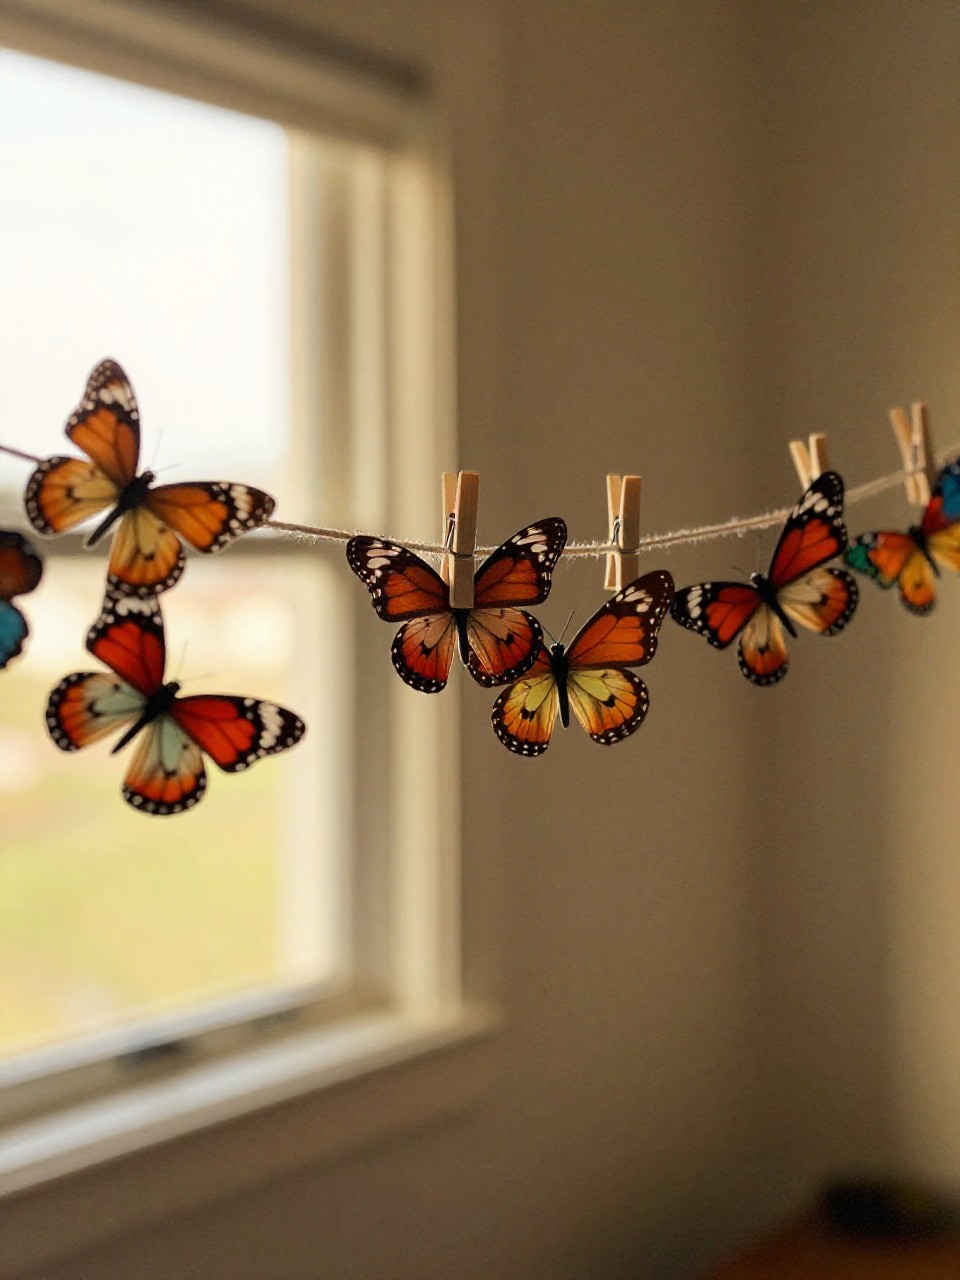
Glittery wings and a sturdy clothespin body make a functional art piece that can clip onto backpacks or curtains. The spring action is satisfying for little hands.
Materials Needed:
- Wooden clothespins
- Coffee filters or cupcake liners
- Markers
How to make it:
- 1. Color a coffee filter with markers; mist lightly to blend.
- 2. Pinch the filter center and clip it with the clothespin for wings.
- 3. Draw stripes or dots on the clothespin body.
- 4. Add antennae from a folded pipe cleaner.
12. Egg Carton Ant Parade
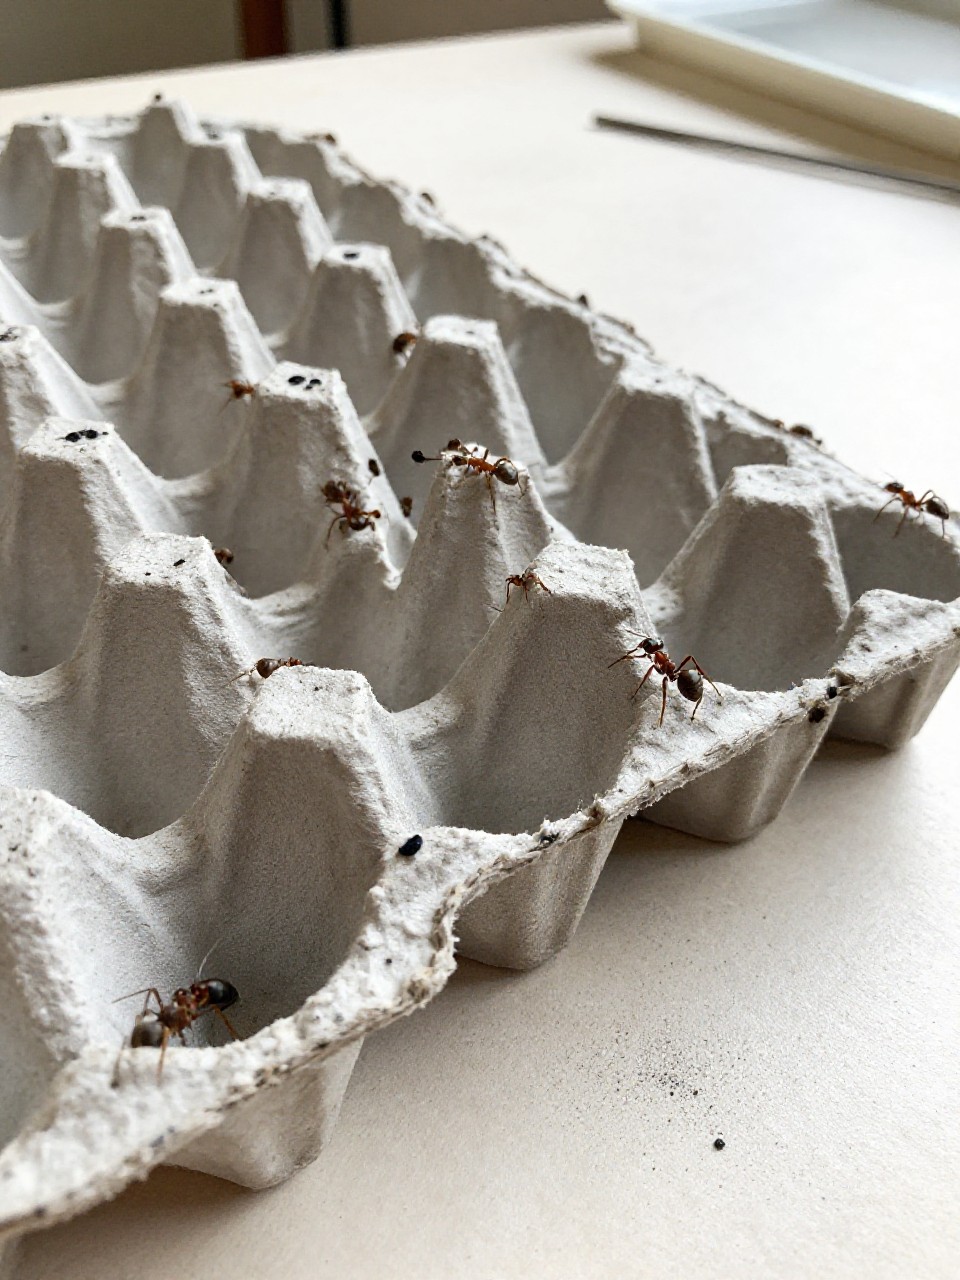
Three egg-cup segments turn into a marching ant with big personality. The chunky shape is perfect for preschoolers to handle and paint.
Materials Needed:
- Cardboard egg carton
- Black paint
- Pipe cleaners
How to make it:
- 1. Cut three connected egg cups and paint them black.
- 2. Poke small holes and thread pipe cleaners for legs.
- 3. Add two short pipe cleaners as antennae.
- 4. Draw or glue on eyes and a happy grin.
13. Paper Straw Bumblebees

Striped paper straws become plump bee bodies in minutes. Add vellum or tissue wings for a soft, airy finish.
Materials Needed:
- Paper straws (yellow/black or plain to color)
- White tissue or vellum
- Glue
How to make it:
- 1. Cut a straw piece for the body.
- 2. Cut two teardrop wings from tissue and glue to the straw.
- 3. Draw eyes and stripes if using plain straws.
- 4. Tie on thread to hang in a window.
14. Bottle Cap Spider Magnets

Bottle caps flip into shiny spider bodies with bendy legs and a friendly face. Stick them on the fridge for instant spooky-cute decor.
Materials Needed:
- Metal or plastic bottle caps
- Black pipe cleaners
- Adhesive magnet dots
How to make it:
- 1. Glue four short pipe cleaners inside the cap for eight legs.
- 2. Bend legs outward and adjust.
- 3. Add googly eyes inside the cap.
- 4. Stick a magnet on the back.
15. Foam Shape Moth Collage

Pre-cut foam shapes layer into elegant moths with big patterned wings. The raised foam look makes them “pop” on paper.
Materials Needed:
- Foam sticker shapes
- Cardstock
- Markers
How to make it:
- 1. Draw a simple mason jar outline on white paper.
- 2. Dip a fingertip in yellow paint and dot “lights” inside the jar.
- 3. When dry, draw tiny wings and heads over the dots.
- 4. Dab a little glitter on a few for sparkle.
16. Rainbow Pasta Caterpillar Necklace
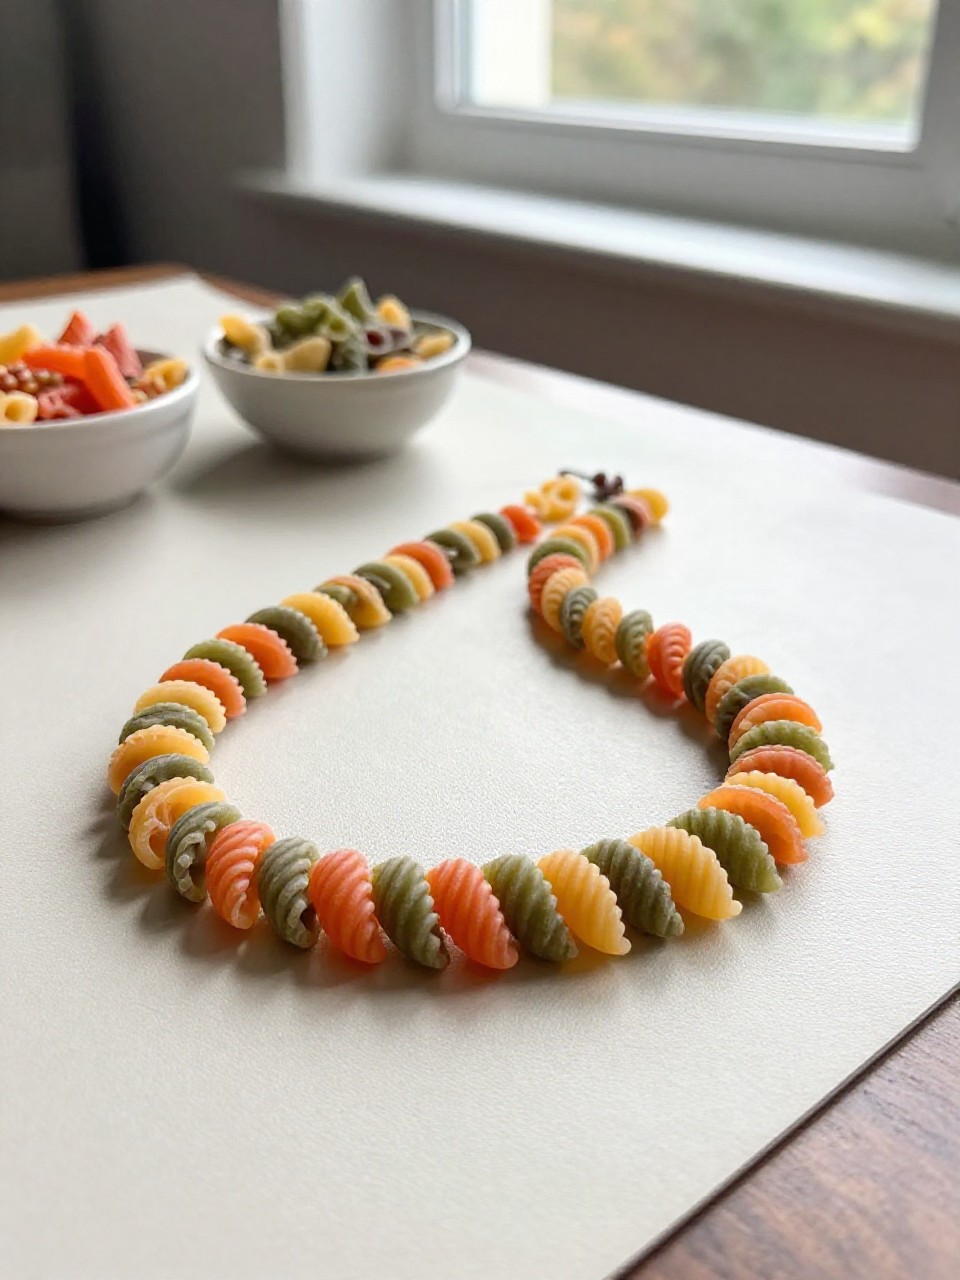
Dyed pasta turns into a wearable caterpillar that kids proudly show off. The chunky noodles and color patterning build fine motor skills and style.
Materials Needed:
- Dyed pasta (rigatoni or penne)
- Yarn
- Tape
How to make it:
- 1. Wrap a bit of tape on one yarn end to make a “needle.”
- 2. Thread pasta in a color sequence to form a chunky caterpillar.
- 3. Tie ends together to make a necklace.
- 4. Draw a tiny face on the first noodle with marker.