


Table of Contents Show
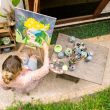
When you want a relaxing hobby, it can be hard to pick a painting idea that feels simple but still looks beautiful. Tote bags are perfect because they’re useful, beginner-friendly, and fun to personalize.

In this list, you’ll find Christian-based tote bag painting ideas that are calming to make and easy to wear or gift.
Grab a plain canvas tote, and let’s paint something meaningful.
1. Cross and Wildflowers Tote Bag

A simple wooden-style cross sits in the center of the tote, surrounded by small hand-painted wildflowers and leafy stems. It’s satisfying because the shapes are forgiving, and you can add as many flowers as you want. Great for beginners who want a peaceful, pretty design with faith at the center.
Materials Needed:
- Canvas tote bag
- Acrylic paint (fabric acrylic or mixed with fabric medium)
- Paintbrushes in multiple sizes
- Palette or paint tray
- Cardboard insert (to prevent bleed-through)
- Optional fabric sealer or heat-set iron
Steps to Make:
- Slide cardboard inside the tote and smooth the fabric flat.
- Lightly sketch a cross shape in the middle with pencil or thinned paint.
- Paint the cross with warm browns or neutrals, letting brush strokes show.
- Add wildflowers around it using small dabs and thin stems.
- Let dry fully, then heat-set with an iron (follow paint instructions) or seal lightly.
2. “Faith Over Fear” Lettered Tote Bag
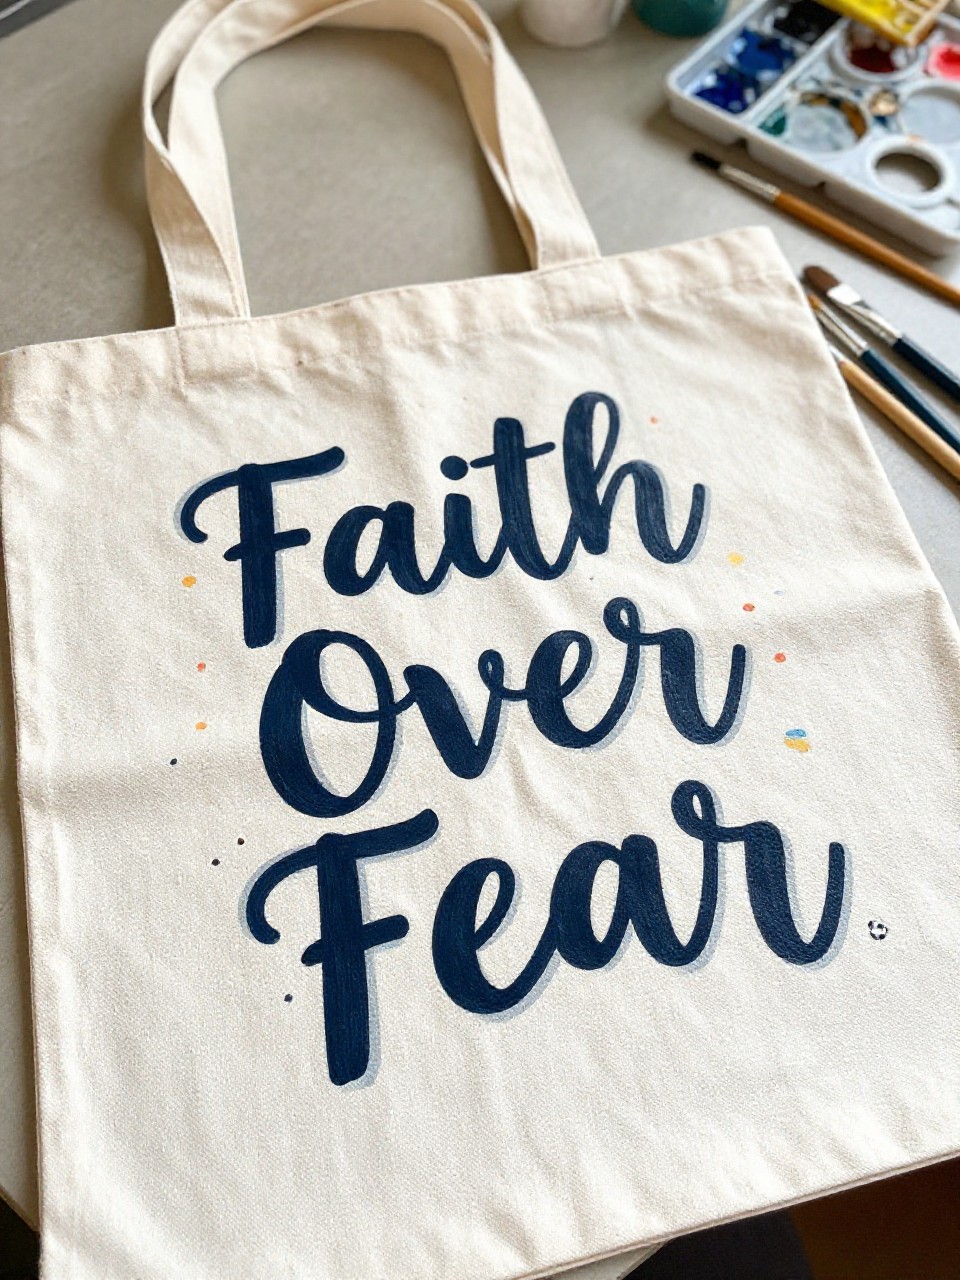
The tote shows the words “Faith Over Fear” in bold hand-painted letters with soft shadows and tiny spark-like dots around the phrase. This project feels calming because lettering is slow and focused, and you can keep it simple with two colors. It’s perfect if you want an encouraging bag for daily errands.
Materials Needed:
- Canvas tote bag
- Acrylic paint (fabric acrylic or fabric medium)
- Paintbrushes in multiple sizes
- Palette or paint tray
- Chalk pencil or regular pencil
- Optional fabric sealer or heat-set iron
Steps to Make:
- Insert cardboard inside the tote and tape the bag flat if it shifts.
- Lightly sketch the words in the center using pencil or chalk.
- Paint the main letters with a medium brush, working slowly along the outlines.
- Add a soft shadow or outline with a smaller brush for a hand-lettered look.
- Dry completely, then heat-set or seal so the letters stay crisp over time.
3. Psalm 23 Shepherd Hills Tote Bag
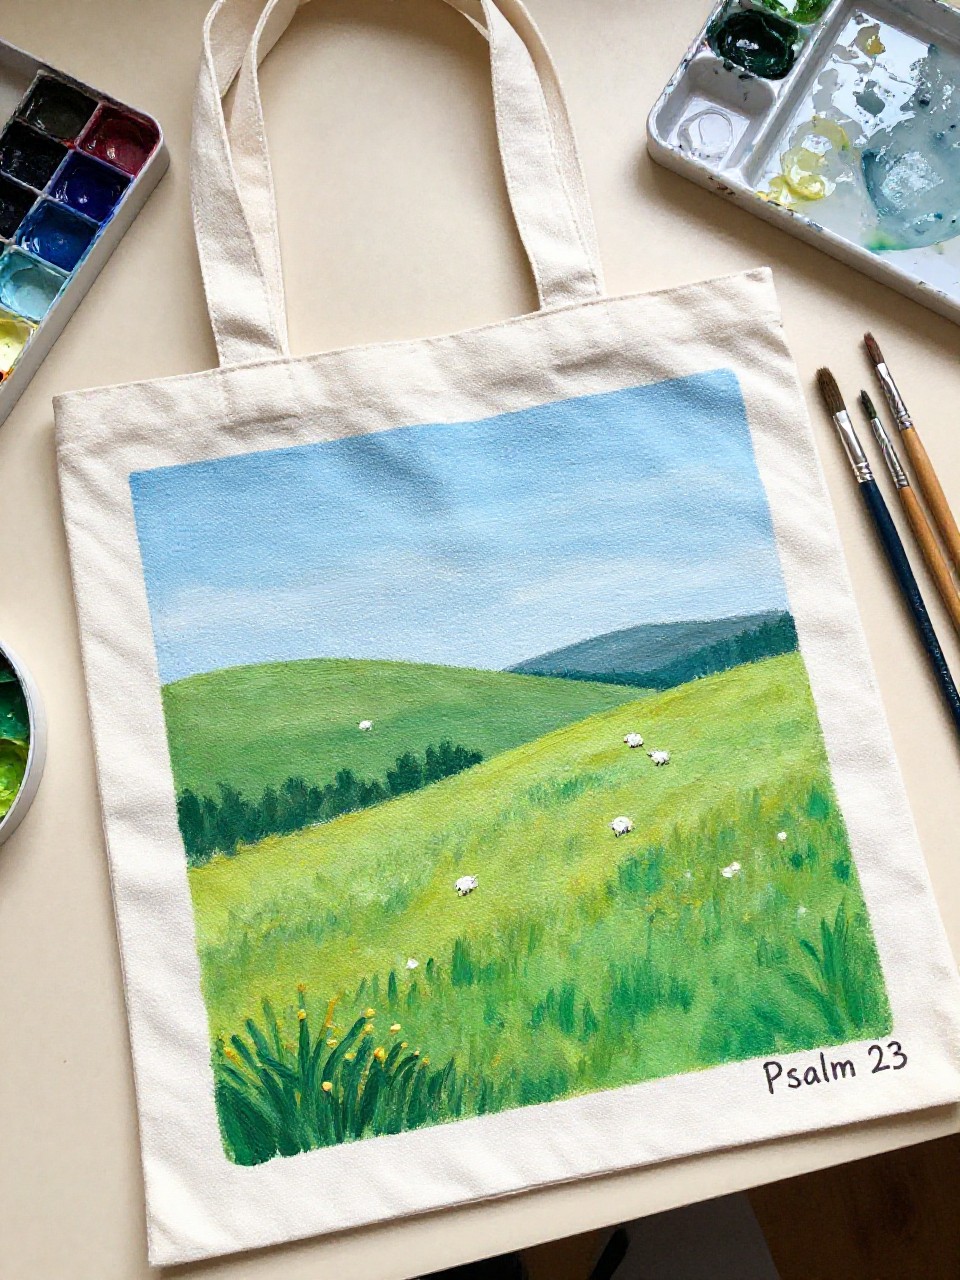
This tote looks like a peaceful mini landscape with rolling green hills, a tiny flock of sheep, and “Psalm 23” painted neatly in one corner. It’s relaxing because you’re blending simple colors and making easy, rounded shapes. Beginners can keep the details minimal and still get a sweet, meaningful scene.
Materials Needed:
- Canvas tote bag
- Acrylic paint (fabric acrylic or fabric medium)
- Paintbrushes in multiple sizes
- Palette or paint tray
- Cardboard insert
- Optional fabric sealer or heat-set iron
Steps to Make:
- Place cardboard inside and lightly sketch a horizon line across the lower half.
- Paint the sky with soft blue, leaving visible blended brush strokes.
- Add layered green hills with curved strokes, darker in front, lighter behind.
- Dot in small white sheep shapes and add tiny legs with a thin brush.
- Paint “Psalm 23,” let dry, then heat-set or seal for durability.
4. Simple Dove and Olive Branch Tote Bag
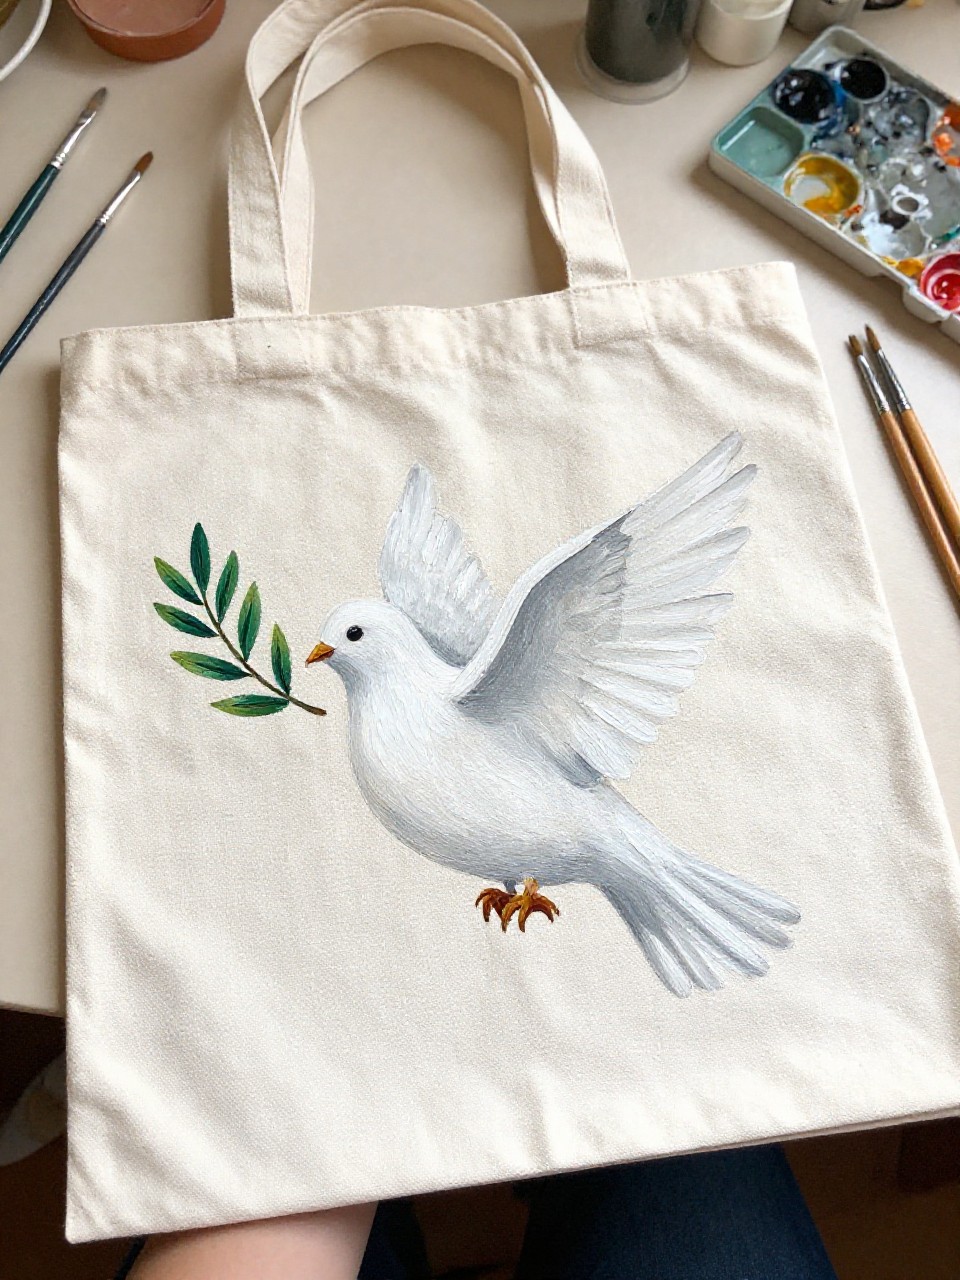
A white dove is painted mid-flight with an olive branch in its beak, using gentle strokes and a few light gray shadows. This is great for beginners because the shapes are soft and you don’t need perfect lines. It also makes a peaceful gift bag for church, study group, or a friend.
Materials Needed:
- Canvas tote bag
- Acrylic paint (fabric acrylic or fabric medium)
- Paintbrushes in multiple sizes
- Palette or paint tray
- Cardboard insert
- Optional fabric sealer or heat-set iron
Steps to Make:
- Insert cardboard and lightly draw a dove silhouette with pencil.
- Block in the dove with white paint, leaving room for feather edges.
- Add light gray shadows under the wings with thin, sweeping strokes.
- Paint the olive branch with green leaves and a brown stem.
- Let dry fully, then heat-set or seal to protect the soft whites.
5. “Be Still” Minimal Laurel Tote Bag
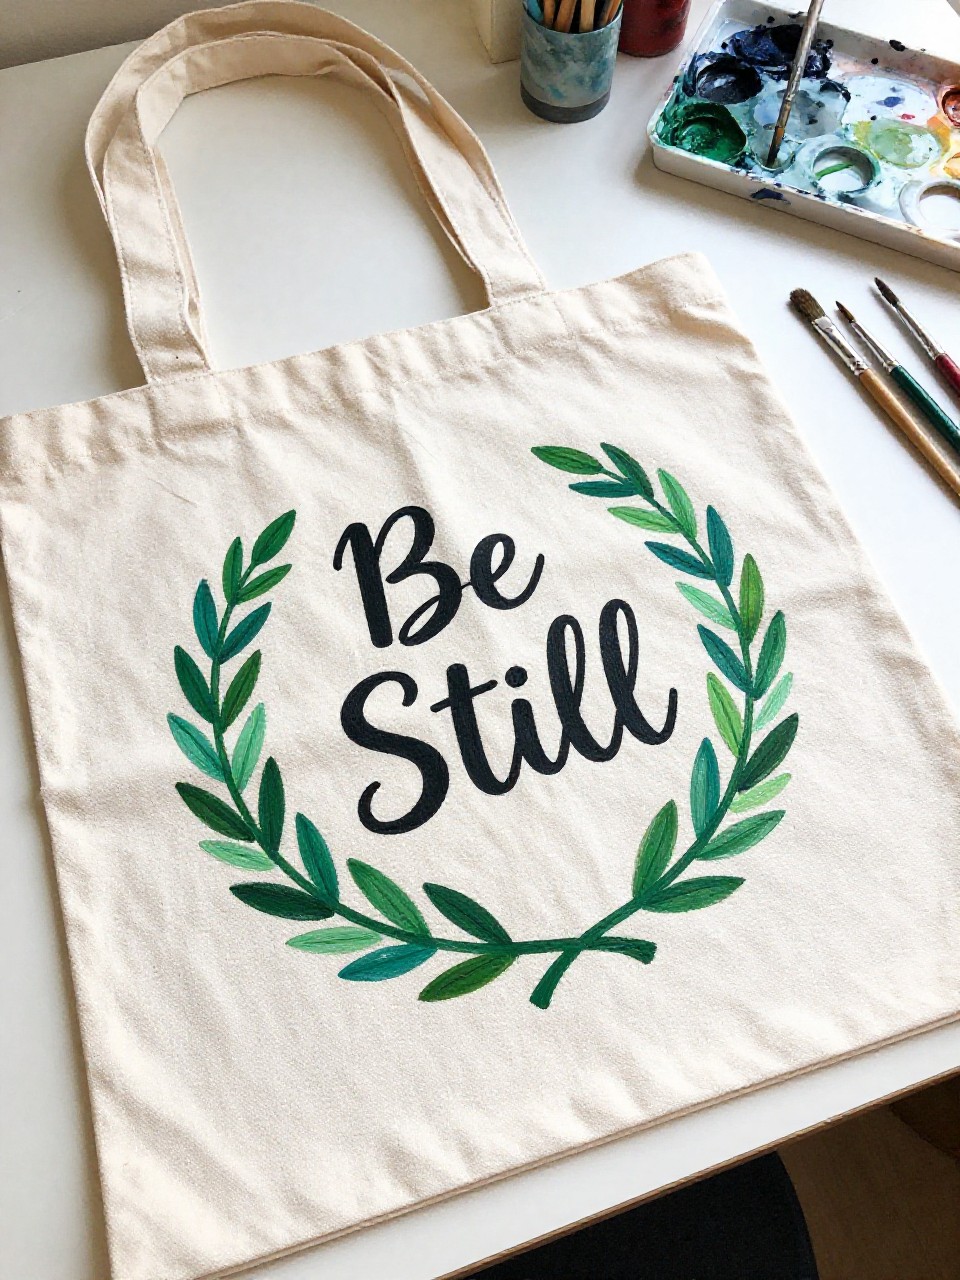
The tote has the words “Be Still” in clean hand-painted script, framed by a simple laurel wreath made from small green leaf strokes. It feels satisfying because it’s minimal, quick, and still looks elegant. If you like calm designs that don’t feel crowded, this one is an easy win.
Materials Needed:
- Canvas tote bag
- Acrylic paint (fabric acrylic or fabric medium)
- Paintbrushes in multiple sizes
- Palette or paint tray
- Pencil for sketching
- Optional fabric sealer or heat-set iron
Steps to Make:
- Slide cardboard inside and sketch a light oval wreath shape.
- Paint the laurel leaves using small angled strokes along both sides of the oval.
- Add “Be Still” in the center with a smaller brush and steady, slow strokes.
- Touch up any uneven edges and add a few darker leaf accents for depth.
- Dry, then heat-set or seal so the thin lettering doesn’t crack later.
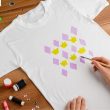
6. Ichthys Fish Symbol Pattern Tote Bag
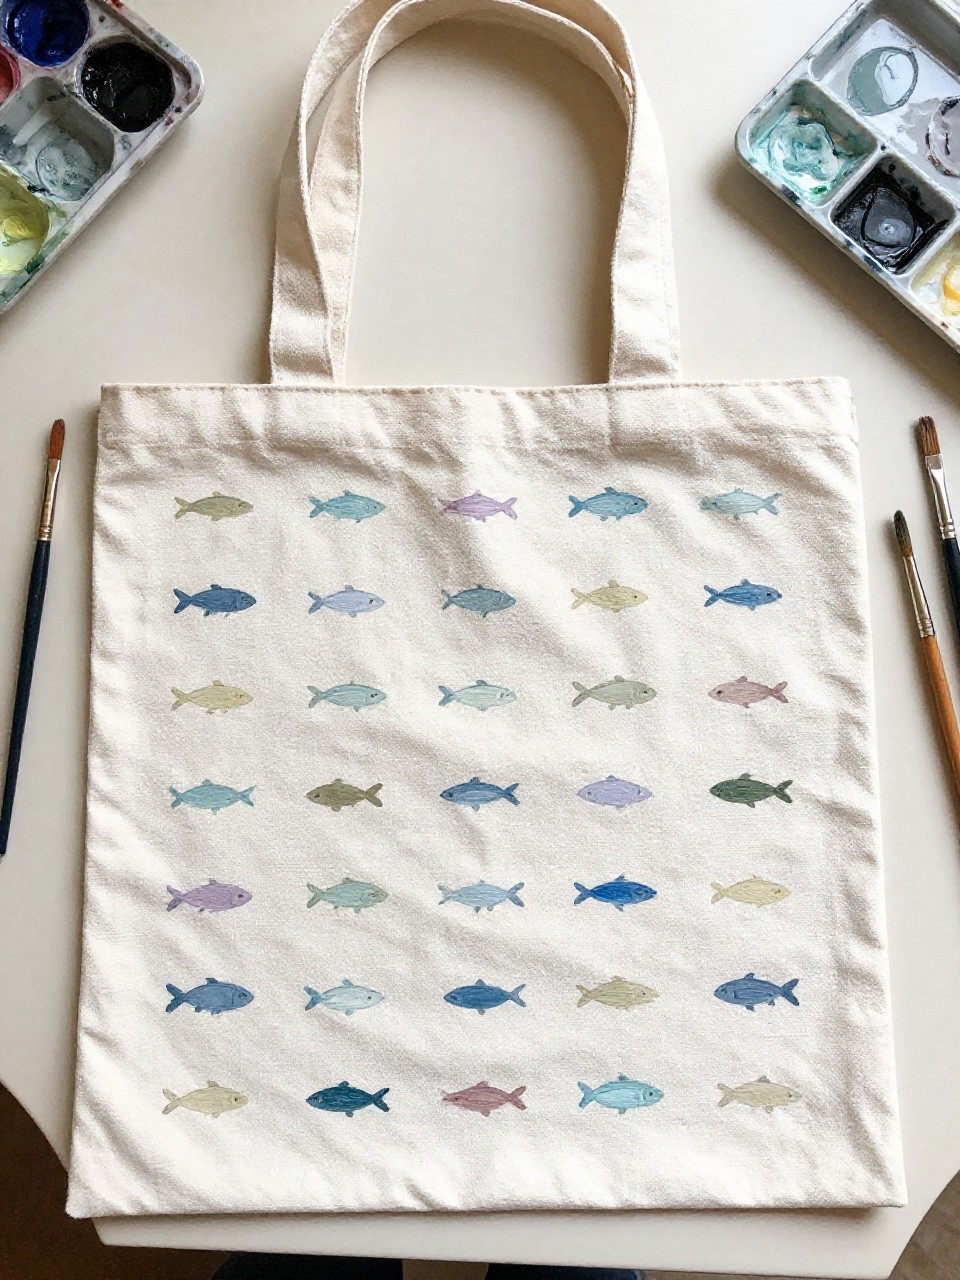
This tote features a repeating pattern of small Ichthys (Christian fish) symbols in two or three colors, spaced like a simple wallpaper design. It’s relaxing because you paint one easy shape over and over, and small imperfections make it look more handmade. Great for beginners who want a neat design without complex drawing.
Materials Needed:
- Canvas tote bag
- Acrylic paint (fabric acrylic or fabric medium)
- Paintbrushes in multiple sizes
- Palette or paint tray
- Cardboard insert
- Optional fabric sealer or heat-set iron
Steps to Make:
- Insert cardboard and lightly mark a grid of dots to guide spacing.
- Paint the first Ichthys symbol near the top using two curved strokes.
- Repeat the symbol across the tote, alternating colors for a simple rhythm.
- Add tiny dot accents or short lines between a few symbols for variety.
- Let it dry completely, then heat-set or seal to keep the pattern lasting.
7. “Love Never Fails” Heart Vine Tote Bag
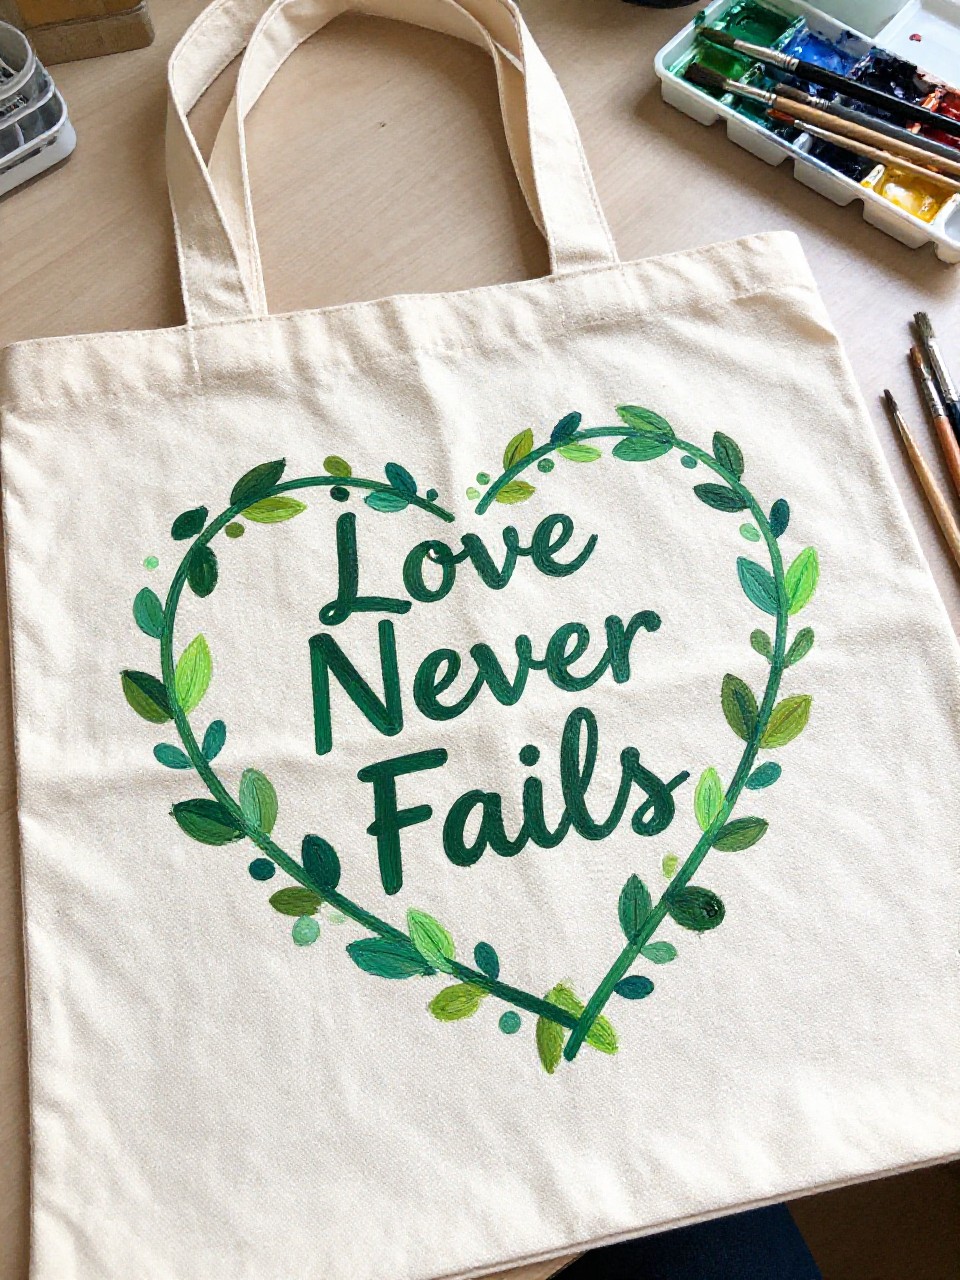
The bag shows “Love Never Fails” with a hand-painted heart made from winding vines and tiny leaves. This is a sweet project because you can paint the vine slowly, like doodling with a brush, and it still looks pretty even if lines wobble. It’s lovely for gifts, weddings, or everyday encouragement.
Materials Needed:
- Canvas tote bag
- Acrylic paint (fabric acrylic or fabric medium)
- Paintbrushes in multiple sizes
- Palette or paint tray
- Pencil for sketching
- Optional fabric sealer or heat-set iron
Steps to Make:
- Place cardboard inside and sketch a heart outline lightly with pencil.
- Paint a vine line following the heart shape, letting it curve naturally.
- Add small leaves along the vine with quick teardrop brush strokes.
- Paint “Love Never Fails” beneath or inside the heart with simple block letters.
- Dry well, then heat-set or seal so the thin vine lines stay sharp.
8. Sunrise Cross Silhouette Tote Bag
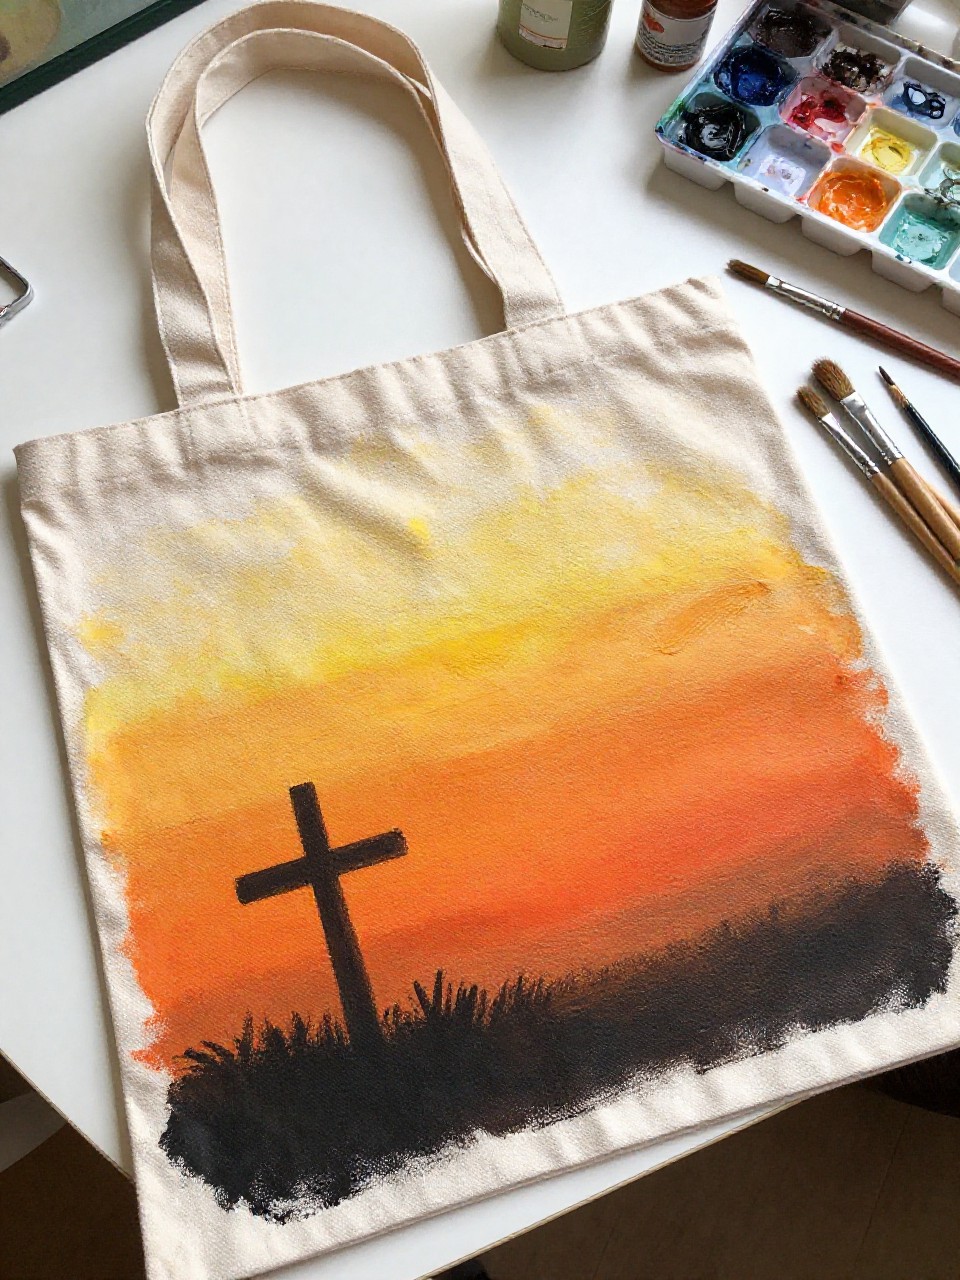
A warm sunrise fades from soft orange to pale yellow behind a simple dark cross silhouette at the bottom. This one feels rewarding because blending the sky colors looks impressive, even if you’re new to painting. It’s a peaceful design that pairs well with casual outfits and makes a meaningful statement without words.
Materials Needed:
- Canvas tote bag
- Acrylic paint (fabric acrylic or fabric medium)
- Paintbrushes in multiple sizes
- Palette or paint tray
- Cardboard insert
- Optional fabric sealer or heat-set iron
Steps to Make:
- Insert cardboard and lightly mark a horizontal sunrise area across the tote.
- Blend yellow, peach, and orange in wide strokes while the paint is still wet.
- Let the background dry, then paint a simple cross silhouette in dark brown or black.
- Add a few thin sun rays or light streaks with a nearly dry brush.
- Dry fully and heat-set or seal to keep the blended colors bright.
9. Armor of God Shield Icon Tote Bag
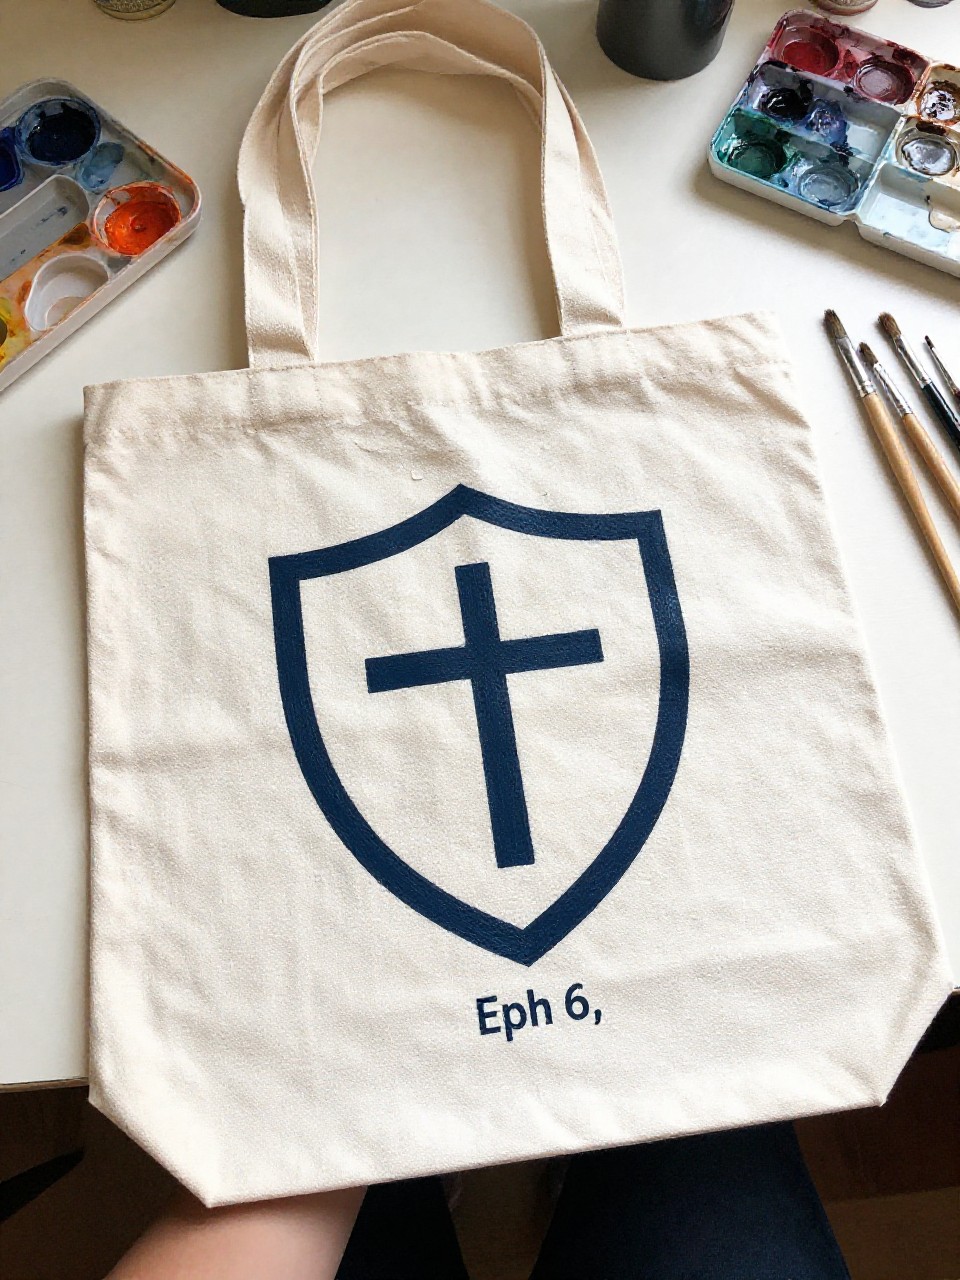
This tote has a simple shield icon with small painted symbols inside—like a cross, a tiny flame, and a short “Eph 6” note. It’s fun because you build it like a set of easy shapes, and you can keep it bold with just a few colors. Great for kids, teens, or anyone who likes strong, graphic designs.
Materials Needed:
- Canvas tote bag
- Acrylic paint (fabric acrylic or fabric medium)
- Paintbrushes in multiple sizes
- Palette or paint tray
- Pencil for sketching
- Optional fabric sealer or heat-set iron
Steps to Make:
- Slide in cardboard and sketch a shield shape centered on the tote.
- Paint the shield base color in smooth, even strokes and let it dry.
- Add simple icon shapes inside the shield (cross, flame, small banner).
- Outline key edges with a thin brush for a bold, hand-painted look.
- Dry, then heat-set or seal so the thicker paint layers stay flexible.
10. “Amazing Grace” Floral Border Tote Bag
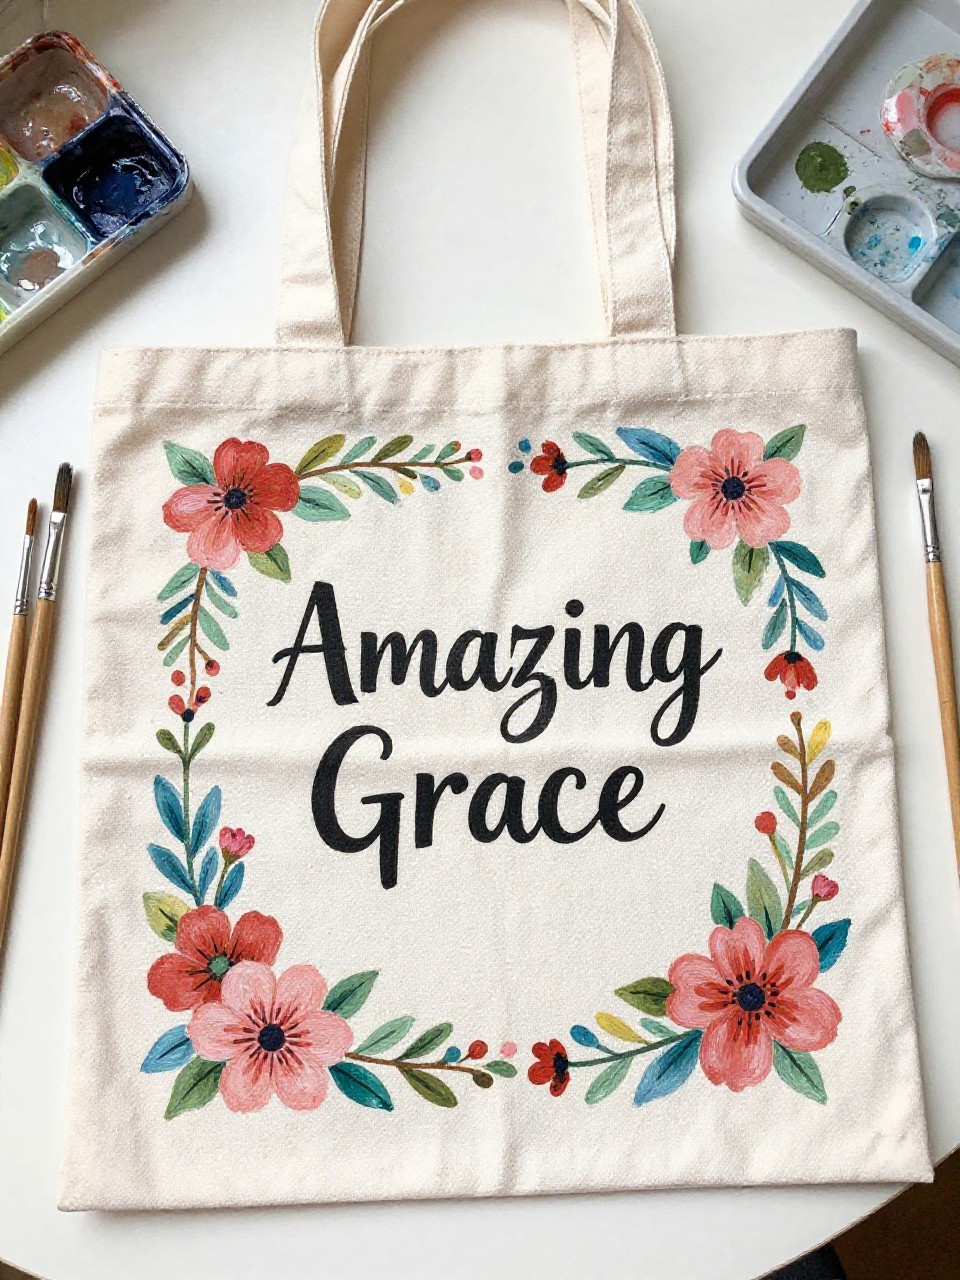
The tote shows “Amazing Grace” in the center with a loose floral border around the edges, like a painted frame. It’s relaxing because you can paint flowers in simple blobs and petals, then add details only where you want. This looks beautiful on a plain neutral tote and works well as a thoughtful gift.
Materials Needed:
- Canvas tote bag
- Acrylic paint (fabric acrylic or fabric medium)
- Paintbrushes in multiple sizes
- Palette or paint tray
- Cardboard insert
- Optional fabric sealer or heat-set iron
Steps to Make:
- Insert cardboard and lightly mark a border line about an inch from the edges.
- Paint loose flowers and leaves around the border, leaving gaps for breathing room.
- Add darker centers, leaf veins, or extra petals once the first layer dries.
- Paint “Amazing Grace” in the middle using steady, simple lettering.
- Dry completely and heat-set or seal to protect the border from scuffs.
11. Bible Verse Bookmark Stripes Tote Bag
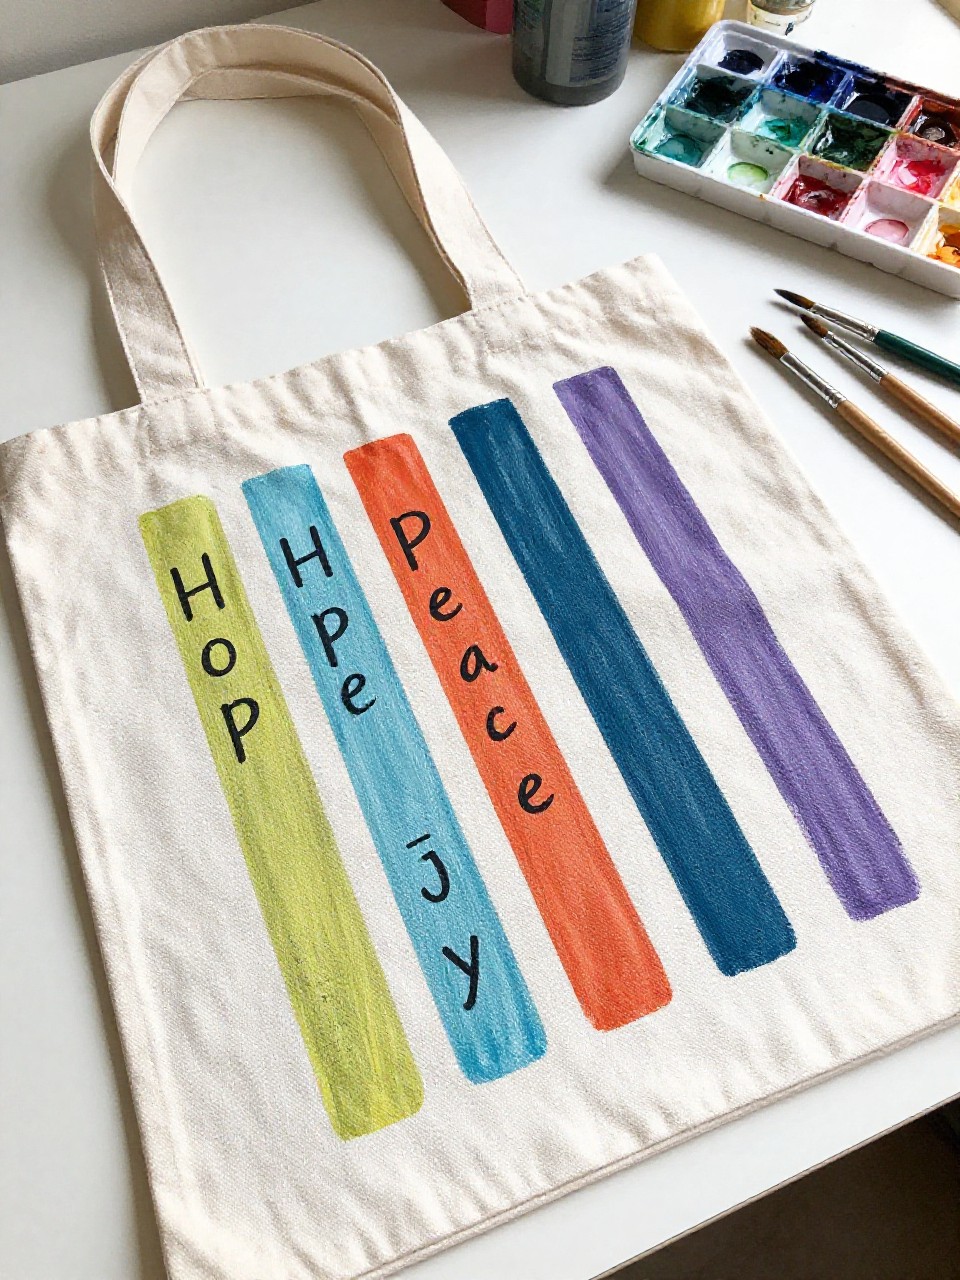
This tote looks like a stack of painted “bookmark” stripes down one side, each stripe holding a short word like “Hope,” “Peace,” and “Joy,” plus a small verse reference at the bottom. It’s satisfying because it’s mostly straight lines and easy blocks of color. Beginners can keep it neat with painter’s tape and simple lettering.
Materials Needed:
- Canvas tote bag
- Acrylic paint (fabric acrylic or fabric medium)
- Paintbrushes in multiple sizes
- Palette or paint tray
- Painter’s tape
- Optional fabric sealer or heat-set iron
Steps to Make:
- Insert cardboard and tape off 4–6 vertical stripes on one side of the tote.
- Paint each stripe a different soft color, then peel tape while paint is slightly damp.
- Let dry, then add words on each stripe with a thin brush.
- Paint a small verse reference near the bottom (like “Rom 15:13”).
- Dry fully and heat-set or seal to help the lettering last.
12. Mustard Seed Mini Illustration Tote Bag
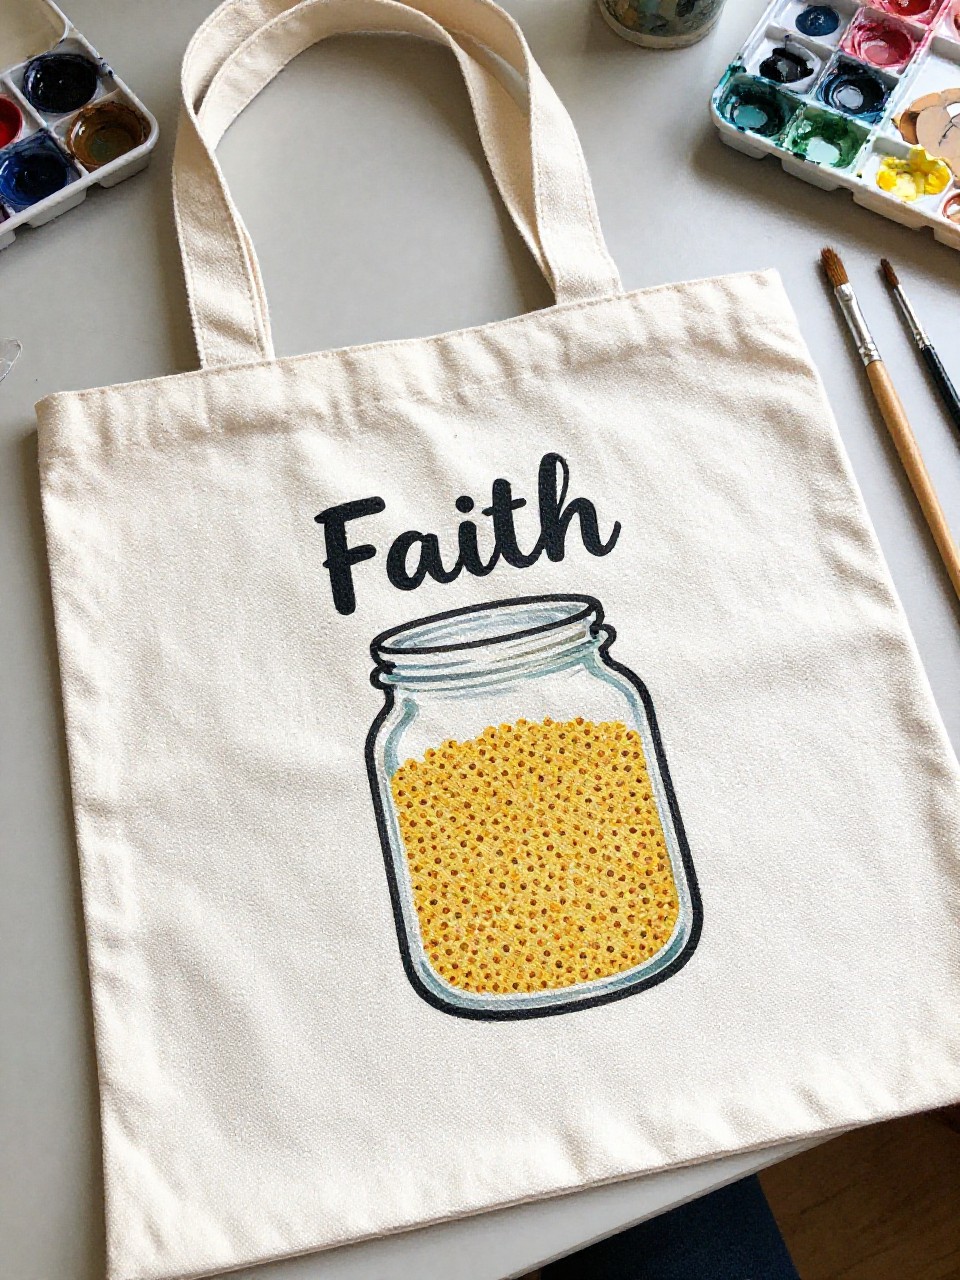
A tiny mustard seed jar illustration sits near the bottom corner, with “Faith” painted above it in small, neat letters. This design looks clean and modern, and it’s great if you feel nervous about filling the whole tote with paint. It’s satisfying because small paintings are less pressure, but still meaningful.
Materials Needed:
Canvas tote bag
Acrylic paint (fabric acrylic or fabric medium)
Paintbrushes in multiple sizes
Palette or paint tray
Pencil for sketching
Optional fabric sealer or heat-set iron
Steps to Make:
- Place cardboard inside and sketch a small jar shape in a lower corner.
- Paint the jar with light gray-blue and add a simple lid line on top.
- Dot tiny mustard seeds inside using brown and gold specks of paint.
- Add the word “Faith” above the jar with a thin brush and slow strokes.
- Let dry, then heat-set or seal so the tiny dots don’t rub off.
13. “Let Your Light Shine” Lantern Tote Bag
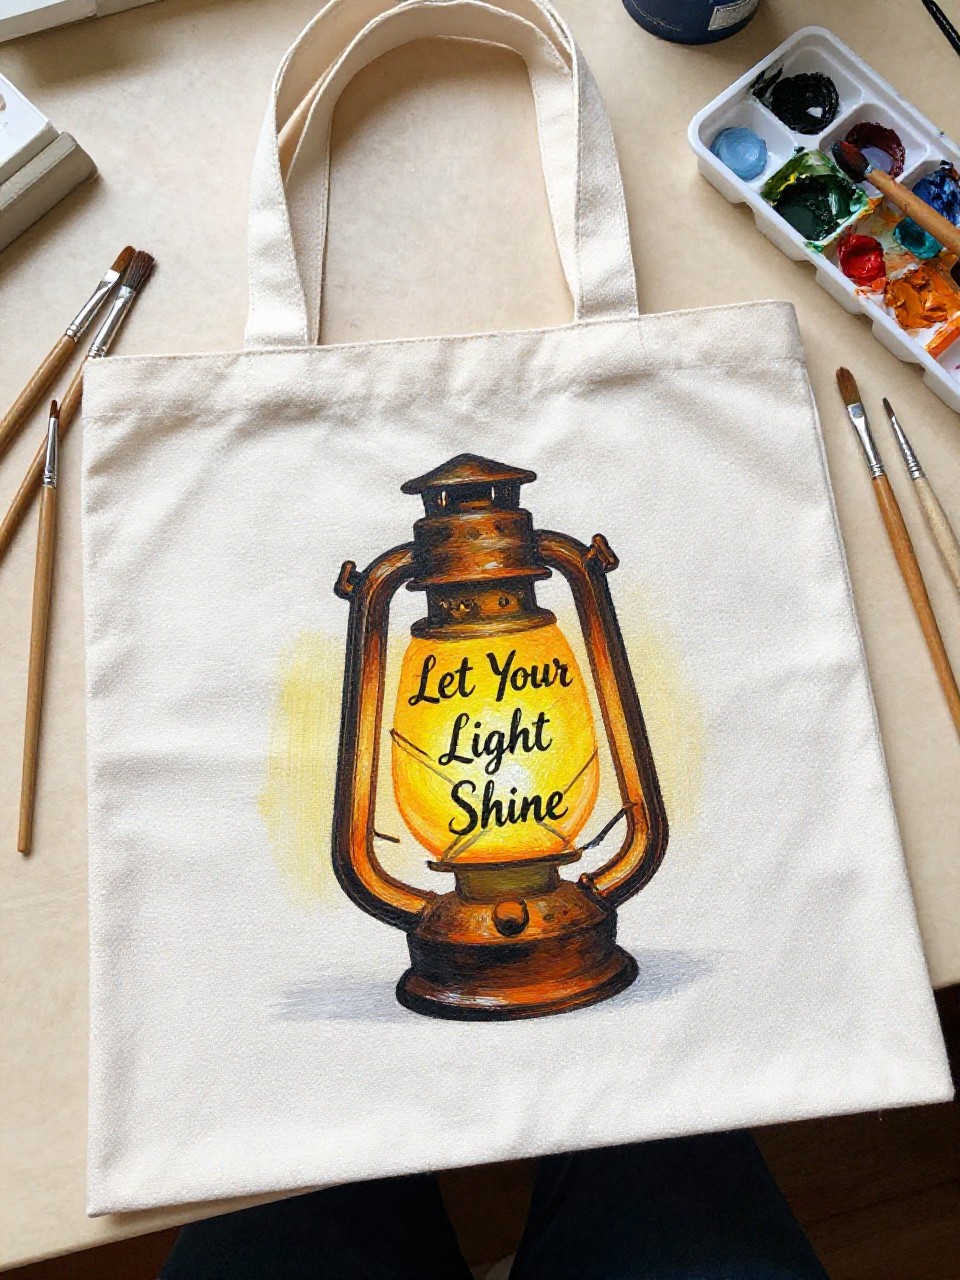
The tote features a glowing lantern with warm yellow light and the words “Let Your Light Shine” curved gently above. This is a cozy painting because you get to layer warm colors and make the lantern look bright with simple highlights. Beginners can keep the lantern shape basic and still get a strong effect.
Materials Needed:
- Canvas tote bag
- Acrylic paint (fabric acrylic or fabric medium)
- Paintbrushes in multiple sizes
- Palette or paint tray
- Cardboard insert
- Optional fabric sealer or heat-set iron
Steps to Make:
- Insert cardboard and sketch a simple lantern outline in the center.
- Paint the lantern frame in dark brown or black, leaving the inside unpainted.
- Fill the lantern glow with layered yellow and orange, blending outward softly.
- Add small highlight strokes on the frame and paint the phrase above.
- Dry completely, then heat-set or seal to keep the glow colors bright.
14. Trinity Triangle Minimal Symbol Tote Bag
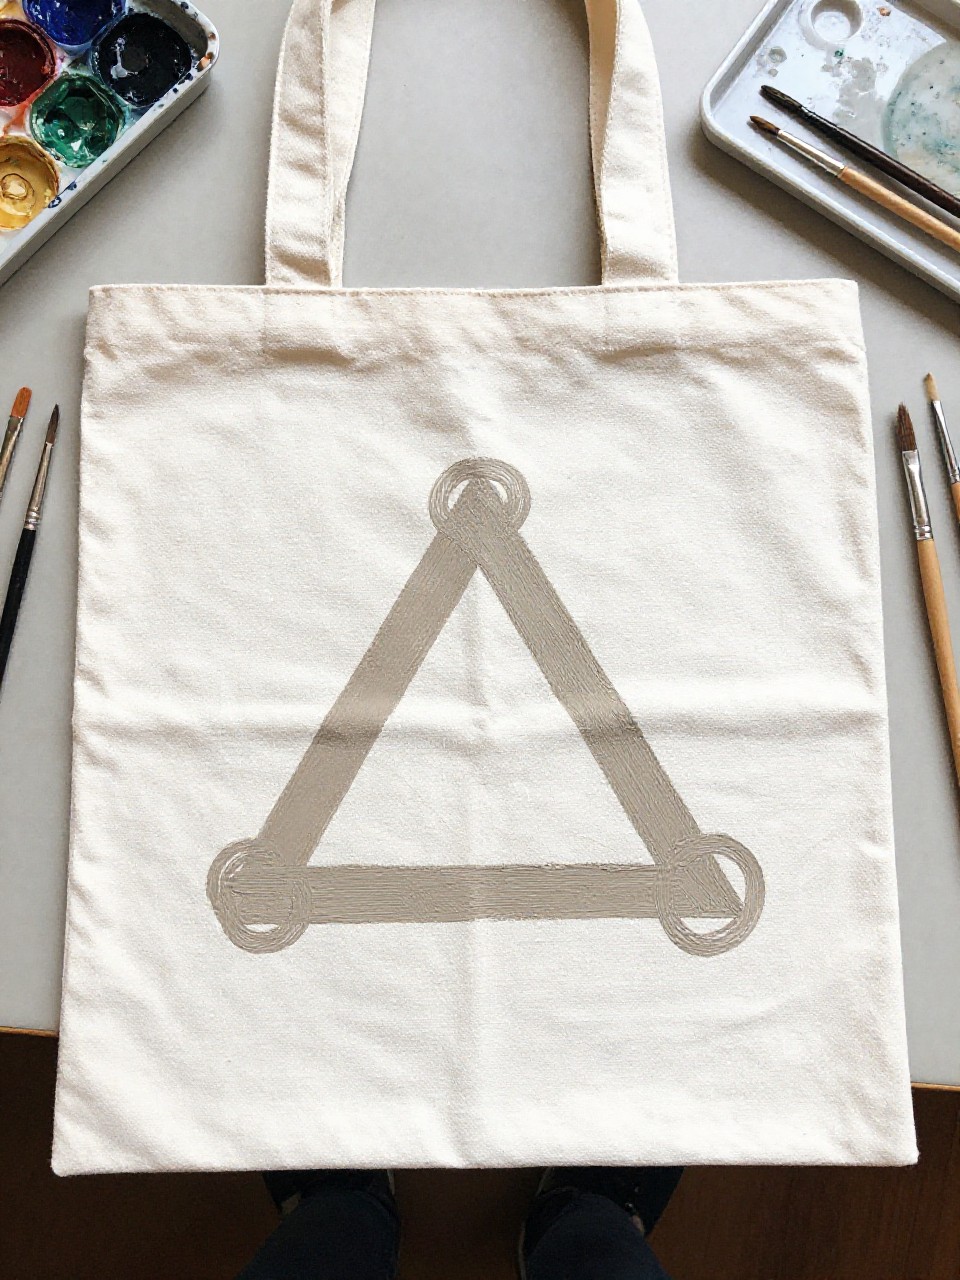
A clean triangle symbol sits in the center, with three small brush-stroke loops that suggest the Trinity, painted in calm neutral tones. This project is soothing because it’s simple, balanced, and doesn’t require lots of detail. If you like modern designs that still have meaning, this is an easy tote to finish in one sitting.
Materials Needed:
- Canvas tote bag
- Acrylic paint (fabric acrylic or fabric medium)
- Paintbrushes in multiple sizes
- Palette or paint tray
- Ruler (optional for straight lines)
- Optional fabric sealer or heat-set iron
Steps to Make:
- Insert cardboard and lightly mark the triangle points with small pencil dots.
- Paint the triangle outline with a medium brush, keeping lines steady and slow.
- Add three looped brush-stroke shapes inside or near each corner.
- Layer a second coat in a few spots so the paint texture looks hand-built.
- Dry fully, then heat-set or seal to protect the clean lines from wear.
15. “Prayer Changes Things” Hands and Stars Tote Bag

The tote shows a pair of simple praying hands with small gold stars sprinkled around, plus the phrase “Prayer Changes Things” underneath. It’s a comforting project because the hands can be painted as a basic outline with soft shading, and the stars are quick little touches. Great for a gentle reminder you can carry anywhere.
Materials Needed:
- Canvas tote bag
- Acrylic paint (fabric acrylic or fabric medium)
- Paintbrushes in multiple sizes
- Palette or paint tray
- Cardboard insert
- Optional fabric sealer or heat-set iron
Steps to Make:
- Place cardboard inside and sketch a simple praying hands outline in the center.
- Paint the hands with a base skin-tone or neutral color, then let it dry.
- Add soft shadow lines between fingers with a thin brush and slightly darker paint.
- Dot small stars around the hands using gold paint and quick, imperfect strokes.
- Paint the phrase below, dry fully, then heat-set or seal for long-lasting wear.


