


Table of Contents Show
Want to paint something calming, but you’re not sure what to make beyond a simple sunset? Celestial skies are perfect for beginners because loose blends, soft dots, and gentle glow effects still look beautiful even if they’re not “perfect.”

This list gives you 17 dreamy sky painting ideas you can finish in an afternoon and proudly hang on your wall.
Grab a canvas and let’s paint some stars.
1. Moonlit Cloud Drift Canvas

This painting shows a glowing full moon floating above soft, blended clouds in a deep blue sky, with tiny stars scattered around. It’s satisfying because you can relax into gentle brush blending, and beginners get a big “wow” result without needing detailed drawing skills.
Materials Needed:
- Stretched canvas
- Acrylic paint (navy, white, gray, pale yellow)
- Paintbrushes in multiple sizes
- Palette or paint tray
- Optional sealer or varnish
Steps to Make:
- Prime the canvas with a quick white layer if needed and let it dry.
- Paint a dark-to-midnight blue background, blending while it’s still wet.
- Lightly sketch a circle for the moon and fill it with pale yellow and white.
- Add clouds using soft, curved strokes of gray and white, keeping edges fluffy.
- Dot in stars, let everything dry fully, then seal and hang.
2. Crescent Moon and Pine Silhouette Canvas

The finished canvas has a slim crescent moon over a gradient night sky, with dark pine trees reaching up from the bottom edge. It’s great for beginners because silhouettes are forgiving, and the contrast makes the scene look crisp and dramatic with simple shapes.
Materials Needed:
- Stretched canvas
- Acrylic paint (black, deep blue, teal, white)
- Paintbrushes in multiple sizes
- Palette or paint tray
- Optional sealer or varnish
Steps to Make:
- Paint a smooth gradient background from deep blue to teal and let it dry.
- Use a small brush to paint a crescent moon with slightly uneven edges for realism.
- Block in the tree line using black paint along the bottom third of the canvas.
- Pull upward strokes to form pine branches, varying heights for a natural look.
- Add a few stars and a soft moon glow, then seal when dry.
3. Milky Way Band Canvas
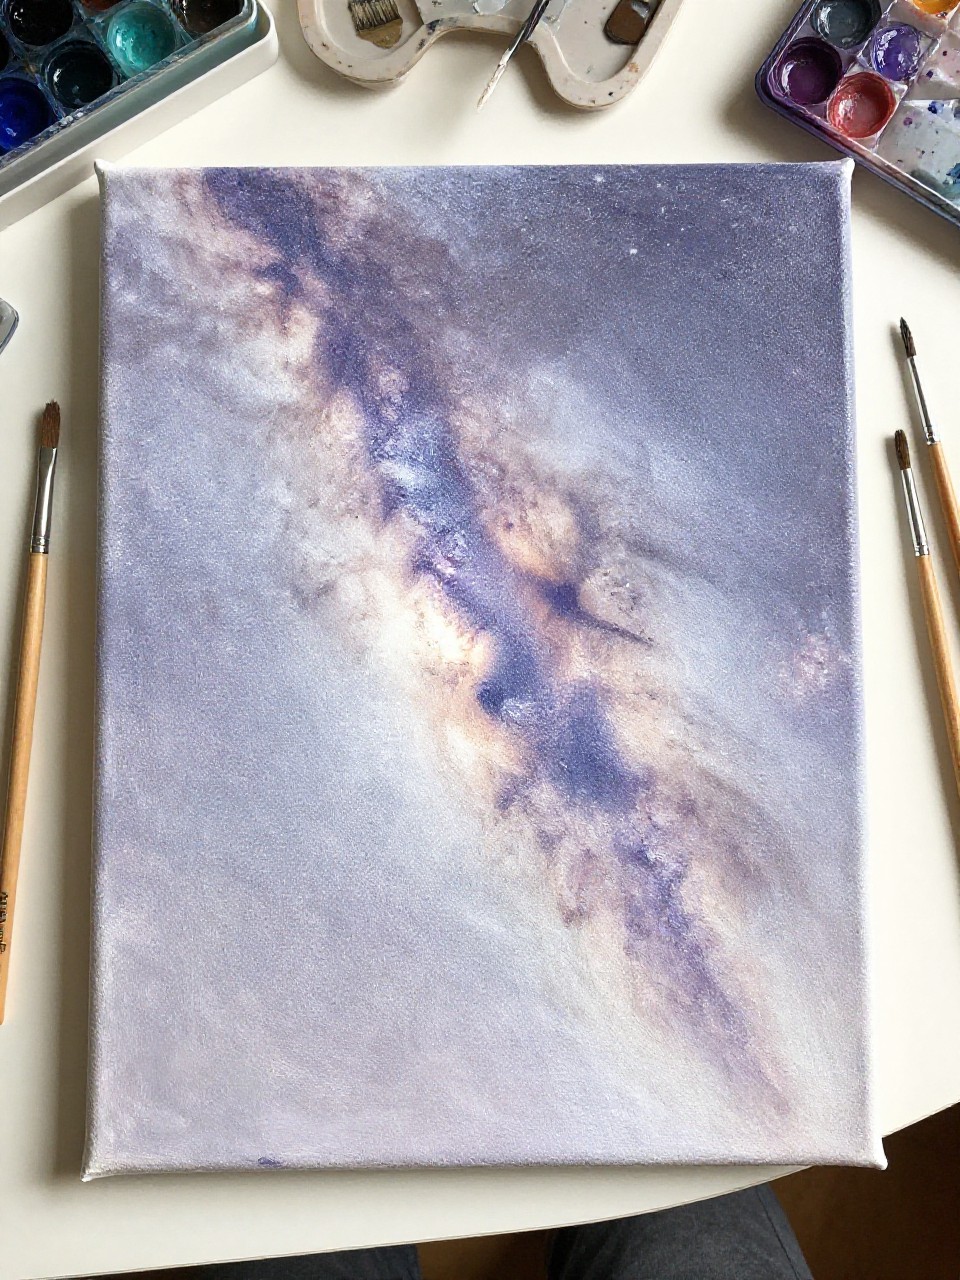
This canvas shows a bright, misty Milky Way streak crossing a dark sky, with star clusters sprinkled thickly in the center. It feels dreamy and meditative to make because you’re layering soft whites and dots, and beginners can build it slowly until it looks right.
Materials Needed:
- Stretched canvas
- Acrylic paint (black, indigo, violet, white)
- Paintbrushes in multiple sizes
- Palette or paint tray
- Optional sealer or varnish
Steps to Make:
- Paint the whole canvas a very dark base and let it dry.
- Brush a diagonal, cloudy band using thinned white, keeping edges soft and smoky.
- Tap in violet and indigo around the band to add depth without hard lines.
- Flick or dot white paint for stars, adding denser clusters along the Milky Way.
- Let it dry flat, then varnish for a richer night-sky look.
4. Pastel Nebula Swirl Canvas
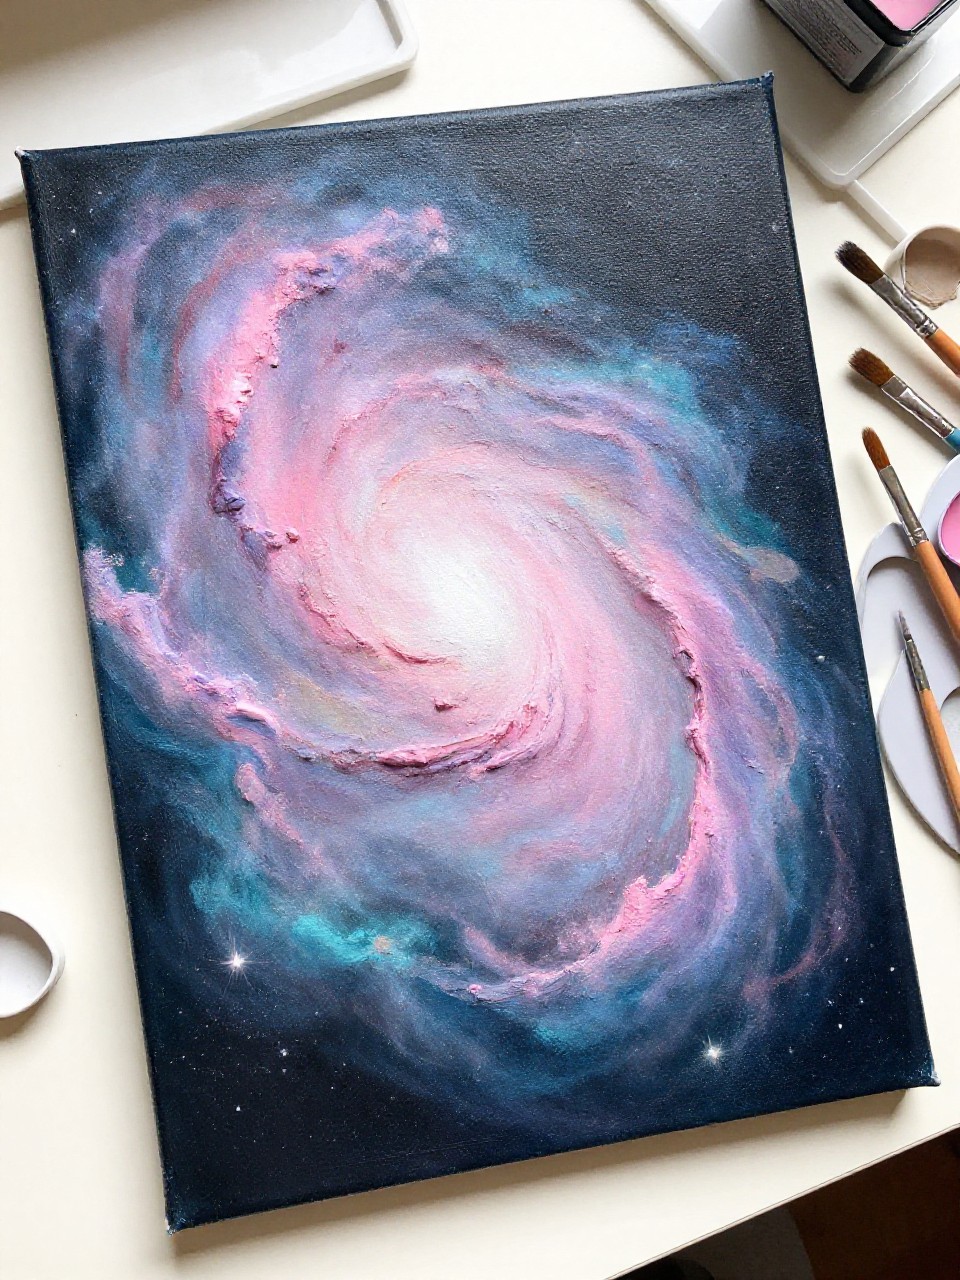
The finished piece looks like a soft nebula cloud, blending pastel pink, lavender, and turquoise into a glowing space fog with tiny stars. It’s relaxing because you can focus on smooth blending and gentle swirls, and there’s no “wrong” shape—just dreamy color.
Materials Needed:
- Stretched canvas
- Acrylic paint (pink, lavender, turquoise, white, navy)
- Paintbrushes in multiple sizes
- Palette or paint tray
- Optional sealer or varnish
Steps to Make:
- Lay down a dark navy background, leaving a few lighter areas for glow.
- Add pastel colors in loose cloud shapes and blend edges while still damp.
- Swirl in extra white where you want the nebula to look brighter.
- Dot tiny stars, then add a few larger stars with small cross-shaped highlights.
- Dry completely and seal to protect the soft blended layers.
5. Galaxy Gradient Ombré Canvas
This canvas has a smooth ombré sky shifting from black to purple to blue, sprinkled with stars and a few faint glow spots. It’s perfect if you want something easy and calming because the main skill is blending, and the star layer hides small streaks.
Materials Needed:
- Stretched canvas
- Acrylic paint (black, purple, blue, white)
- Paintbrushes in multiple sizes
- Palette or paint tray
- Optional sealer or varnish
Steps to Make:
- Wet your brush slightly and blend black, purple, and blue in wide horizontal bands.
- Soften the transitions by brushing back and forth where colors meet.
- Add a few faint white patches to suggest distant glow.
- Splatter and dot white paint for stars, keeping some areas more open than others.
- Let it dry flat, then varnish for an even finish.
6. Shooting Star Trail Canvas

The finished canvas shows a quiet night sky with one bright shooting star and a long, glowing trail fading into the darkness. It’s satisfying because it’s fast and simple, and beginners can practice making one confident curved stroke without worrying about lots of details.
Materials Needed:
- Stretched canvas
- Acrylic paint (dark blue, black, white, pale yellow)
- Paintbrushes in multiple sizes
- Palette or paint tray
- Optional sealer or varnish
Steps to Make:
- Paint a dark night background with subtle blue-black variation and let it dry.
- Lightly plan the arc of the shooting star with a faint pencil line.
- Paint the star head as a bright dot, then pull a curved trail using thinned white.
- Blend a little pale yellow into the brightest part for a warm glow.
- Add small stars around it, then dry and seal.
7. Moon Phases Row Canvas

This canvas features a neat row of moon phases—new moon to full moon—painted in soft creams and grays on a starry midnight background. It’s great for beginners who like tidy designs, and it makes clean, modern wall decor for bedrooms or a calm reading corner.
Materials Needed:
- Stretched canvas
- Acrylic paint (black, indigo, white, gray, cream)
- Paintbrushes in multiple sizes
- Palette or paint tray
- Optional sealer or varnish
Steps to Make:
- Paint the background indigo-black and let it dry completely.
- Mark a straight guideline and lightly sketch evenly spaced circles across the canvas.
- Paint each moon circle in creamy white, then shade edges with gray for depth.
- Create phases by painting shadow shapes, keeping the curves consistent.
- Add tiny stars around the moons, then seal once dry.
8. Constellation Map Canvas
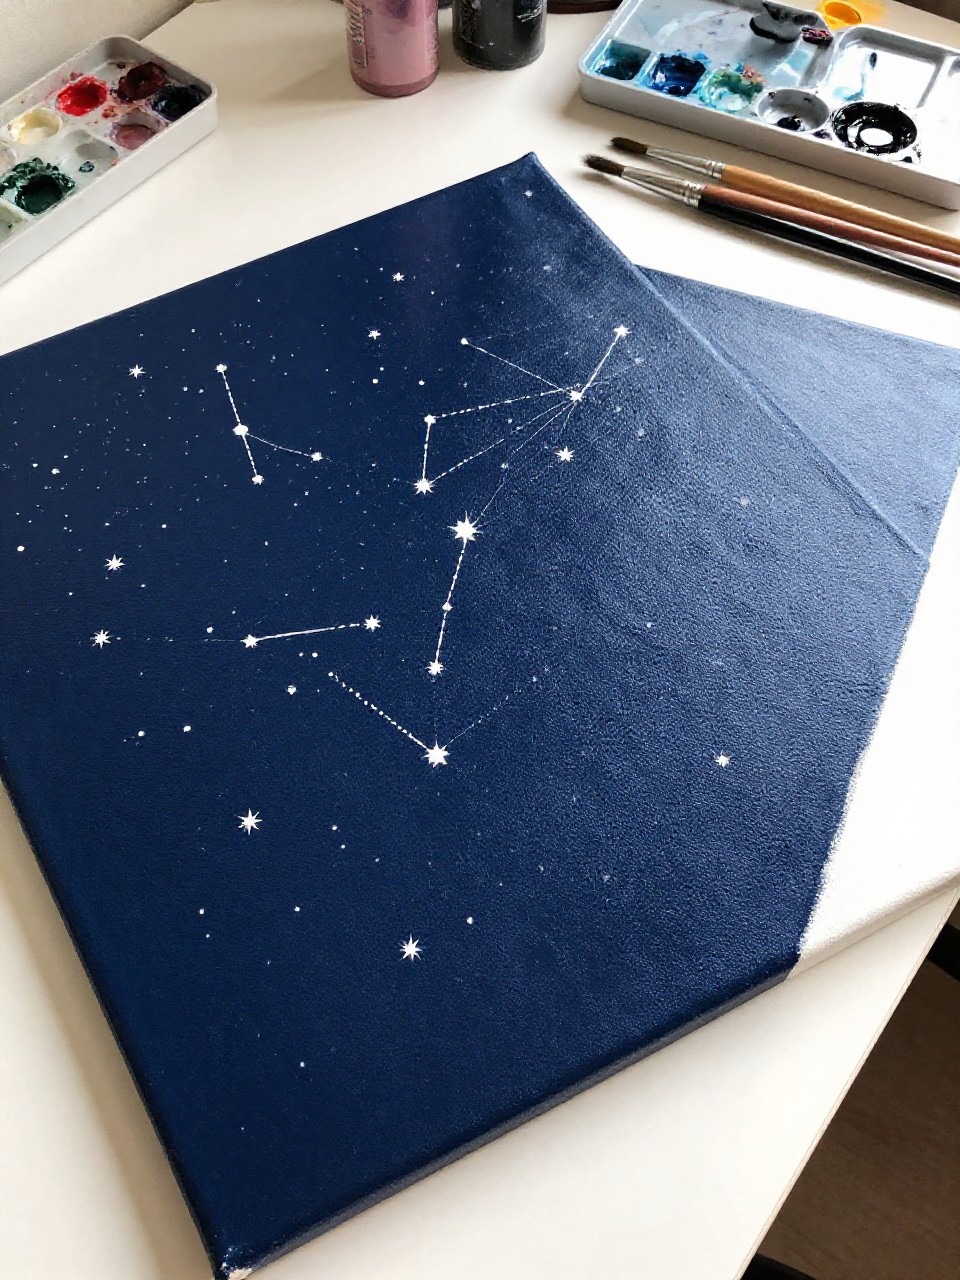
The finished canvas looks like a simple star map, with a few constellations connected by thin painted lines over a deep night sky. It’s relaxing because you can go slow and place each star dot by dot, and it’s a sweet gift idea for a birthday or nursery.
Materials Needed:
- Stretched canvas
- Acrylic paint (navy, black, white, silver or pale yellow)
- Paintbrushes in multiple sizes
- Palette or paint tray
- Optional sealer or varnish
Steps to Make:
- Paint a dark, slightly mottled sky background and let it dry.
- Choose 2–4 constellations and lightly mark star placements with pencil.
- Dot stars in different sizes, making a few brighter than the rest.
- Connect constellation stars with thin, slightly uneven lines for a hand-drawn feel.
- Add a faint glow around key stars, then seal the canvas.
9. Aurora Borealis Sky Canvas

This canvas shows ribbon-like green and teal aurora lights waving across a dark polar sky with a sprinkle of stars. It’s fun for beginners because the aurora is made with loose, vertical-to-curved strokes, and blending makes it look magical even if the lines wobble.
Materials Needed:
- Stretched canvas
- Acrylic paint (black, deep blue, teal, green, white)
- Paintbrushes in multiple sizes
- Palette or paint tray
- Optional sealer or varnish
Steps to Make:
- Paint a dark blue-black sky and let it dry to avoid muddy aurora colors.
- Brush thin vertical streaks of teal and green where you want the lights.
- Soften and pull the streaks sideways into gentle waves with a clean damp brush.
- Add white highlights in the brightest areas and dot small stars around.
- Dry fully, then varnish to deepen the dark sky.
10. Watercolor-Style Star Wash Canvas

The finished piece looks like a watercolor night sky, with soft blooms of blue and purple and gentle white star dots on top. It’s calming because you let the paint move and blend, and beginners love it since it’s more about mood than perfect edges.
Materials Needed:
- Stretched canvas
- Fluid acrylic paint (blue, purple, white)
- Paintbrushes in multiple sizes
- Palette or paint tray
- Optional sealer or varnish
Steps to Make:
- Lightly dampen the canvas surface so the paint glides and spreads.
- Brush on watery blue and purple patches, letting them bleed into each other.
- Tilt the canvas a little to create natural-looking drips and soft gradients.
- Once dry, dot stars and add a few brighter ones with tiny halos.
- Let it cure fully, then seal with a clear varnish.
11. Planet Trio with Rings Canvas

This canvas shows three painted planets floating in space, including one with soft rings wrapping around it, all set against a starry background. It’s a beginner-friendly way to practice circles and shading, and the planets look cute and bold even with simple blending.
Materials Needed:
- Stretched canvas
- Acrylic paint (black, white, peach, teal, mustard, gray)
- Paintbrushes in multiple sizes
- Palette or paint tray
- Optional sealer or varnish
Steps to Make:
- Paint a dark space background and add a few faint cloudy patches for depth.
- Sketch three planet circles in different sizes and place them across the canvas.
- Fill each planet with a base color, then shade one side with gray or darker tones.
- Paint a ring around one planet, curving the band to look like it wraps behind.
- Add stars and small speckles, then dry and seal.
12. Half-Moon Horizon Canvas

The finished canvas shows a large half-moon rising above a simple horizon line, with a gradient sky and a few bright stars. It’s great for beginners who like clean layouts, and it feels peaceful—like a quiet moment before bedtime.
Materials Needed:
- Stretched canvas
- Acrylic paint (black, deep blue, white, pale yellow, gray)
- Paintbrushes in multiple sizes
- Palette or paint tray
- Optional sealer or varnish
Steps to Make:
- Paint a smooth dark-to-lighter blue gradient from top to near the horizon.
- Mark a straight horizon line and paint the land as a simple dark shape.
- Paint a large half circle for the moon peeking up from the horizon.
- Add light gray shading and a soft glow along the moon edge.
- Dot stars, let dry, then varnish.
13. Starry Sky with Mountain Peaks Canvas
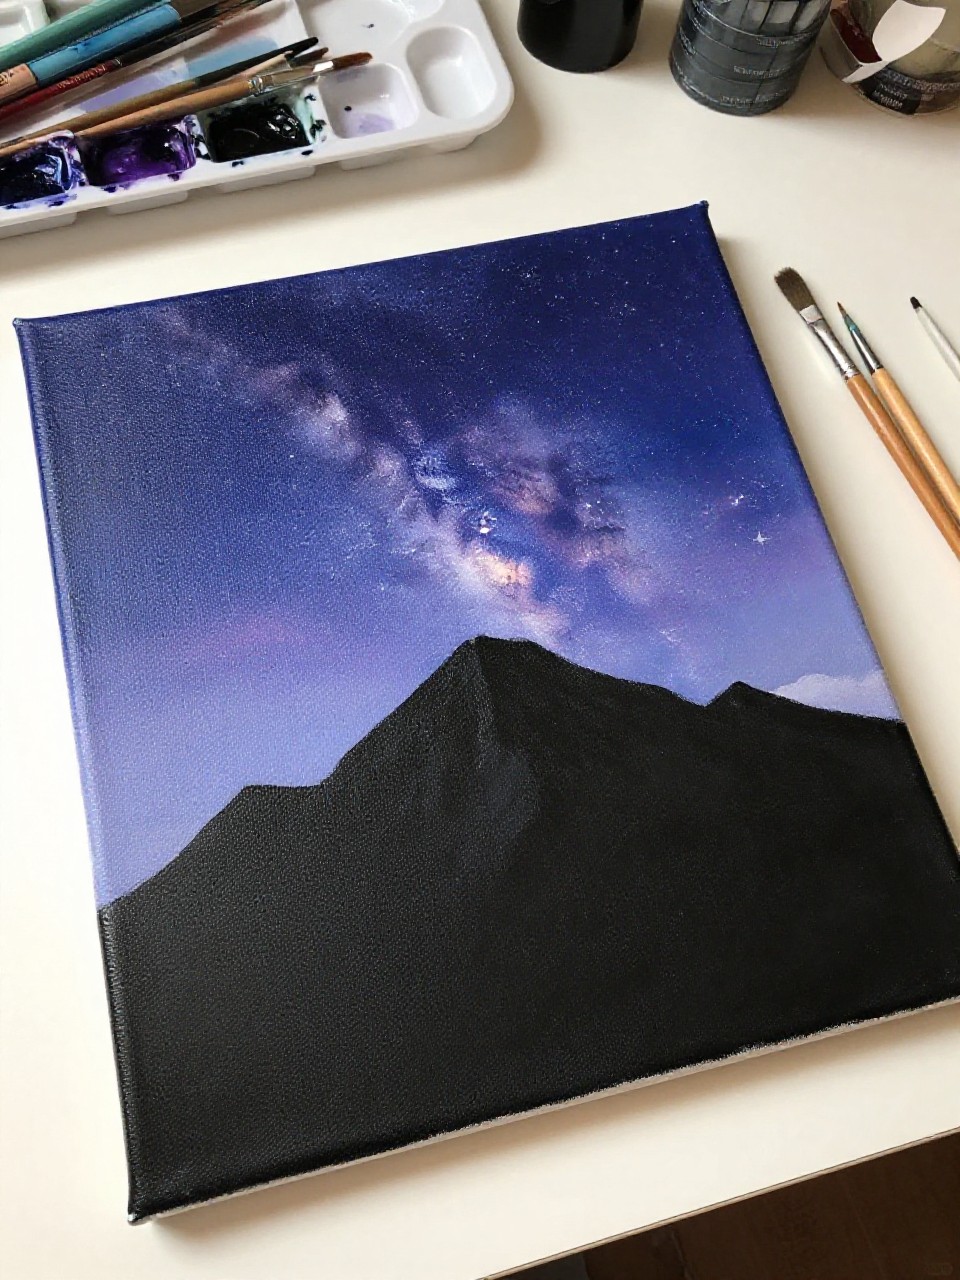
This canvas shows sharp mountain peaks in silhouette under a bright, star-filled sky with a soft Milky Way haze. It’s satisfying because you get both soothing sky blending and bold, simple mountain shapes, making it a strong beginner project for living room wall art.
Materials Needed:
- Stretched canvas
- Acrylic paint (black, indigo, white, gray)
- Paintbrushes in multiple sizes
- Palette or paint tray
- Optional sealer or varnish
Steps to Make:
- Paint the sky first with indigo tones, leaving lighter space where you want haze.
- Brush in a faint cloudy Milky Way area using thinned white.
- Sketch mountain outlines along the bottom and fill them in with black.
- Add a few gray edge highlights on one side of peaks for shape.
- Finish with stars and seal after drying.
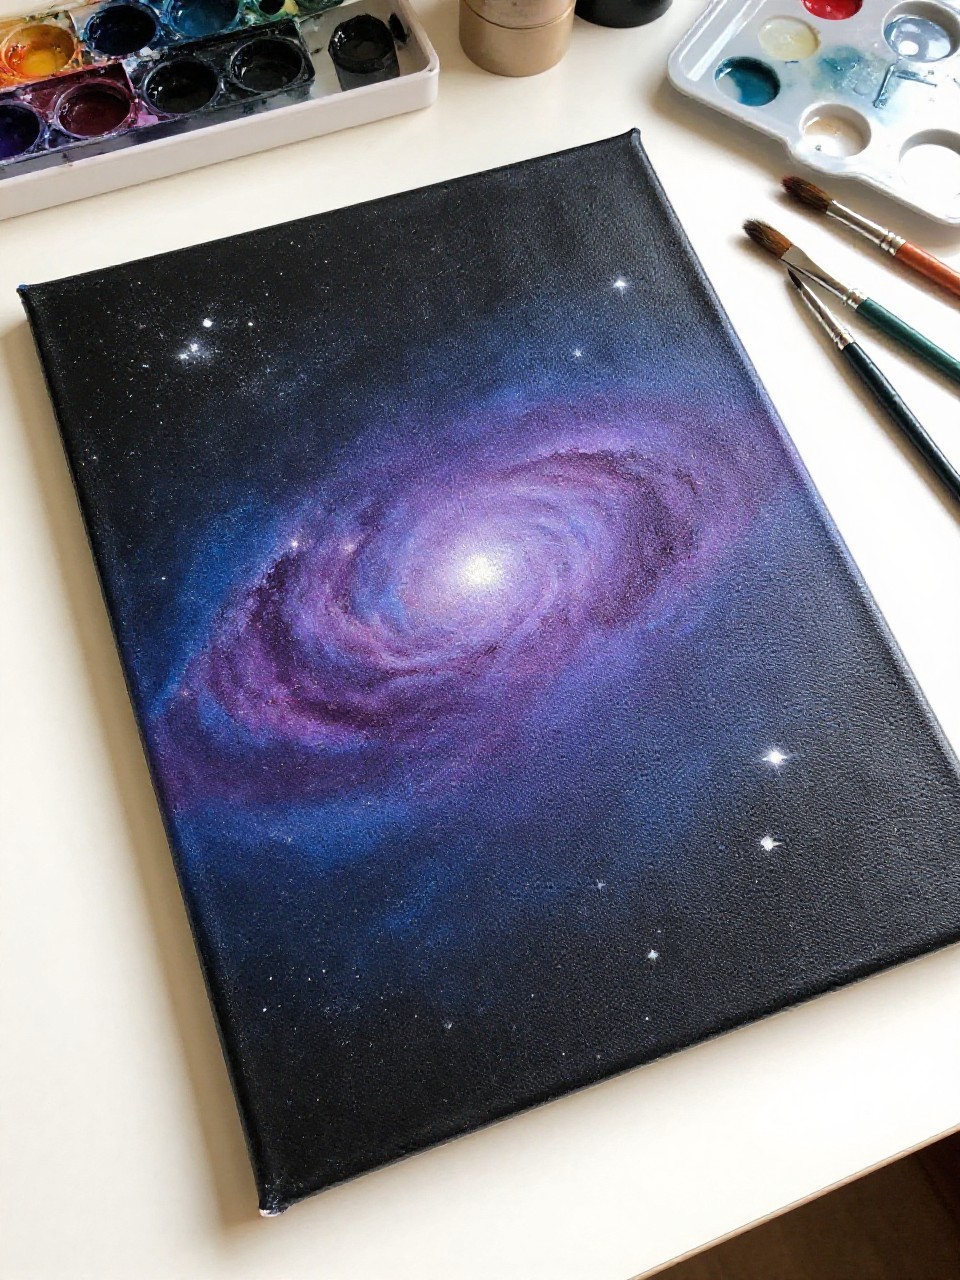
14. Star Spiral Vortex Canvas
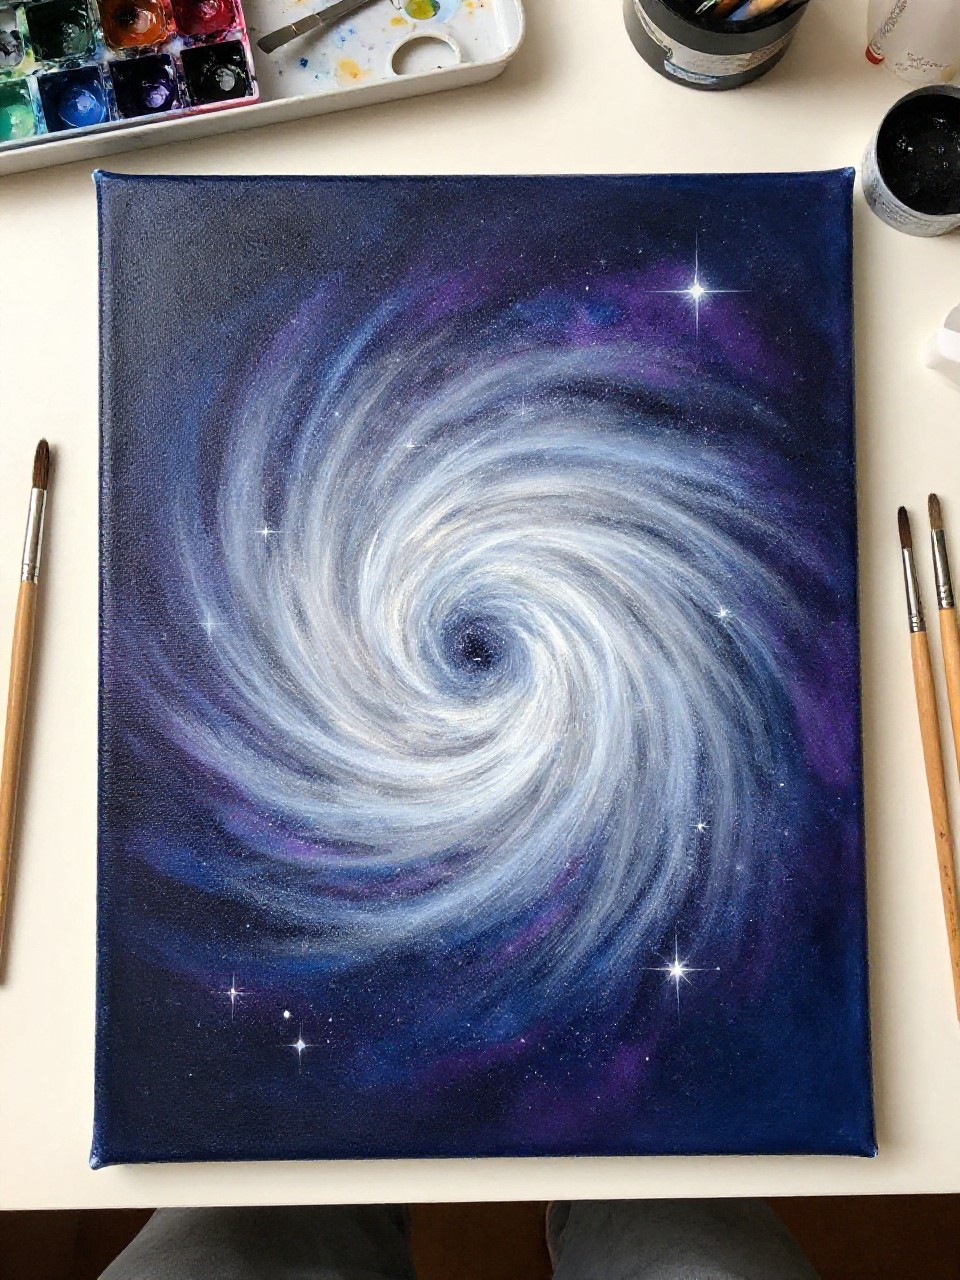
The finished painting looks like a swirling spiral of stars, pulling your eye toward a bright center, like a dreamy space whirlpool. It’s relaxing for beginners because you repeat curved brush strokes and dots, and the spiral guides you so the design feels balanced without heavy planning.
Materials Needed:
- Stretched canvas
- Acrylic paint (black, blue, violet, white)
- Paintbrushes in multiple sizes
- Palette or paint tray
- Optional sealer or varnish
Steps to Make:
- Paint a dark background with subtle blue-violet patches and let it dry.
- Lightly draw a loose spiral guide starting wide and curling toward the center.
- Paint the spiral path with thinned white, keeping edges soft and misty.
- Dot stars along the spiral, making them denser near the center for glow.
- Add a brighter center highlight, dry completely, and seal.
15. Pink Twilight Starfield Canvas

This canvas shows a dreamy twilight sky blending from warm pink into purple and deep blue, with the first stars popping out overhead. It’s great for beginners who love softer colors, and it makes sweet decor for a bedroom, hallway, or cozy craft corner.
Materials Needed:
- Stretched canvas
- Acrylic paint (pink, magenta, purple, deep blue, white)
- Paintbrushes in multiple sizes
- Palette or paint tray
- Optional sealer or varnish
Steps to Make:
- Blend pink at the horizon up into magenta, purple, and deep blue at the top.
- Soften streaks by brushing lightly back across the blends while paint is wet.
- Add a faint glow band near the horizon using a touch of white mixed into pink.
- Dot small stars mainly in the darker upper area, with a few near the middle.
- Let dry, then varnish for a smooth finish.
16. Sun and Moon Split Sky Canvas

The finished canvas is split into two halves: one side is a warm sunset with a soft sun, and the other is a cool night sky with a moon and stars. It’s satisfying because you get two moods in one painting, and beginners can keep each side simple with big color areas.
Materials Needed:
- Stretched canvas
- Acrylic paint (yellow, orange, pink, navy, black, white)
- Paintbrushes in multiple sizes
- Palette or paint tray
- Optional sealer or varnish
Steps to Make:
- Draw a straight center line to divide the canvas into day and night halves.
- Paint the day side with warm blended bands and a simple sun circle.
- Paint the night side with navy-black tones and a moon with a soft glow.
- Add a few stars on the night side and subtle cloud streaks on the day side.
- Clean up the center edge, let dry, and seal.
17. Minimal Stars on Black Canvas
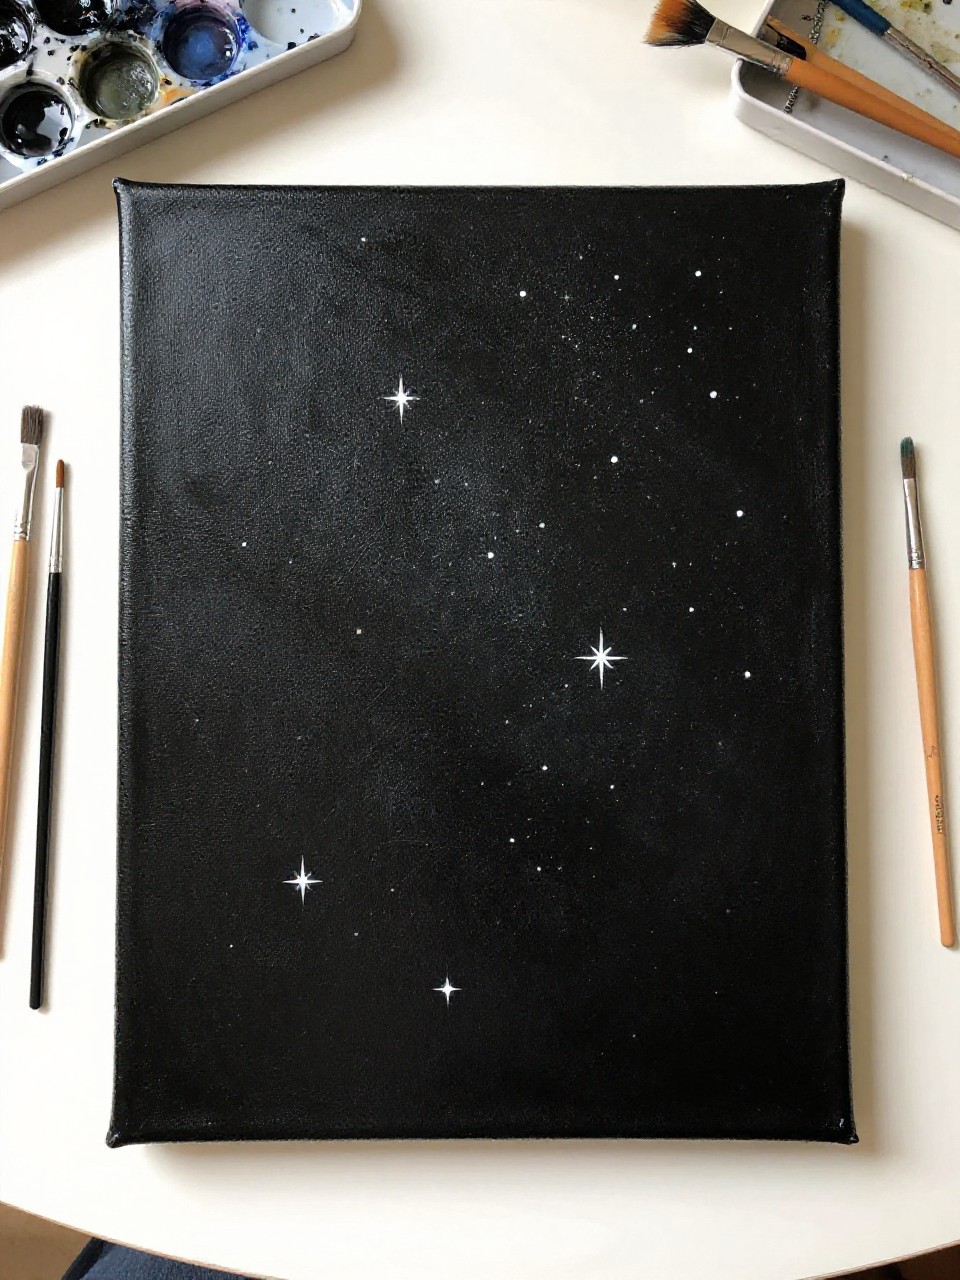
This canvas looks modern and calm: a deep black sky with scattered tiny stars and a few brighter ones that gently glow. It’s perfect if you want something easy after a long day, and it still looks classy on the wall because the simple design lets the texture of the paint stand out.
Materials Needed:
- Stretched canvas
- Acrylic paint (black, white, a touch of gray or silver)
- Paintbrushes in multiple sizes
- Palette or paint tray
- Optional sealer or varnish
Steps to Make:
- Paint the entire canvas black, then add a second coat for a rich, even base.
- Mix white with a hint of gray so your stars aren’t all the same bright tone.
- Dot stars in different sizes, leaving some open space for a calm look.
- Add a few brighter stars with tiny cross highlights and soft halos.
- Dry completely and seal to protect the star texture.