

Table of Contents Show
Want to paint something cute, calming, and not too hard? Turtles are perfect because their shapes are simple, and you can make the shells as plain or as detailed as you like. If you’re looking for a relaxing hobby night, a beginner-friendly painting idea, or handmade decor you can actually finish, this list will help.
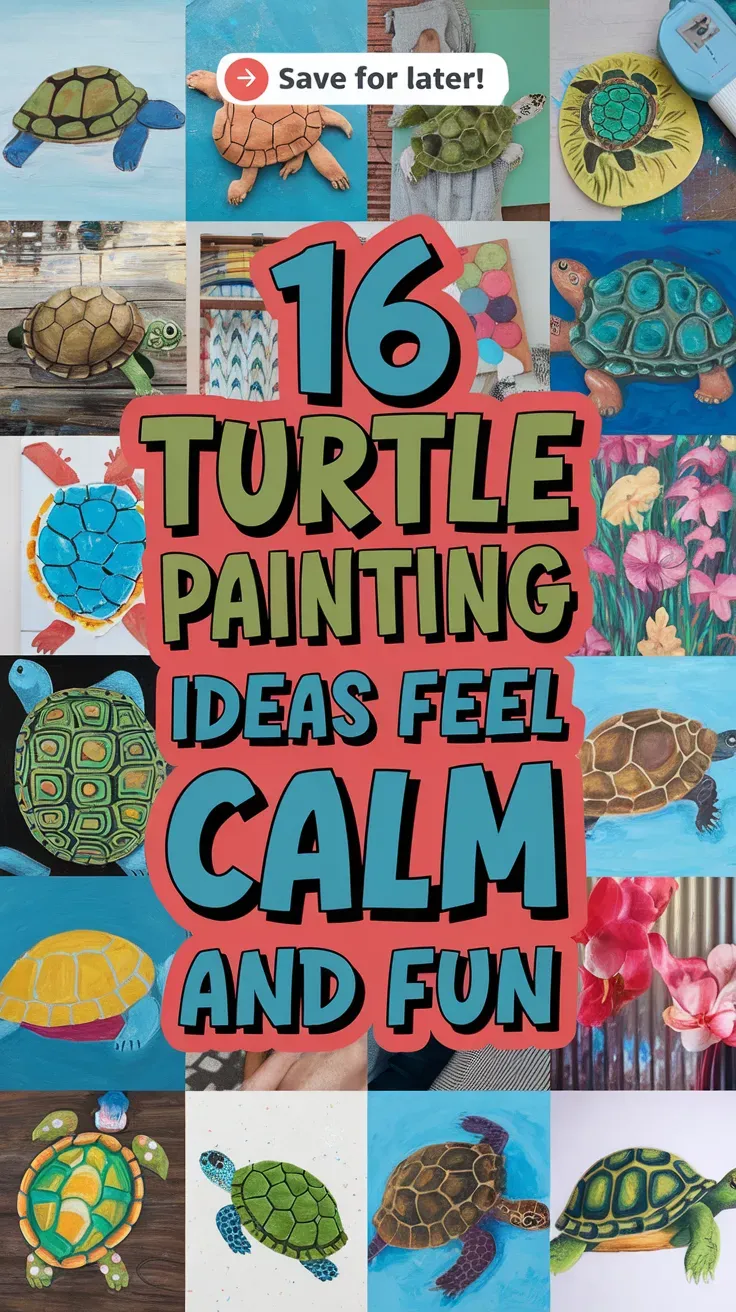
Here are 16 turtle painting ideas that feel calm and fun.
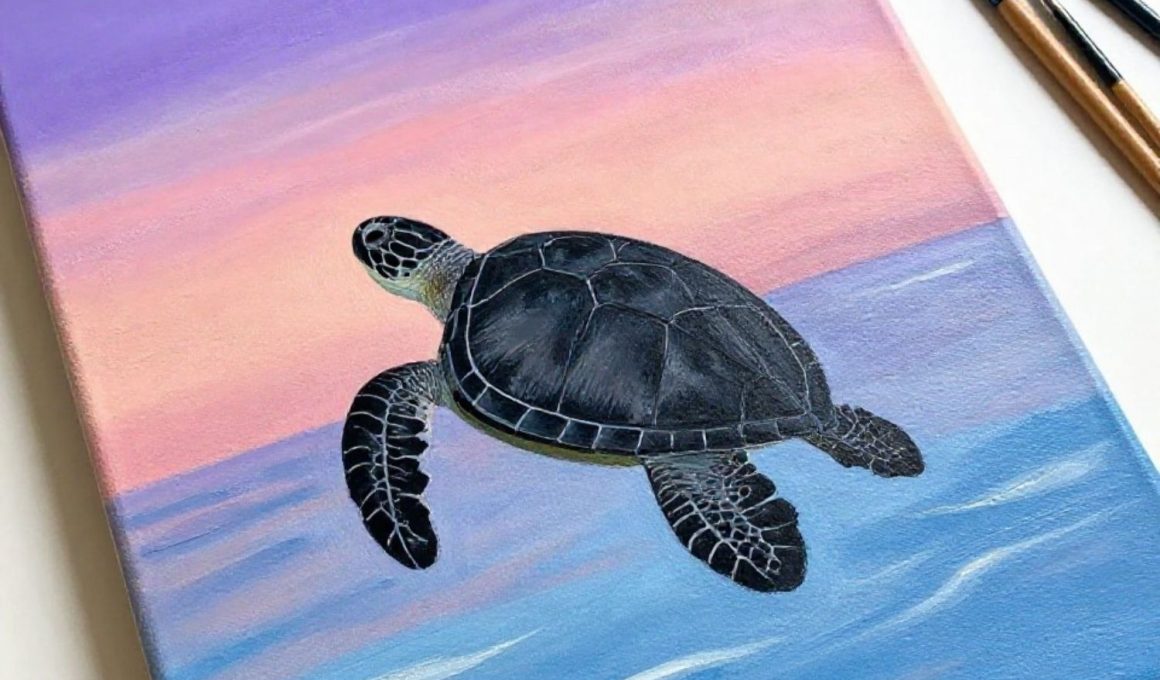
1. Sea Turtle Sunset Canvas Painting
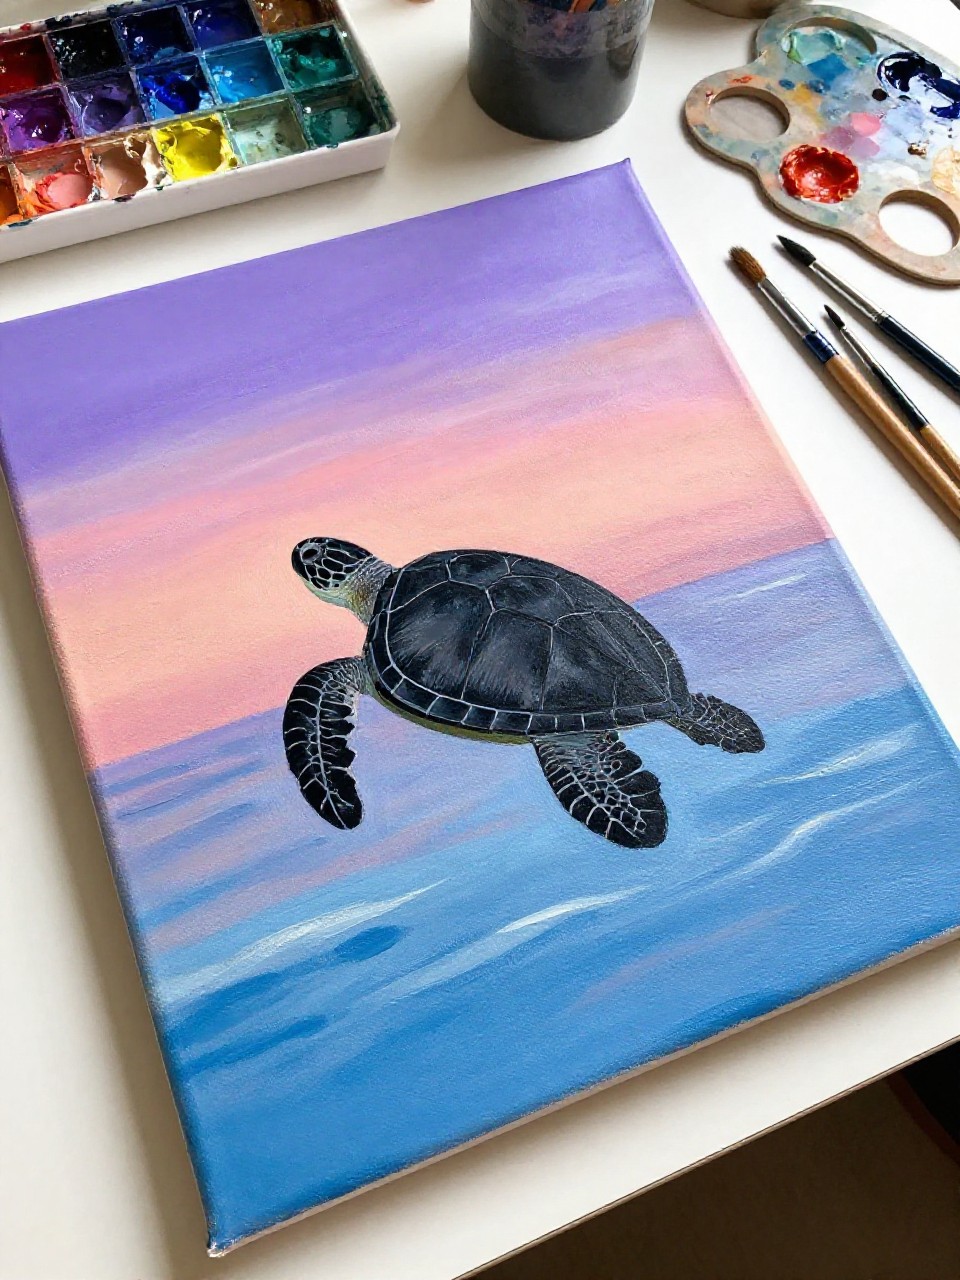
This finished canvas shows a gentle sea turtle silhouette gliding across a blended sunset sky with soft waves under it. It’s satisfying because you can keep the turtle shape simple while enjoying slow color blending, which is great for beginners and stress-free painting time.
Materials Needed:
- Stretched canvas
- Acrylic paint
- Paintbrushes in multiple sizes
- Palette or paint tray
- Cup of water + paper towel
Steps to Make:
For People Who Love to Make Things ✂️
- Lightly sketch a simple turtle silhouette near the center of the canvas.
- Paint the background sky with wide strokes, blending warm sunset colors into each other.
- Add a calmer ocean band underneath using horizontal strokes and a darker blue.
- Fill in the turtle silhouette in a deep teal or black, then add a few lighter shell marks.
- Let it dry fully and display it on a shelf or wall where the blended colors can shine.
2. Polka-Dot Turtle Canvas Nursery Art

This canvas looks like a sweet cartoon turtle with a round shell filled with uneven polka dots in happy colors. It’s a relaxing project because the shapes are forgiving, and it’s perfect if you want simple handmade wall art for a kid’s room or a cheerful corner.
Materials Needed:
- Stretched canvas
- Acrylic paint
- Paintbrushes in multiple sizes
- Palette or paint tray
- Optional sealer or varnish
Steps to Make:
- Paint the canvas a light background color and let it dry.
- Draw a simple turtle body: oval shell, small head, four flippers, and a tiny tail.
- Fill the turtle with solid base colors, keeping edges slightly rounded.
- Dot the shell with different colors using a small brush or the end of a paintbrush handle.
- Seal once dry if you want it to stay bright and easy to dust.
3. Minimal Line Turtle on White Canvas

This finished canvas is clean and calm, with a simple turtle made from thin black lines and one soft green wash on the shell. It’s great for beginners who like modern decor, because you can take your time with the lines and keep everything uncluttered.
Materials Needed:
- Stretched canvas
- Acrylic paint
- Paintbrushes in multiple sizes
- Palette or paint tray
- Pencil + eraser
Steps to Make:
- Paint the canvas white if needed, then let it dry completely.
- Lightly sketch a turtle outline with a pencil using smooth, curved shapes.
- Paint the outline with a small brush and slightly thinned black paint for clean lines.
- Add one watery green layer inside the shell, leaving some white space showing through.
- Erase any visible pencil marks after drying and hang it for a simple, airy look.
4. Tropical Reef Turtle Canvas Scene

This canvas shows a sea turtle swimming over chunky, colorful coral shapes and a calm blue-green water background. It’s satisfying because you can paint the reef as simple blobs first, then slowly add details like dots and stripes, making it beginner-friendly but still impressive.
Materials Needed:
- Stretched canvas
- Acrylic paint
- Paintbrushes in multiple sizes
- Palette or paint tray
- Optional sealer or varnish
Steps to Make:
- Block in the water background with layered blues and greens using wide strokes.
- Sketch a turtle near the top and paint it with a darker base color so it stands out.
- Paint coral shapes along the bottom using bright colors in rounded, imperfect forms.
- Add small reef details like white dots, tiny lines, and darker shadows under coral edges.
- Let it dry, then seal if you want extra color depth and protection.
5. Turtle Mandala Shell Canvas Painting
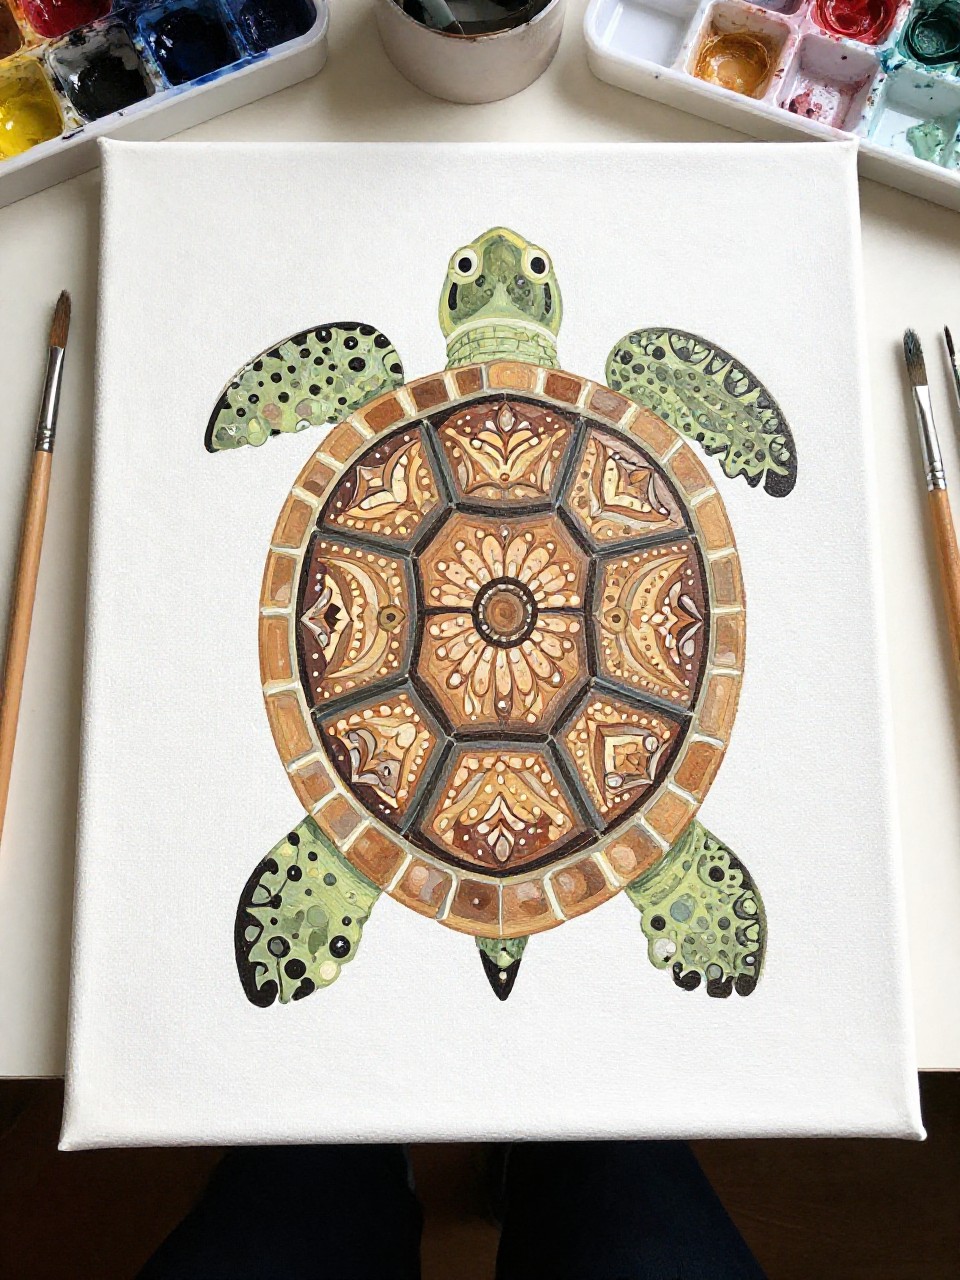
The finished canvas shows a centered turtle with a shell filled with simple mandala patterns like petals, dots, and small arches. It’s calming to make because you repeat tiny shapes slowly, and you can pause anytime without losing the flow, which makes it perfect for a quiet evening.
Materials Needed:
- Stretched canvas
- Acrylic paint
- Paintbrushes in multiple sizes
- Palette or paint tray
- Pencil + eraser
Steps to Make:
- Paint a soft background color and let it dry fully.
- Sketch a turtle shape, then draw simple ring sections inside the shell like a target.
- Paint the turtle body in one solid color, keeping edges rounded and smooth.
- Fill each shell ring with repeating patterns, changing colors as you go for gentle contrast.
- Let everything dry, then touch up outlines to sharpen the mandala details.
6. Starry Night Turtle Canvas

This canvas looks like a turtle drifting through a deep navy sky sprinkled with uneven stars and soft glowing dots. It’s a soothing project because the background is just layers of dark color, and the star speckles are playful and forgiving, even if they turn out a little messy.
Materials Needed:
- Stretched canvas
- Acrylic paint
- Paintbrushes in multiple sizes
- Palette or paint tray
- Toothbrush or stiff brush for splatter
Steps to Make:
- Paint the whole canvas in layered navy and dark purple, leaving visible brush strokes for texture.
- Sketch a turtle silhouette and paint it in a slightly lighter shade so it blends softly.
- Add stars by flicking thinned white paint with a toothbrush for natural-looking speckles.
- Paint a few larger stars by hand with tiny crosses or dots, then add a soft glow around them.
- Let it dry flat so the splatter stays crisp and doesn’t drip.
7. Pastel Beach Turtle Canvas with Footprints

The finished canvas shows a small turtle heading toward the ocean, with tiny footprints in the sand and a pale pastel shoreline. It’s great for beginners because the beach is made of wide color bands, and the footprints and turtle details are small, fun finishing touches.
Materials Needed:
- Stretched canvas
- Acrylic paint
- Paintbrushes in multiple sizes
- Palette or paint tray
- Optional sealer or varnish
Steps to Make:
- Paint horizontal bands for sky, ocean, and sand using soft pastel colors.
- Blend the ocean edge slightly into the sand to make a gentle shoreline.
- Paint a small turtle shape on the sand facing the water, keeping it simple and rounded.
- Add tiny footprint marks behind it with a small brush and a slightly darker sand color.
- Dry fully, then seal if you want a smoother, finished look for display.
8. Turtle Family Canvas Trio (One Canvas)

This canvas shows three turtles—big, medium, and small—lined up with matching shells in different colors. It feels sweet and relaxing because you repeat the same shape three times, and you can keep the details simple while still ending up with meaningful, giftable art.
Materials Needed:
- Stretched canvas
- Acrylic paint
- Paintbrushes in multiple sizes
- Palette or paint tray
- Pencil + eraser
Steps to Make:
- Lightly sketch three turtle shapes across the canvas, spacing them evenly.
- Paint each turtle body in a solid color base, letting the layers dry between coats.
- Add shell sections with curved lines that follow the shell shape, not straight stripes.
- Fill each shell section with a simple pattern like dots, tiny waves, or short lines.
- Clean up edges and add small highlights on shells to make them feel rounded.
9. Watercolor-Style Turtle Canvas (Acrylic Wash)

This finished canvas looks like a soft watercolor turtle, with thin, transparent layers of green and blue that overlap and create gentle color shifts. It’s satisfying because you don’t have to be precise—letting the paint wash and blend is the fun part, and beginners usually love the surprise.
Materials Needed:
- Stretched canvas
- Acrylic paint (plus extra water for thinning)
- Paintbrushes in multiple sizes
- Palette or paint tray
- Paper towel
Steps to Make:
- Paint a very light background wash so the canvas isn’t stark white.
- Sketch a turtle outline and keep it simple with a rounded shell and flippers.
- Thin your acrylic paint with water and brush it inside the turtle in loose, see-through layers.
- Drop in a second color while the first is damp so the edges blend softly.
- Once dry, add a few darker lines for the shell sections and a tiny eye for character.
10. Pebble-Texture Turtle Canvas (Dry Brush Dots)

The finished canvas shows a turtle whose shell is made from many small, dry-brushed dots that look like textured pebbles. It’s a calming, almost meditative project because you build the shell slowly, one dot at a time, and it still looks great even if the dots aren’t perfect.
Materials Needed:
- Stretched canvas
- Acrylic paint
- Paintbrushes in multiple sizes
- Palette or paint tray
- Optional sealer or varnish
Steps to Make:
- Paint a simple ocean or neutral background and let it dry.
- Draw a turtle shape and paint the body in a solid mid-tone color.
- Mix a few lighter and darker shades for the shell so the texture has depth.
- Use a mostly-dry brush to tap and dot the shell, layering colors until it looks pebbly.
- Let it dry, then seal to protect the raised, textured paint layers.
11. Koi Pond Turtle Canvas (Soft Ripples)

This canvas shows a turtle seen from above, floating in a pond with gentle painted ripples circling out around it. It’s satisfying because the ripple lines are simple and repetitive, and the whole piece feels calm and balanced, like something you’d hang near a reading chair.
Materials Needed:
- Stretched canvas
- Acrylic paint
- Paintbrushes in multiple sizes
- Palette or paint tray
- Pencil + eraser
Steps to Make:
- Paint the pond background using layered blue-greens, leaving some streaks for watery texture.
- Sketch a top-down turtle shape in the center and paint it with a darker base coat.
- Add shell sections with curved lines that follow the shell’s roundness.
- Paint ripples around the turtle using thin, curved strokes in lighter and darker pond colors.
- Finish with a few bright highlights on the ripples to make the water look shiny.
12. Abstract Turtle Shell Color Blocks Canvas
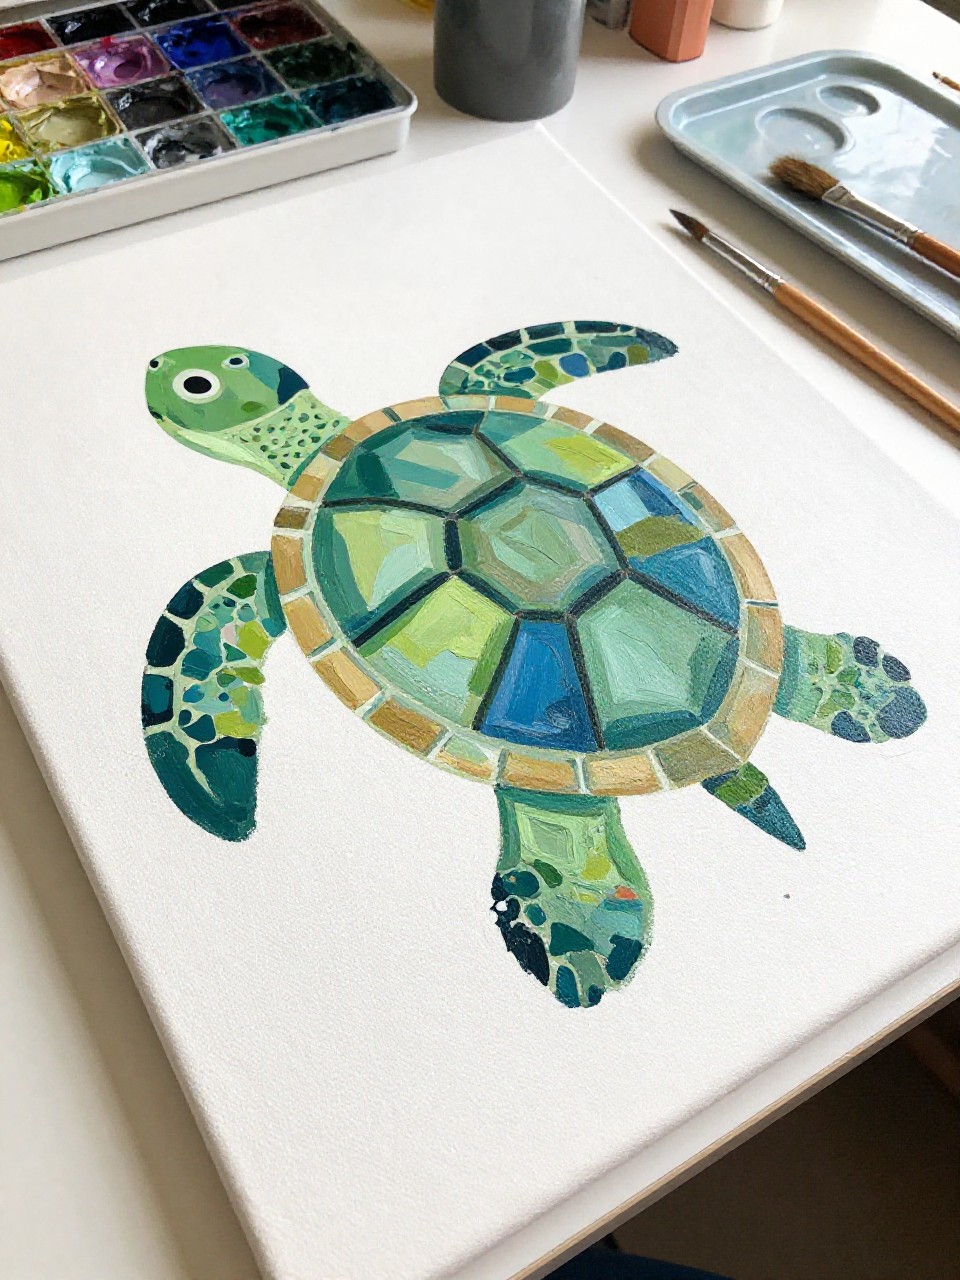
The finished canvas shows a turtle with a shell made from uneven color blocks, like a patchwork quilt of calming greens, blues, and sandy tones. It’s great for beginners because you can tape or freehand the shapes, and tiny wobbles make it look more handmade and artsy.
Materials Needed:
- Stretched canvas
- Acrylic paint
- Paintbrushes in multiple sizes
- Palette or paint tray
- Painter’s tape (optional)
Steps to Make:
- Paint a simple light background and let it dry so your blocks stay crisp.
- Sketch a turtle with a large shell area to hold the color blocks.
- Create block shapes inside the shell with pencil or painter’s tape, following the shell curve.
- Paint each block a different shade, letting some brush strokes show for texture.
- Peel tape when dry (if used) and touch up the turtle outline for a clean finish.
13. Blooming Lotus Turtle Canvas

This canvas shows a turtle resting near a large lotus flower, with soft leaves and calm water colors around them. It’s a nice project if you enjoy nature themes, because you can paint the big flower shapes first and then slowly add darker lines and highlights for a gentle, finished look.
Materials Needed:
- Stretched canvas
- Acrylic paint
- Paintbrushes in multiple sizes
- Palette or paint tray
- Optional sealer or varnish
Steps to Make:
- Paint a soft water background using blended blue-green strokes.
- Sketch a large lotus bloom and a small turtle beside it, keeping both shapes simple.
- Paint the lotus petals in light layers, building darker pink toward the petal bases.
- Paint the turtle in calm greens and add shell lines that curve with the shell shape.
- Let it dry, then add a few bright highlights on petals and water to make it pop.
14. Cozy Sweater Turtle Canvas Character

The finished canvas shows a cute turtle wearing a tiny hand-painted sweater pattern, with a warm neutral background. It’s fun because you get to paint simple clothing details like stripes or zigzags, and it’s forgiving—if the sweater pattern is uneven, it just looks more cozy and handmade.
Materials Needed:
- Stretched canvas
- Acrylic paint
- Paintbrushes in multiple sizes
- Palette or paint tray
- Pencil + eraser
Steps to Make:
- Paint a warm background color, like beige or light tan, and let it dry.
- Sketch a turtle with a bigger head and rounded shell to make it look extra friendly.
- Paint the turtle body and shell base colors, leaving space for the sweater area.
- Add the sweater as a band across the shell with stripes, zigzags, or tiny dots.
- Finish with small facial details and a few lighter highlights to make it feel lively.
15. Ombre Shell Turtle Canvas

This finished canvas shows a turtle with a shell that fades from dark to light in a smooth ombre, like deep teal to pale mint. It’s satisfying because you practice blending in a small area instead of a whole background, and the gentle gradient makes the turtle look polished even with simple shapes.
Materials Needed:
- Stretched canvas
- Acrylic paint
- Paintbrushes in multiple sizes
- Palette or paint tray
- Cup of water + paper towel
Steps to Make:
- Paint a simple light background so the turtle stands out clearly.
- Sketch and paint the turtle body in a solid color, keeping the shell area separate.
- Paint the shell in two or three bands of color from dark to light.
- Blend the edges where the colors meet using a slightly damp brush and short curved strokes.
- Add shell section lines on top once dry so the gradient still shows through.
16. Underwater Bubble Trail Turtle Canvas

This canvas shows a sea turtle swimming upward with a trail of round bubbles that get smaller as they rise. It’s calming and beginner-friendly because the bubbles are just circles with highlights, and the turtle can be as simple as you want while still looking like it’s floating.
Materials Needed:
- Stretched canvas
- Acrylic paint
- Paintbrushes in multiple sizes
- Palette or paint tray
- Optional sealer or varnish
Steps to Make:
- Paint an underwater background with layered blues, making the top slightly lighter than the bottom.
- Sketch the turtle at an angle, then paint it in greens with a darker shadow edge.
- Add bubble circles trailing behind the turtle, varying sizes to show movement and depth.
- Paint tiny white highlights on each bubble and soften one side with a light blue glaze.
- Let dry, then seal if you want the bubbles to stay bright and glossy-looking.