


Table of Contents Show
Summer weddings are beautiful, but getting your hair right can feel a little stressful. You want something that looks polished in photos, holds up in warm weather, and still feels like you. I’ve been there, staring in the mirror and wondering if I should wear it up, down, or somewhere in between.
This list will help you pick a wedding-guest hairstyle that looks elegant without being hard to do at home.
You’ll find styles that work for different hair types, different dress codes, and different levels of effort, so you can get ready, feel confident, and enjoy the day.
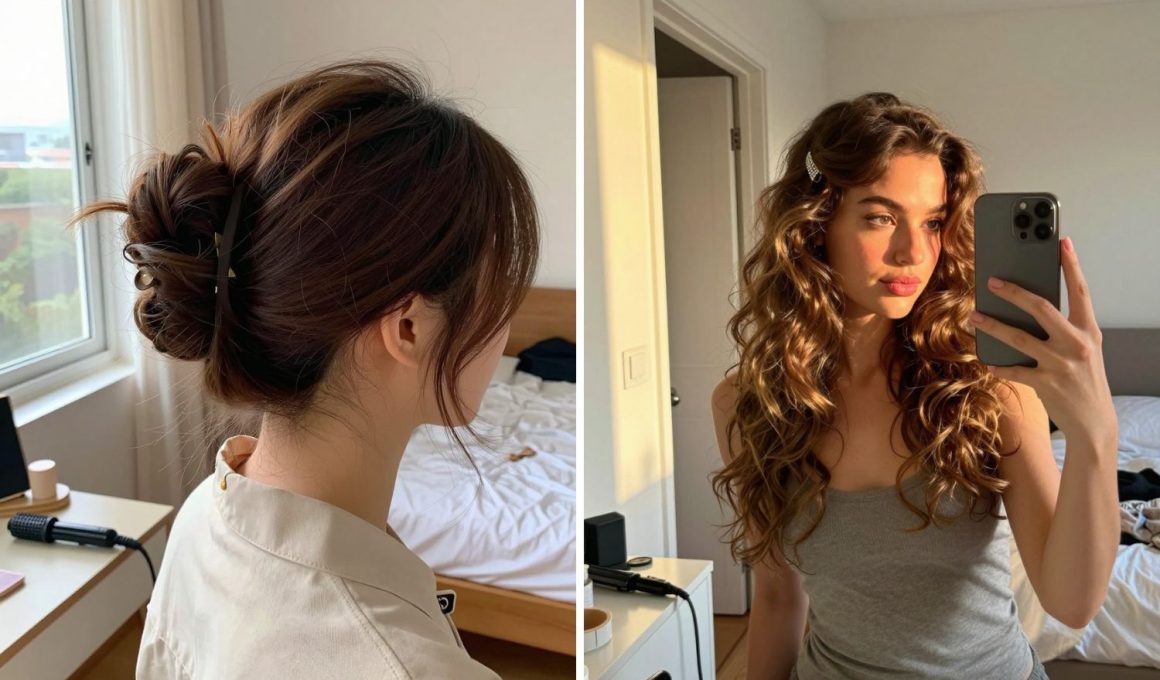
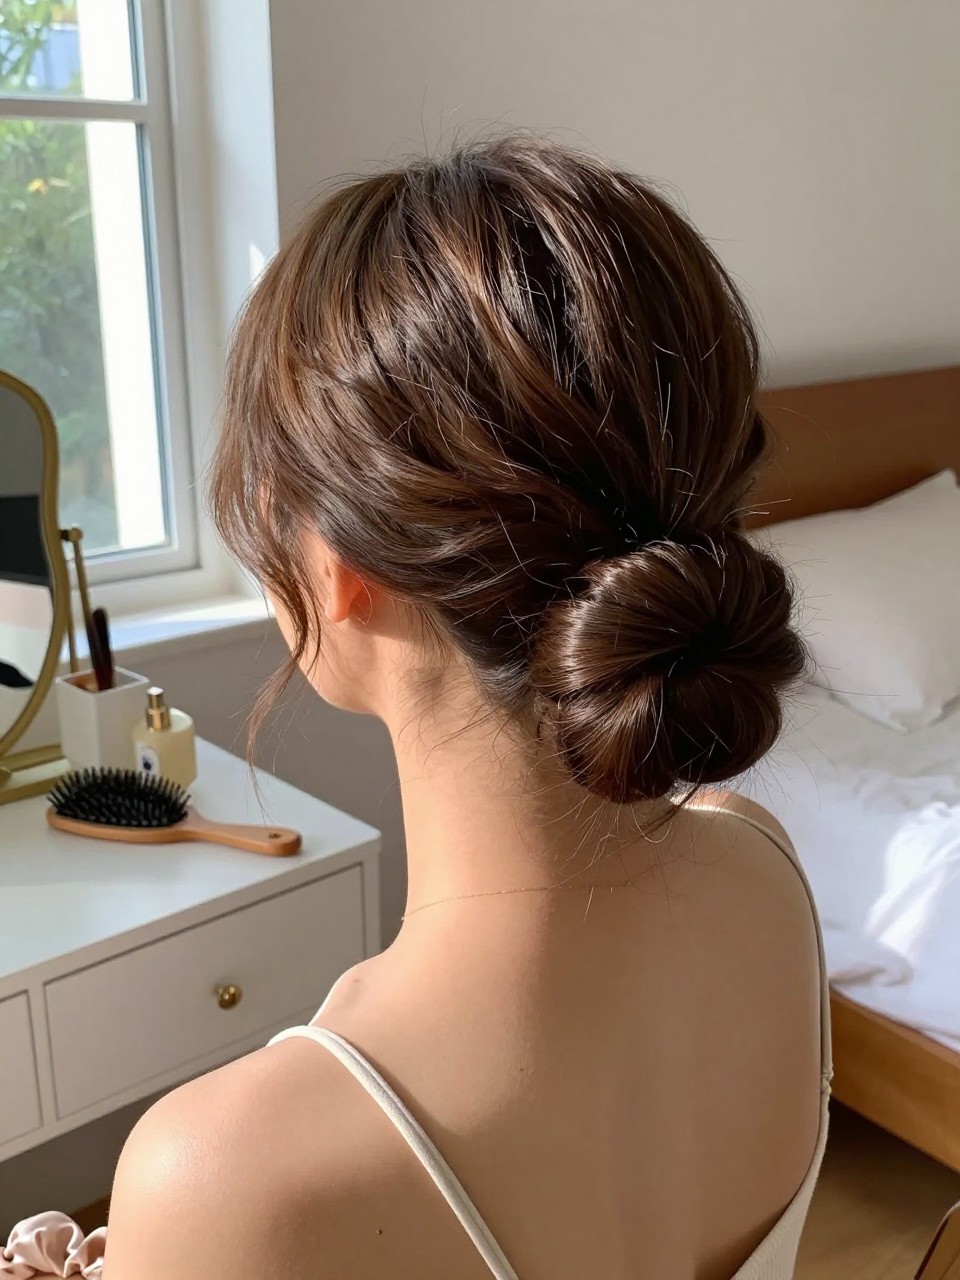
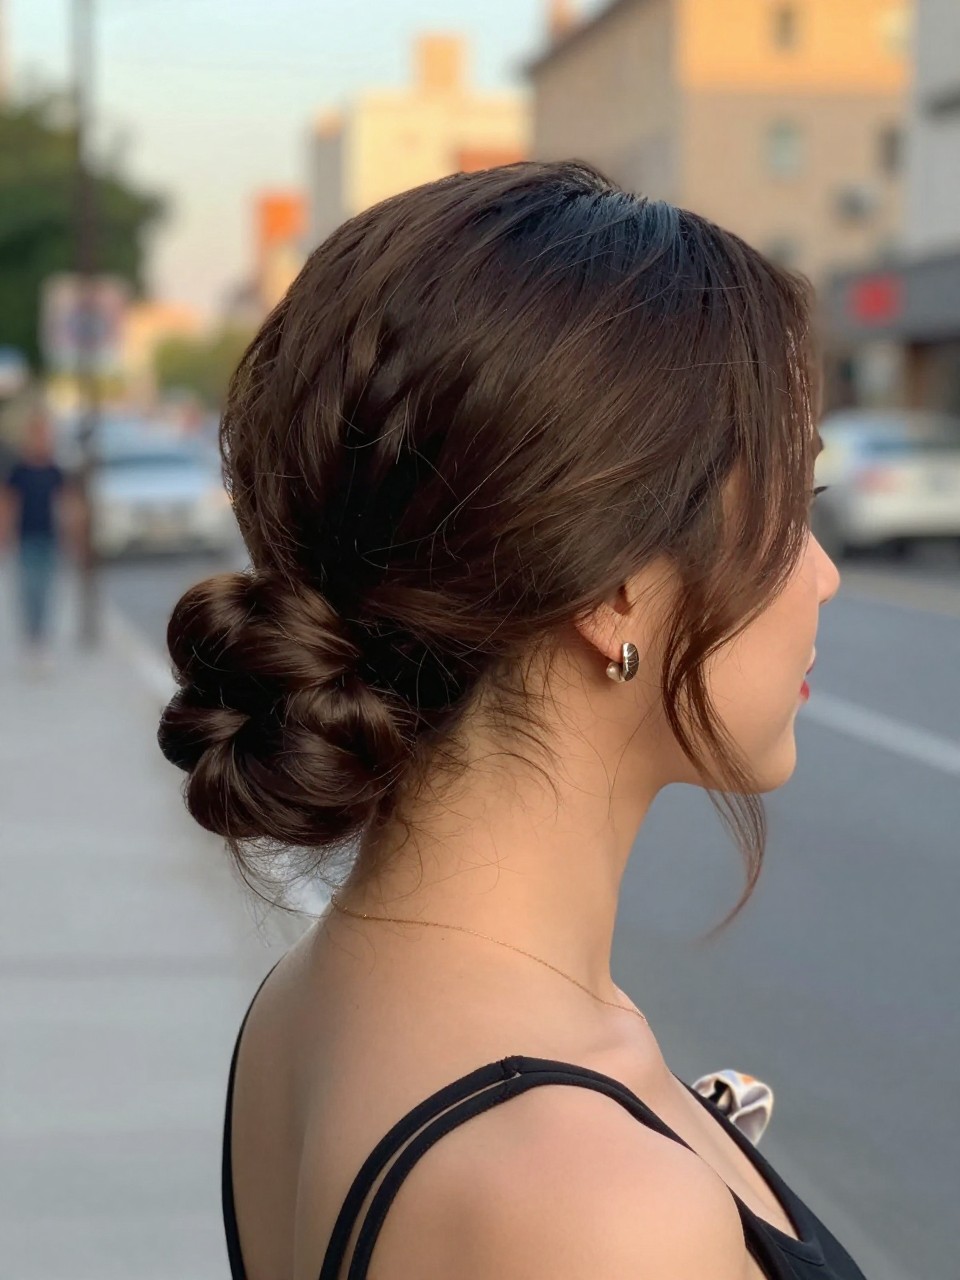
1. Loose Textured Low Bun

This bun looks soft and romantic, with a little texture that keeps it from feeling too strict. It’s great if you want an updo that stays put in heat but still looks easy and natural. This works especially well for medium to long hair and second-day hair.
What you need
For People Who Love to Make Things ✂️
- Bobby pins (to anchor the bun without it slipping)
- Texturizing spray (adds grip so the bun holds longer)
- Hair elastic (creates a secure base ponytail)
- Soft shine serum (tames flyaways without making hair greasy)
How to style it
- Step 1: Spray a little texturizer through mid-lengths and ends, then brush hair back loosely.
- Step 2: Make a low ponytail and twist it into a bun, keeping it relaxed instead of tight.
- Step 3: Pin the bun in place, crossing pins for a stronger hold.
- Step 4: Gently pull a few face-framing pieces loose and finish with a light mist of hairspray.
Quick tip
If your hair is super smooth, add dry shampoo at the roots first so the bun doesn’t slide.
2. Sleek Middle-Part Low Chignon
This style looks clean, elegant, and timeless, with a smooth finish that feels very wedding-ready. It’s perfect for formal ceremonies or when your outfit is already bold and you want your hair to look neat. It works best if you like a polished look that lasts.
What you need
- Fine-tooth comb (for a crisp middle part and smooth sides)
- Smoothing cream (controls frizz and keeps hair sleek)
- Bobby pins (secures the chignon firmly)
- Strong-hold hairspray (locks everything in for the whole event)
How to style it
- Step 1: Part hair down the middle and apply smoothing cream from roots to ends.
- Step 2: Brush into a low ponytail, then twist into a tight chignon at the nape.
- Step 3: Pin the twist under itself, hiding the ends and tightening the shape.
- Step 4: Smooth the sides with the comb and finish with strong-hold spray.
Quick tip
Spray hairspray onto your comb (not directly on your head) to smooth flyaways without stiffness.
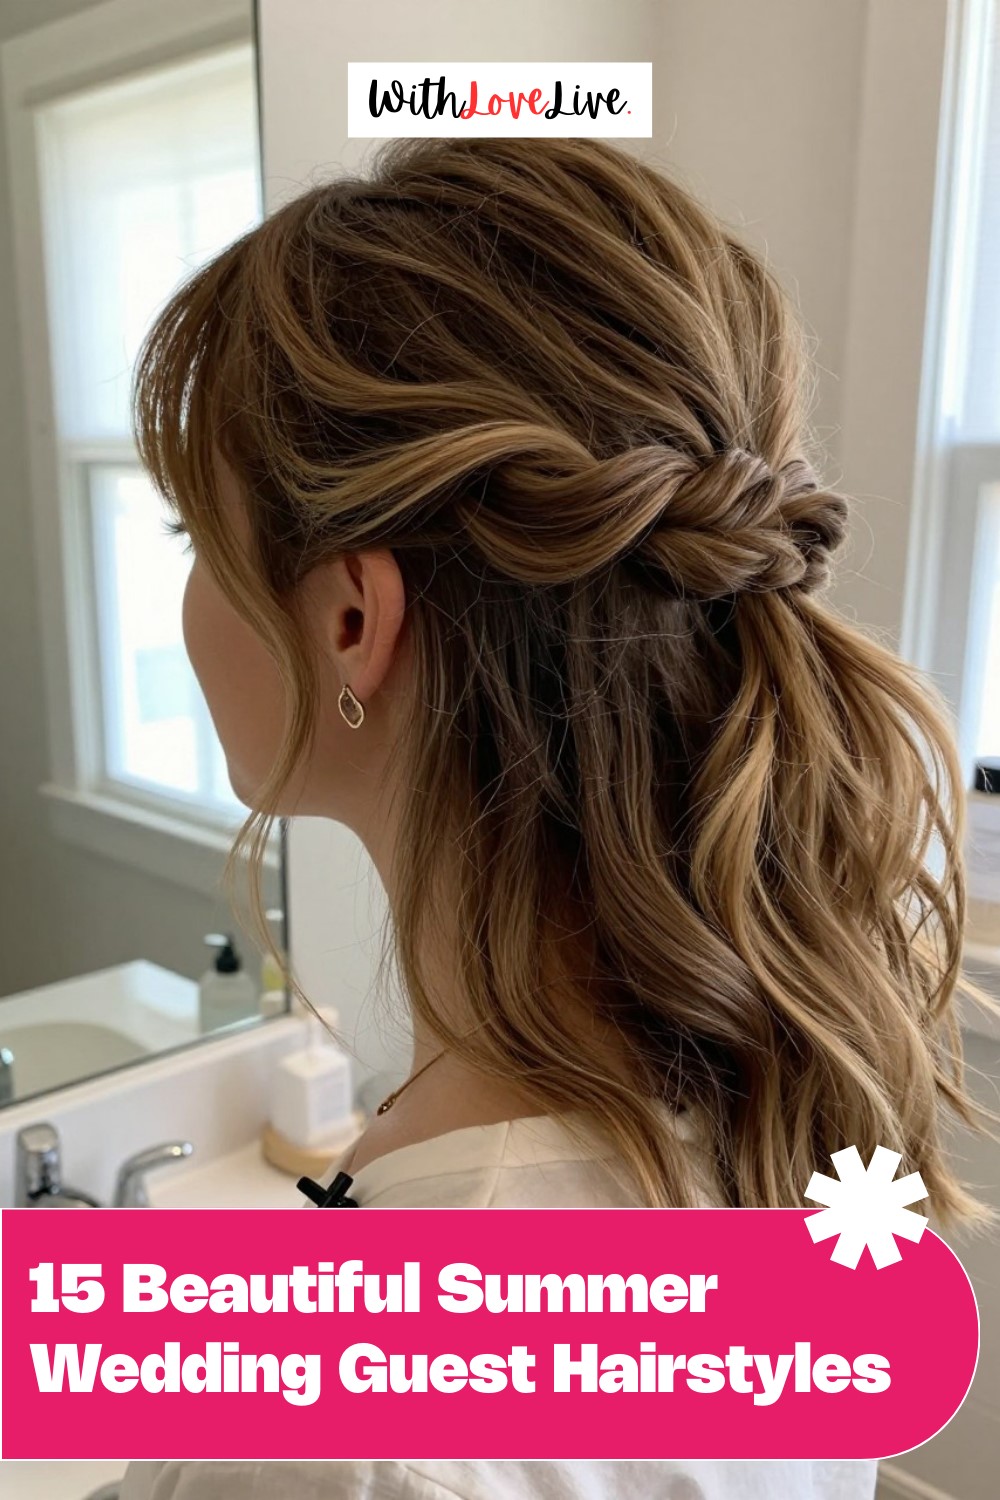
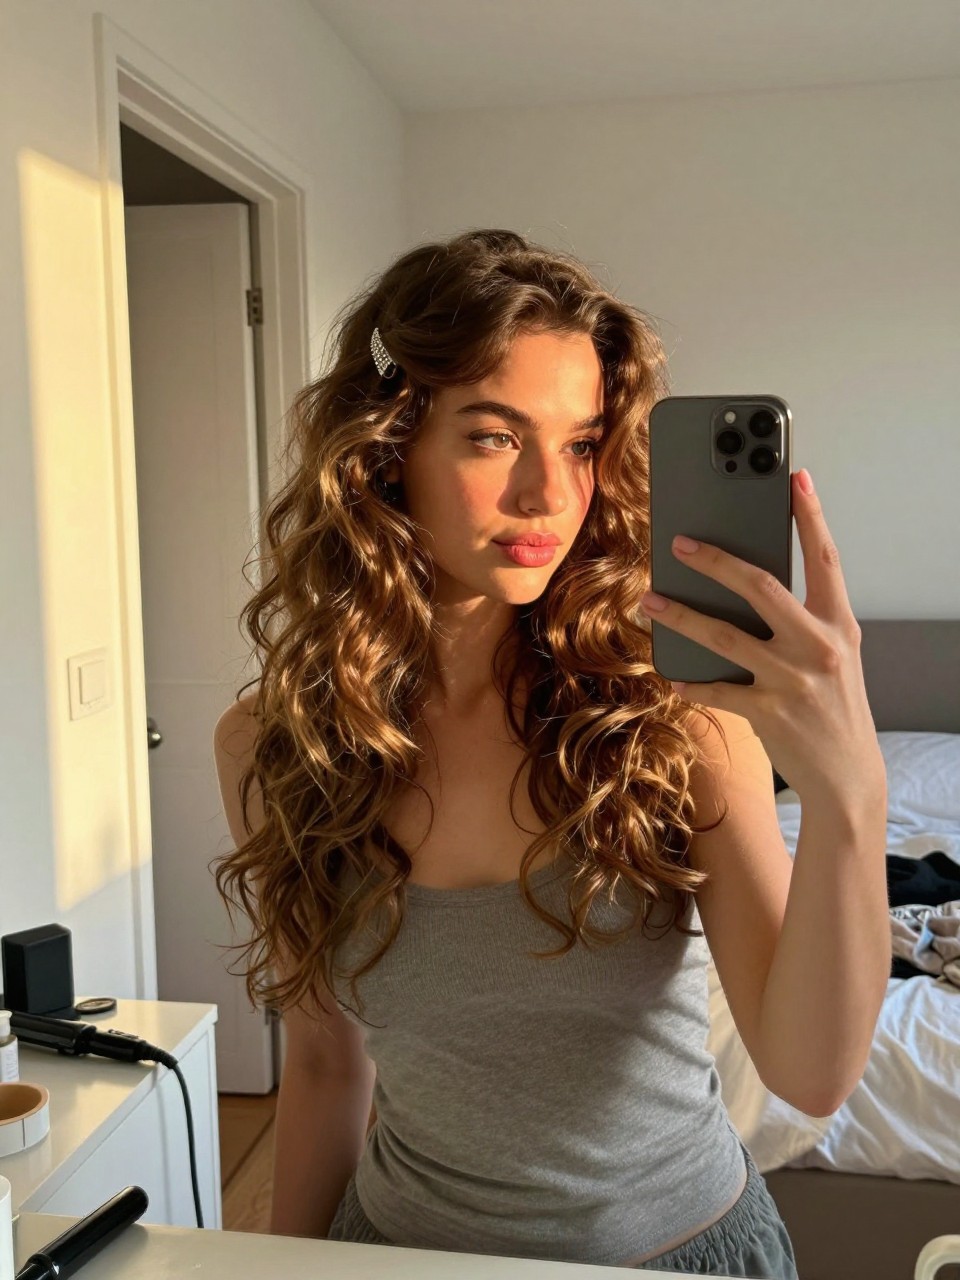
3. Soft Half-Up Twisted Crown
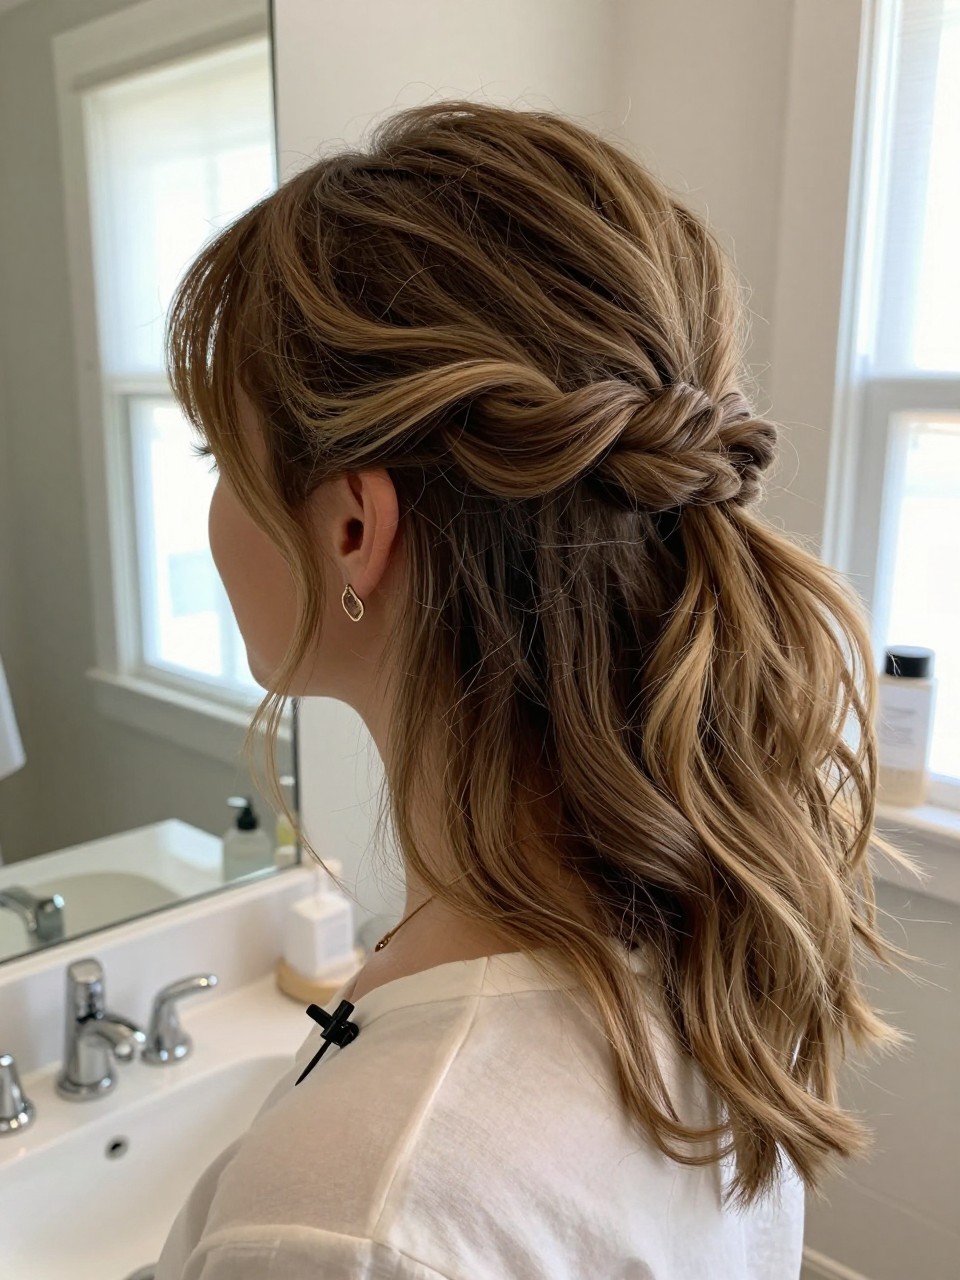
This half-up style feels sweet and dressy, with twists that frame the head like a gentle crown. It’s great if you want hair off your face but still want some movement and length showing. This works well for wavy hair, curled hair, or naturally textured hair.
What you need
- Small clear elastics (to secure twists without showing)
- Lightweight curl cream (helps define soft waves)
- Bobby pins (locks the crown in place)
- Pearl hair pins (optional, adds a wedding touch)
How to style it
- Step 1: Add curl cream or texture spray, then lightly wave or refresh your hair.
- Step 2: Take a section from each side and twist back toward the center.
- Step 3: Secure both twists together with an elastic, then pin underneath for extra hold.
- Step 4: Loosen the twists slightly for softness and finish with a light mist of hairspray.
Quick tip
If your hair is thin, gently tease the crown before twisting to give it more fullness.
4. Romantic Loose Waves With Side Pin
This look is classic and pretty, with soft waves that feel effortless and photo-friendly. It’s perfect for outdoor weddings because it looks great even if the breeze moves it a bit. It works best for medium to long hair and is easy to refresh.
What you need
- 1-inch curling wand (creates soft waves that last)
- Heat protectant spray (helps prevent damage and dryness)
- Light-hold hairspray (keeps movement without crunch)
- Sparkly side clip (optional, makes it feel more dressed up)
How to style it
- Step 1: Spray heat protectant and curl hair in loose sections away from your face.
- Step 2: Let curls cool, then gently brush through for soft waves.
- Step 3: Pin one side back with a clip or a few bobby pins.
- Step 4: Mist with light-hold hairspray and smooth flyaways with fingertips.
Quick tip
Curl the front pieces a little looser so they sit softly around your face in photos.
5. Polished High Ponytail With Wrapped Base
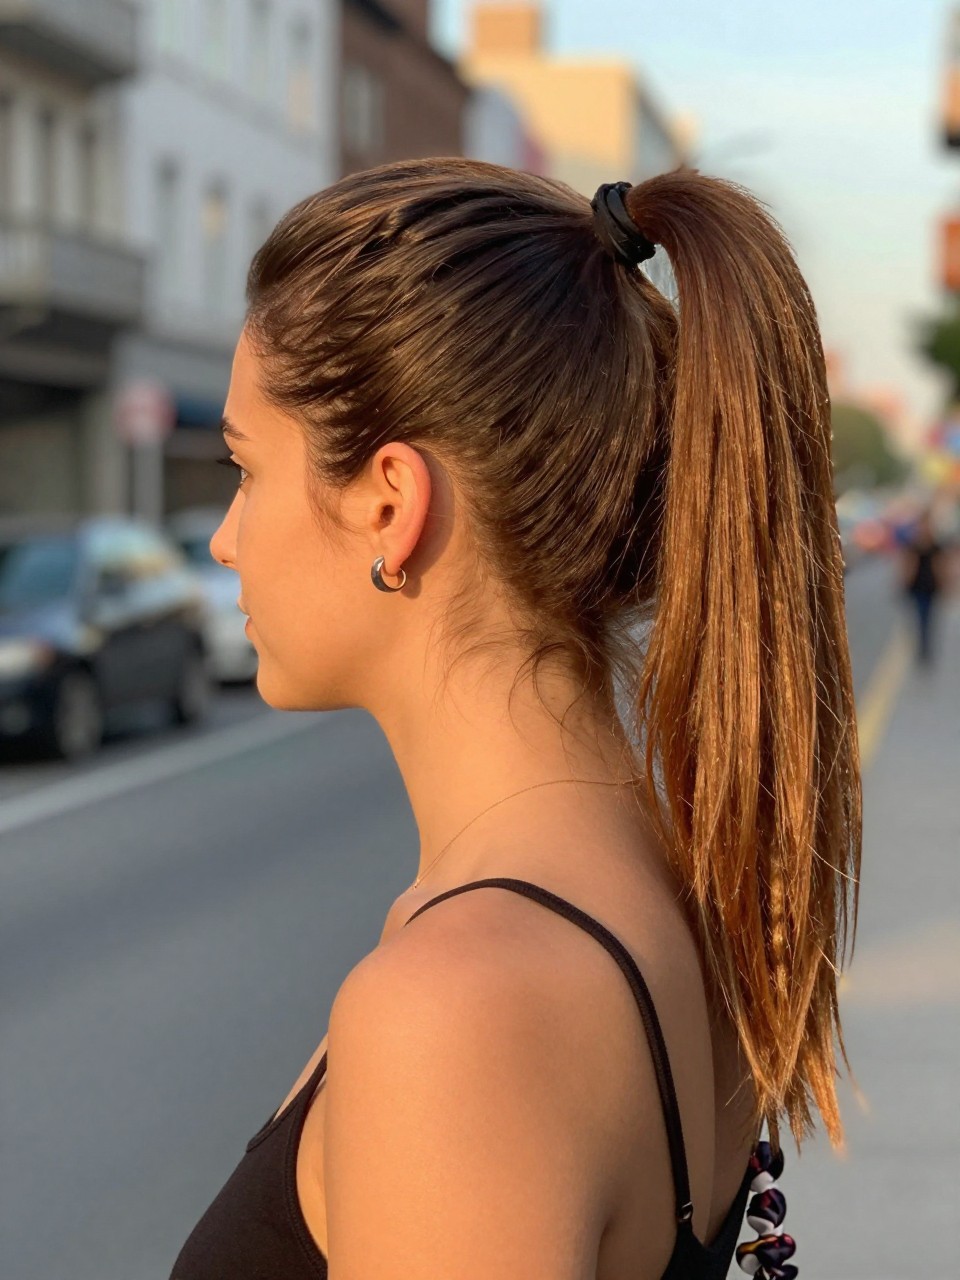
This ponytail looks clean, lifted, and modern, while still feeling event-appropriate. It’s a great choice if you want your hair off your neck for a warm summer wedding. It works well for thick hair and also looks amazing with statement earrings.
What you need
- Hair elastic (a strong one that won’t slip)
- Smoothing brush (helps get a sleek finish)
- Shine spray (adds a glossy, wedding-ready look)
- Bobby pins (to secure the wrapped base)
How to style it
- Step 1: Brush hair up and apply smoothing product to the sides and crown.
- Step 2: Secure a high ponytail and pull it tight at the base.
- Step 3: Wrap a small piece of hair around the elastic and pin it underneath.
- Step 4: Smooth the ponytail, add shine spray, and mist the base with hairspray.
Quick tip
For extra volume, tease the ponytail lightly underneath, then smooth the top layer over it.
6. Low Ponytail With Soft Face-Framing Waves
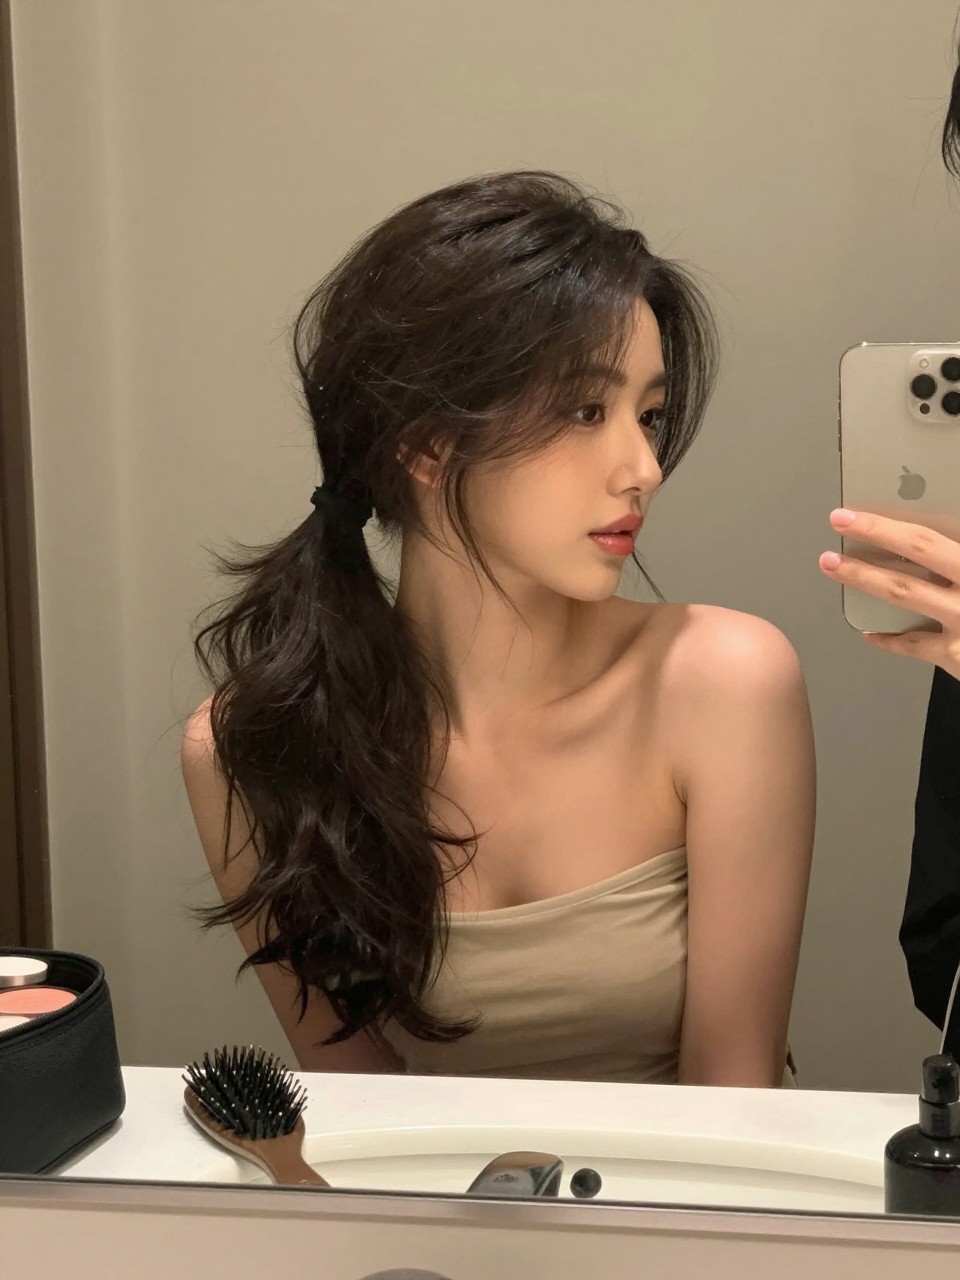
This style feels simple but elevated, with a low ponytail that looks neat and intentional. It’s great if you don’t love buns but still want something that stays tidy during a long wedding day. It works especially well for layered hair.
What you need
- Curling iron (to shape the face-framing pieces)
- Heat protectant (keeps ends from looking dry)
- Texturizing powder (adds lift at the crown)
- Ribbon tie (optional, adds a pretty wedding detail)
How to style it
- Step 1: Add a little texturizing powder at the crown and smooth the top lightly.
- Step 2: Pull hair into a low ponytail, keeping it soft rather than tight.
- Step 3: Curl the front pieces away from your face and gently finger-comb them.
- Step 4: Finish with light hairspray and add a ribbon if you want a romantic touch.
Quick tip
Leave the ponytail slightly loose at the base so it doesn’t look flat in photos.
7. Messy French Twist With Soft Pieces
This twist looks elegant but not stiff, with a relaxed shape that still feels formal enough for a wedding. It’s perfect when you want an updo that looks a little “undone” in a good way. It works best for medium to long hair and holds well with texture.
What you need
- Texturizing spray (adds grip so the twist stays put)
- U-shaped hair pins (strong hold without showing)
- Bobby pins (secures loose ends)
- Medium-hold hairspray (keeps it flexible but set)
How to style it
- Step 1: Spray texture through hair and loosely brush it back.
- Step 2: Gather hair and twist upward, tucking ends inside as you roll.
- Step 3: Secure with U-pins down the center, then add bobby pins where needed.
- Step 4: Pull out a few soft pieces near the face and spray lightly to finish.
Quick tip
If your hair is very long, tuck the ends into the twist in two sections so it doesn’t feel bulky.
8. Braided Low Bun With Clean Center Part
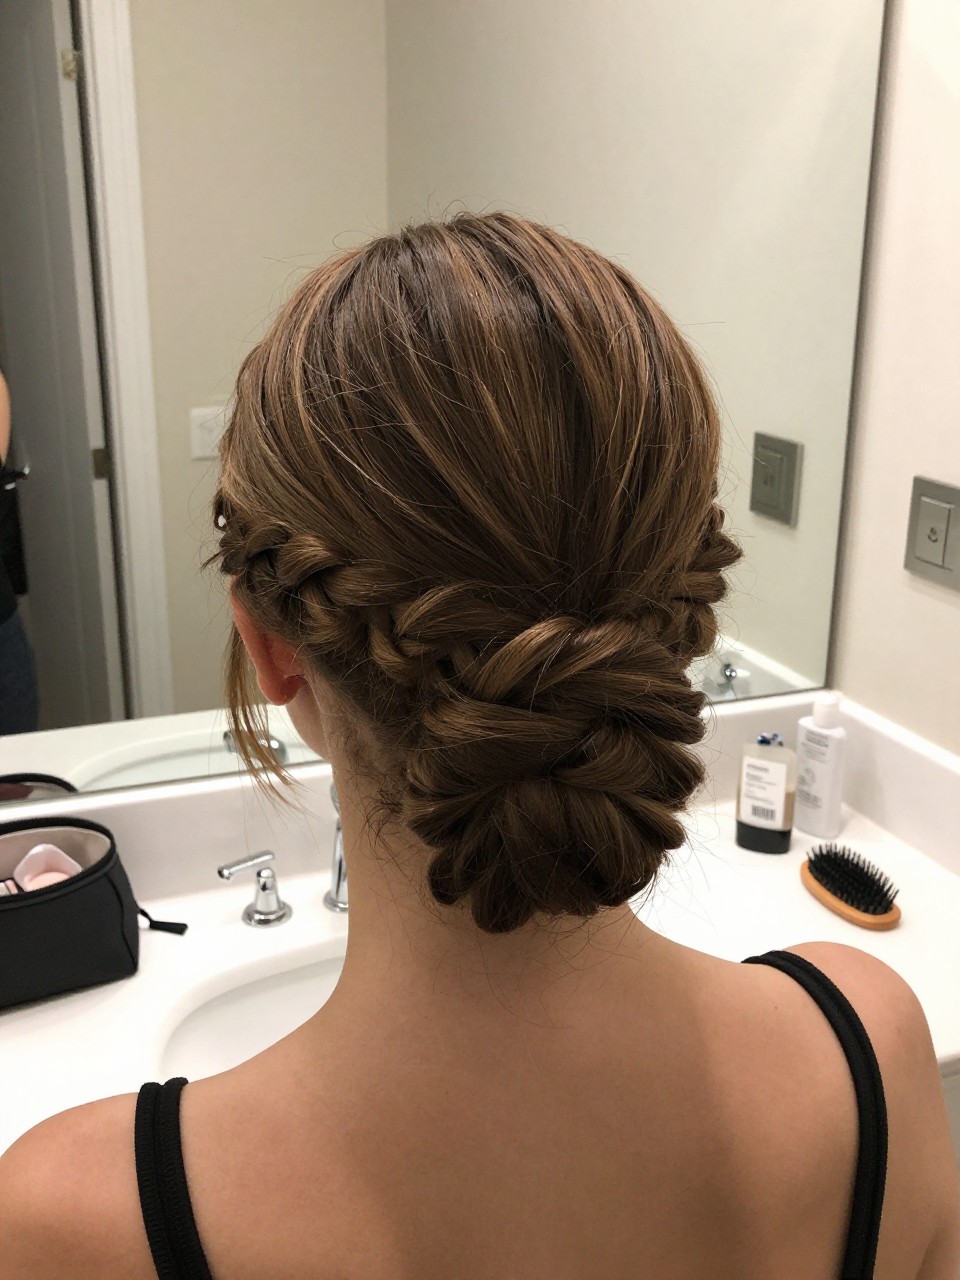
This look feels neat, elegant, and a little special because of the braid detail. It’s great for summer weddings since it keeps hair off your neck and holds up well outside. It works best for medium to long hair.
What you need
- Hair elastic (to secure the braid)
- Smoothing cream (keeps the part and sides clean)
- Bobby pins (locks the bun down)
- Edge brush (optional, for extra smooth hairline)
How to style it
- Step 1: Part hair down the center and smooth product through the top and sides.
- Step 2: Make a low ponytail, braid it, then wrap the braid into a bun.
- Step 3: Pin the bun firmly all around the base so it doesn’t move.
- Step 4: Smooth flyaways and set with hairspray.
Quick tip
If you want more volume, gently pull the braid wider before wrapping it into the bun.
9. Half-Up Claw Clip Twist With Soft Waves
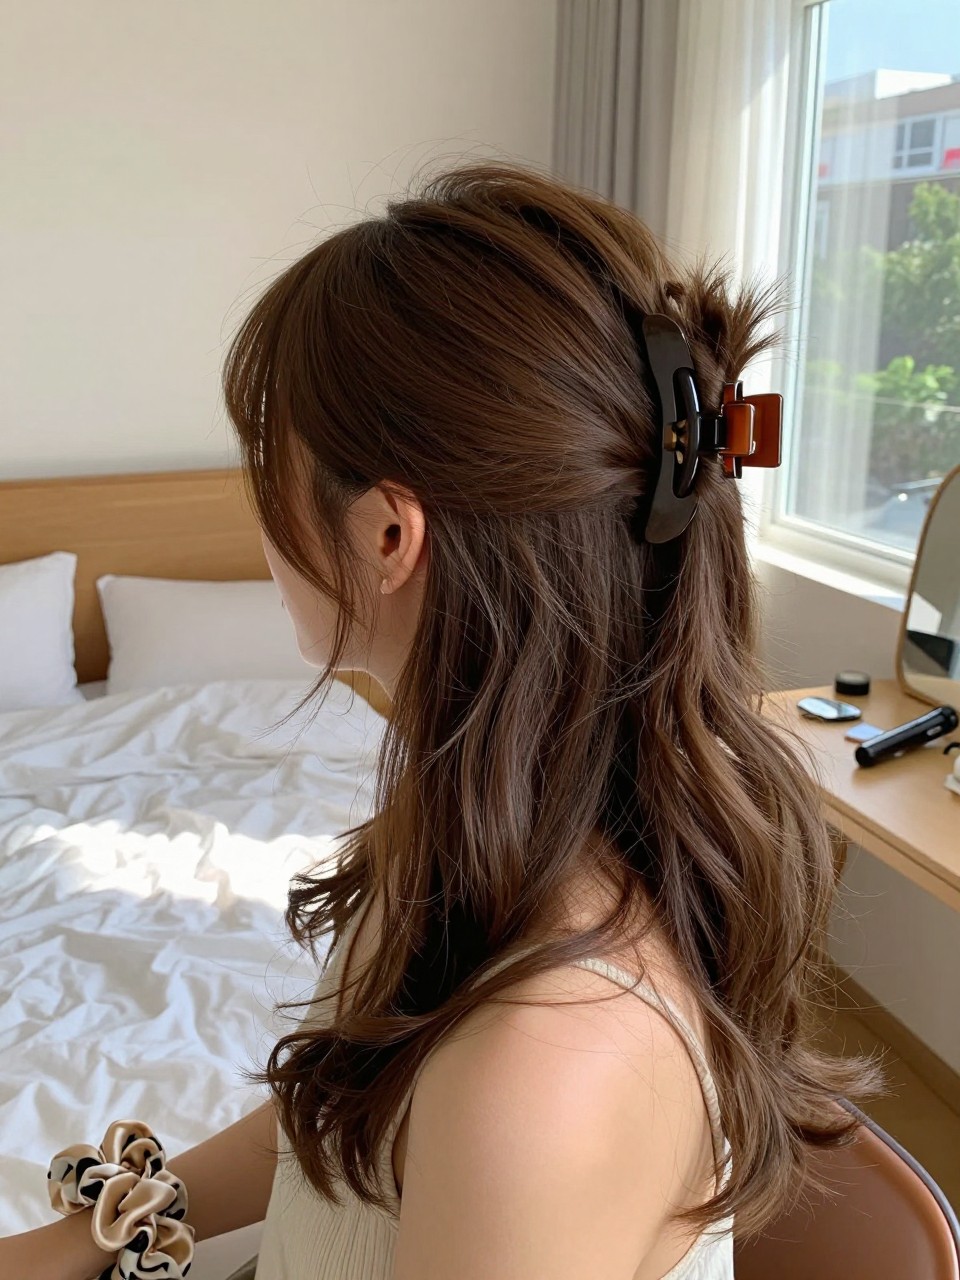
This style is quick, but it still looks wedding-guest appropriate when you keep it sleek and add soft waves. It’s perfect for a casual-to-semi-formal summer wedding, especially outdoors. It works well for medium hair and longer hair.
What you need
- Medium claw clip (holds the twist without tugging)
- Wave spray (adds soft texture and movement)
- Curling wand (optional, to refine waves)
- Glossing serum (keeps ends looking healthy)
How to style it
- Step 1: Add wave spray and lightly curl a few pieces if needed.
- Step 2: Twist the top half of your hair back at the crown.
- Step 3: Clip it in place and tuck any loose ends into the clip.
- Step 4: Smooth the front, add a tiny bit of serum to the ends, and finish with a light spray.
Quick tip
Choose a claw clip in a neutral color or tortoiseshell, so it looks more dressy.
10. Sleek Low Ponytail With Statement Barrette
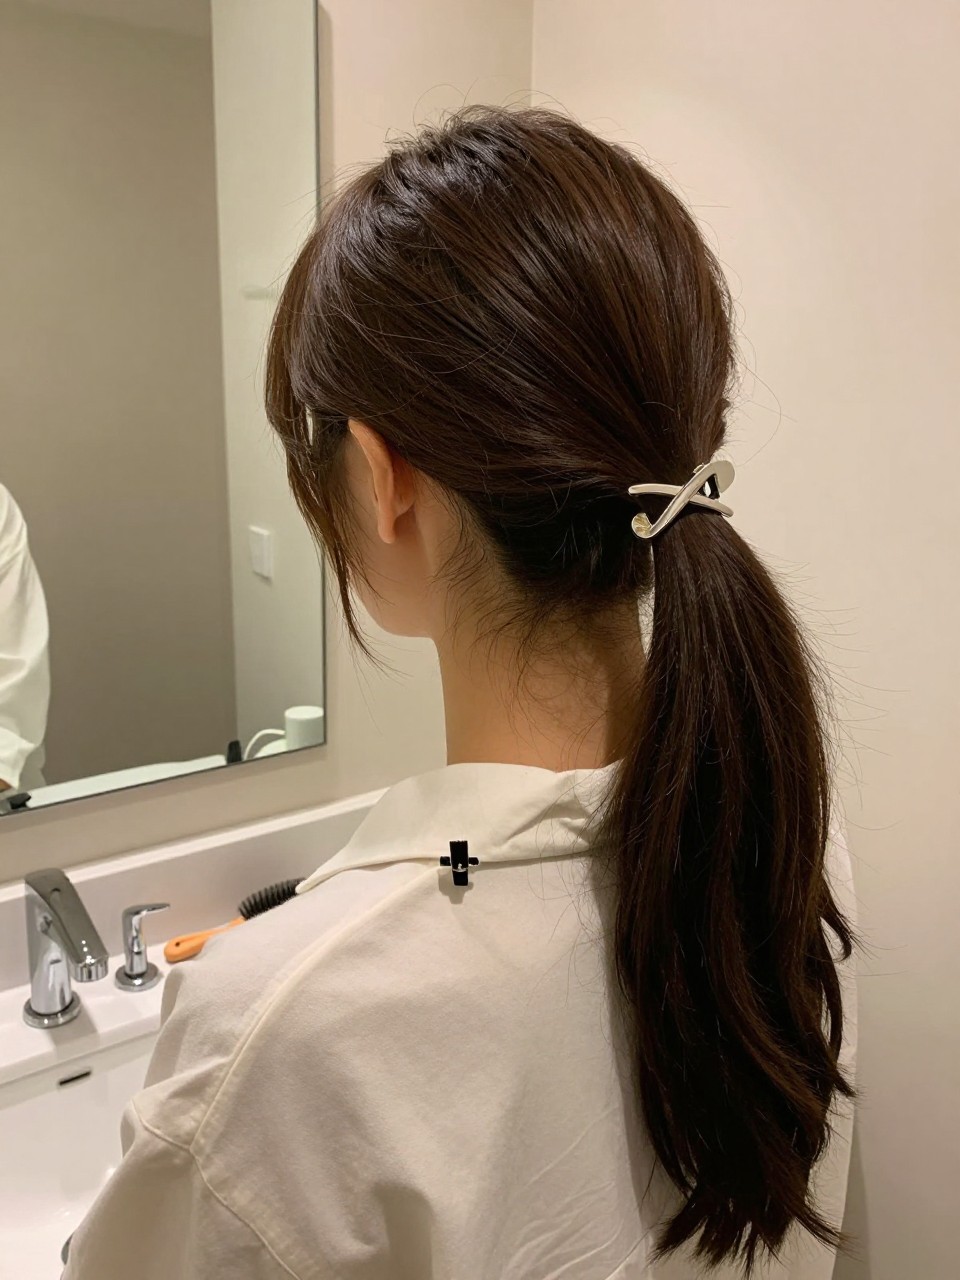
This style is simple, clean, and looks instantly more dressed up with the right barrette. It’s a smart option for hot weather weddings because it stays neat and feels light. It works best for straight or blown-out hair.
What you need
- Smoothing brush (for a sleek finish)
- Anti-frizz serum (keeps hair glossy and controlled)
- Hair elastic (secures the ponytail)
- Statement barrette (adds a wedding-ready touch)
How to style it
- Step 1: Apply serum lightly through the top layer and brush hair smooth.
- Step 2: Pull hair into a low ponytail and secure it tight at the nape.
- Step 3: Clip the barrette above the elastic or to the side for detail.
- Step 4: Smooth flyaways and set with hairspray.
Quick tip
If your hair gets oily fast, use dry shampoo at the roots before you start so it stays fresh longer.
11. Curled Half-Up Ponytail With Volume
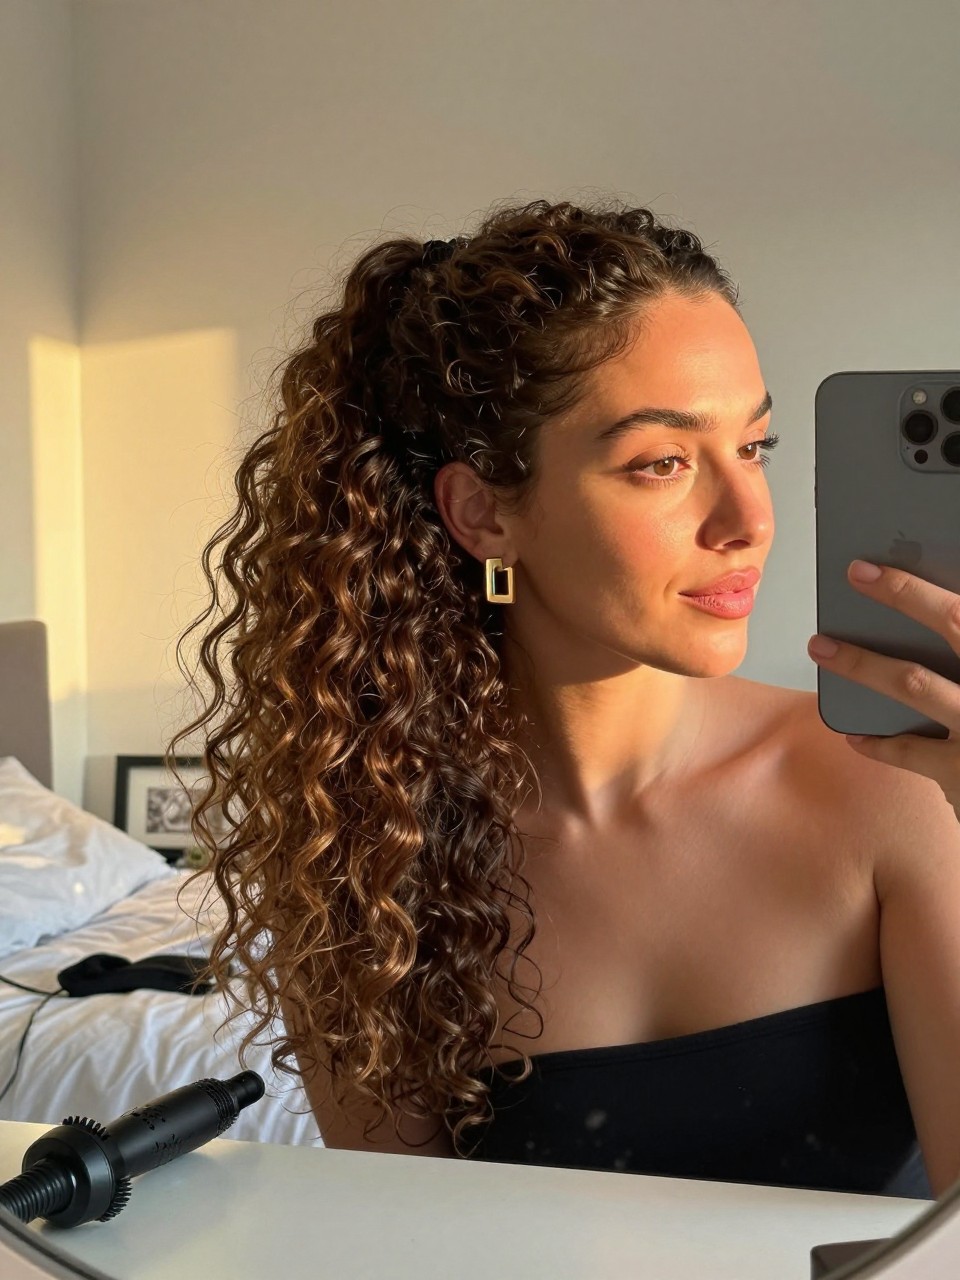
This half-up style gives you a little lift at the crown and soft curls through the ends. It’s great for photos and works nicely with strapless or off-shoulder dresses. It’s also helpful if you want hair out of your face without going fully up.
What you need
- Volumizing mousse (adds body at the roots)
- Curling wand (creates soft, lasting curls)
- Small hair elastic (secures half-up section neatly)
- Hairspray (locks in volume and curl)
How to style it
- Step 1: Add mousse at the roots and dry hair with a little lift.
- Step 2: Curl the bottom half of your hair in loose sections.
- Step 3: Pull the top half back and secure with an elastic, then pin for extra lift.
- Step 4: Loosen curls with your fingers and finish with hairspray.
Quick tip
Backcomb the crown lightly before securing the half-up section for a fuller shape.
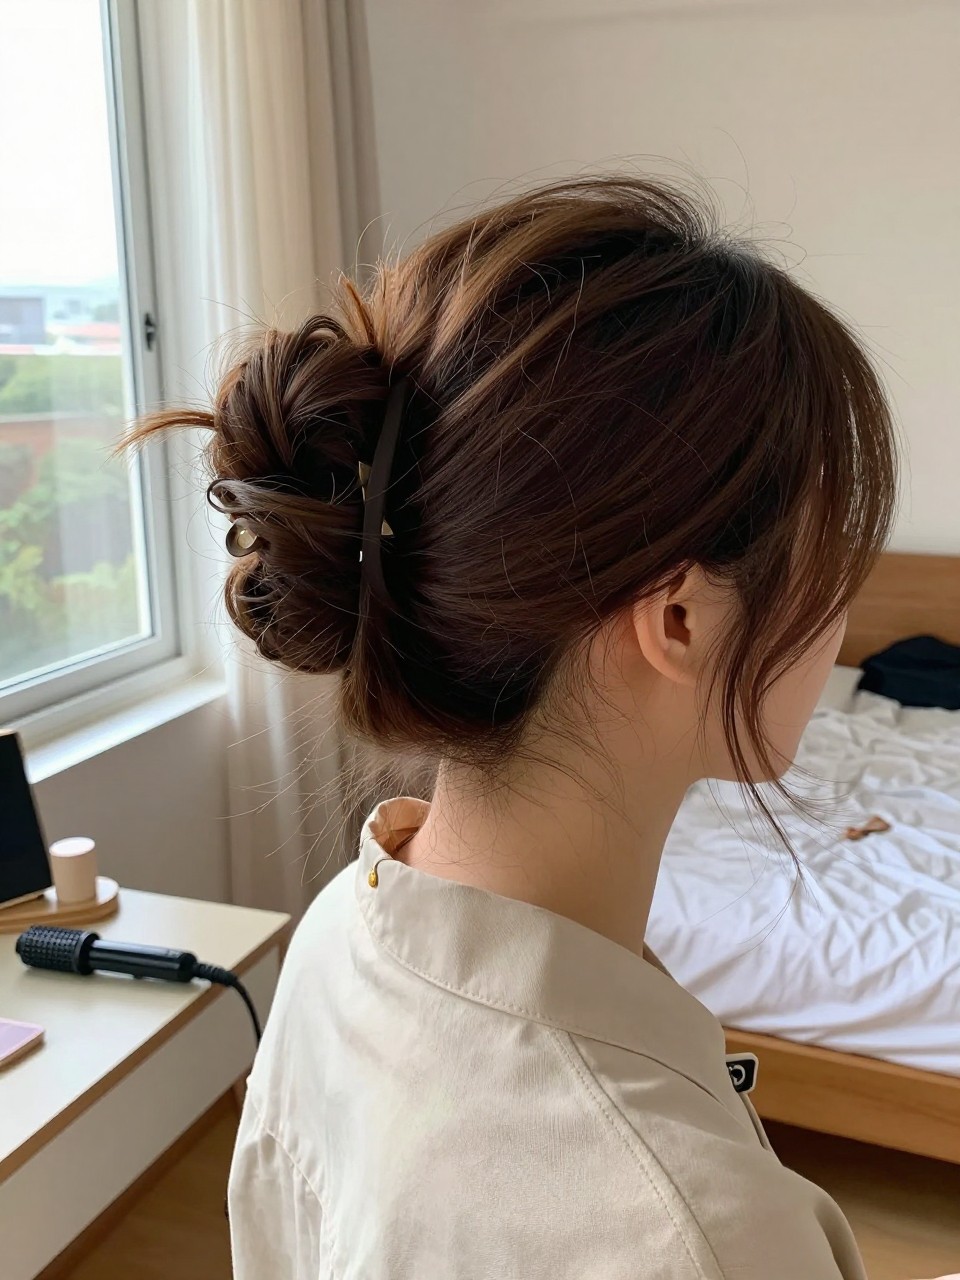
12. Side-Swept Low Bun With Soft Waves
This bun sits slightly to one side and feels romantic and dressy without being too formal. It’s a great style if you’re wearing one-shoulder or asymmetrical outfits. It works best when you add a little wave first.
What you need
- Curling iron (to add soft bend before styling)
- Texturizing spray (helps grip for pinning)
- Bobby pins (secures bun and side sweep)
- Light hairspray (keeps it soft but set)
How to style it
- Step 1: Add a few loose waves, then spray light texture through hair.
- Step 2: Sweep hair to one side and gather it low near the nape.
- Step 3: Twist into a bun and pin it securely, keeping it slightly off-center.
- Step 4: Pull out a few soft pieces and mist with hairspray.
Quick tip
Pin the side-swept section first, then build the bun, so it stays in place longer.
13. Classic Blowout With Soft Curtain Bangs
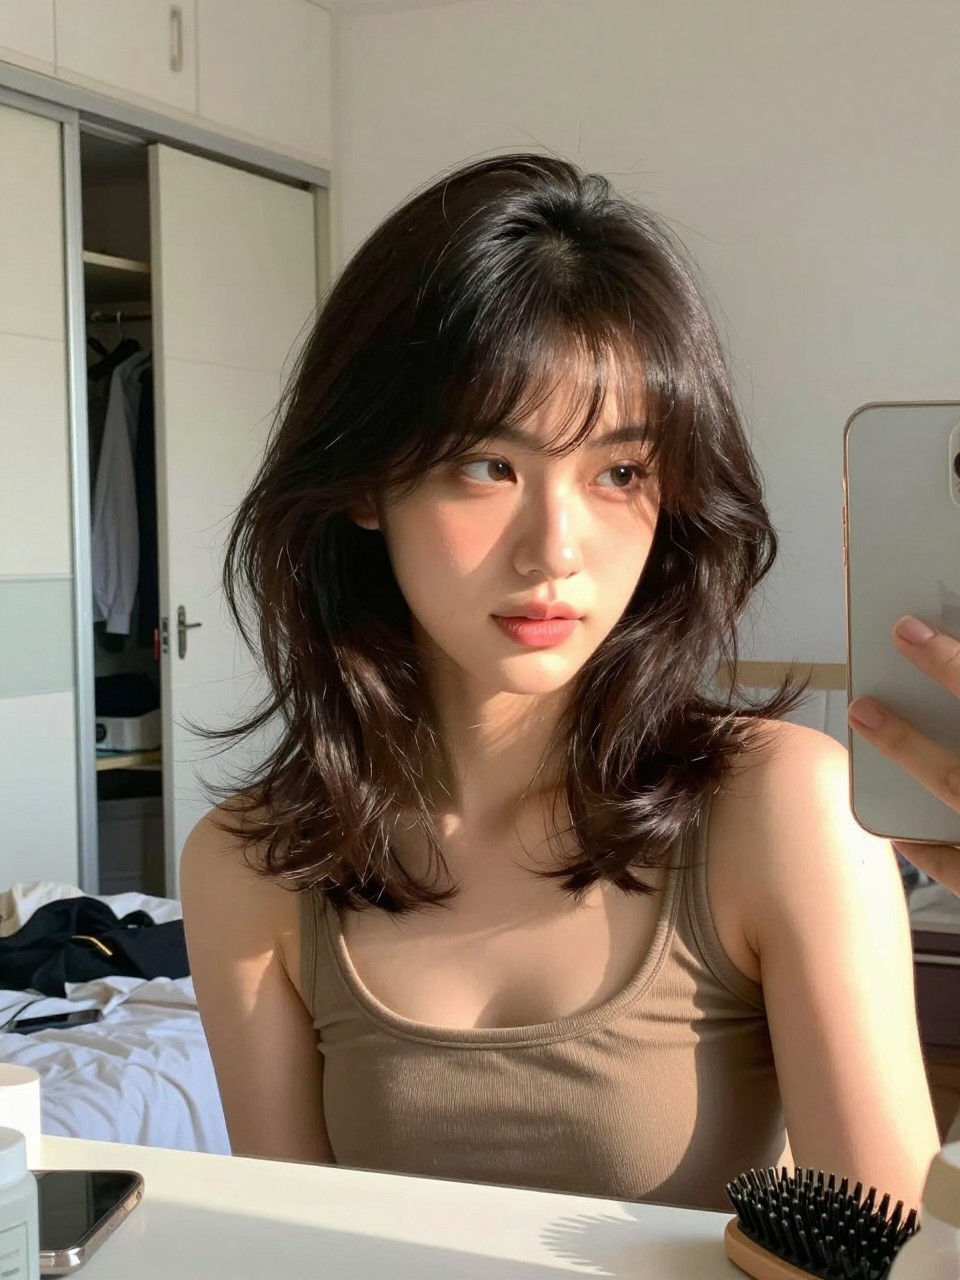
This look feels fresh, bouncy, and elegant, like you just walked out of a salon. It’s perfect for indoor weddings or evening events where you want hair down but still polished. It works best for medium to long hair and looks great in photos.
What you need
- Round brush (for smooth volume and shape)
- Blow-dry cream (reduces frizz and adds softness)
- Velcro rollers (optional, boosts volume at the crown)
- Light hair oil (adds shine to ends)
How to style it
- Step 1: Apply blow-dry cream and rough dry hair until mostly dry.
- Step 2: Blow-dry in sections with a round brush, rolling bangs away from your face.
- Step 3: Set the top in rollers for a few minutes if you want extra lift.
- Step 4: Finish with a tiny bit of oil on the ends and a mist of hairspray.
Quick tip
Let your hair cool fully before you brush it out, so the blowout lasts longer.
14. Sleek Top Knot With Soft Front Pieces
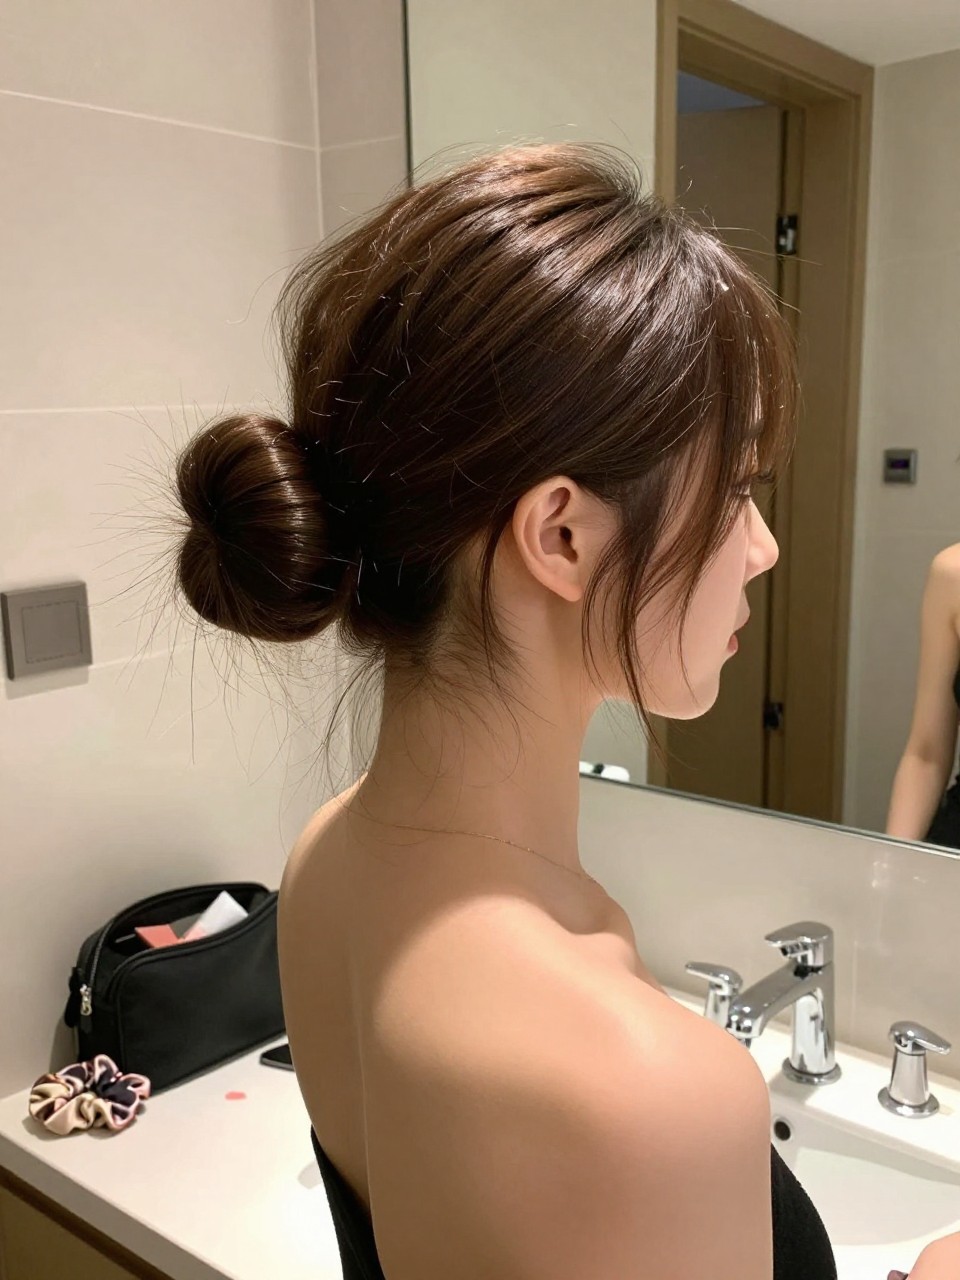
This top knot looks clean and elegant, but the soft front pieces keep it from feeling too harsh. It’s a great pick for very hot summer weddings, especially outdoors. It works well for medium to long hair and keeps your neck free.
What you need
- Hair elastic (strong hold for the bun base)
- Bobby pins (secures the knot shape)
- Smoothing gel (keeps sides sleek and neat)
- Boar bristle brush (for a smooth finish)
How to style it
- Step 1: Brush hair up and apply smoothing gel lightly to the sides.
- Step 2: Secure a high ponytail and twist it into a top knot.
- Step 3: Pin the knot down all around so it feels tight and balanced.
- Step 4: Pull out two small front pieces and finish with hairspray.
Quick tip
If your bun feels heavy, split the ponytail into two twists before wrapping, so it sits tighter.
15. Loose Braid Ponytail With Ribbon Tie
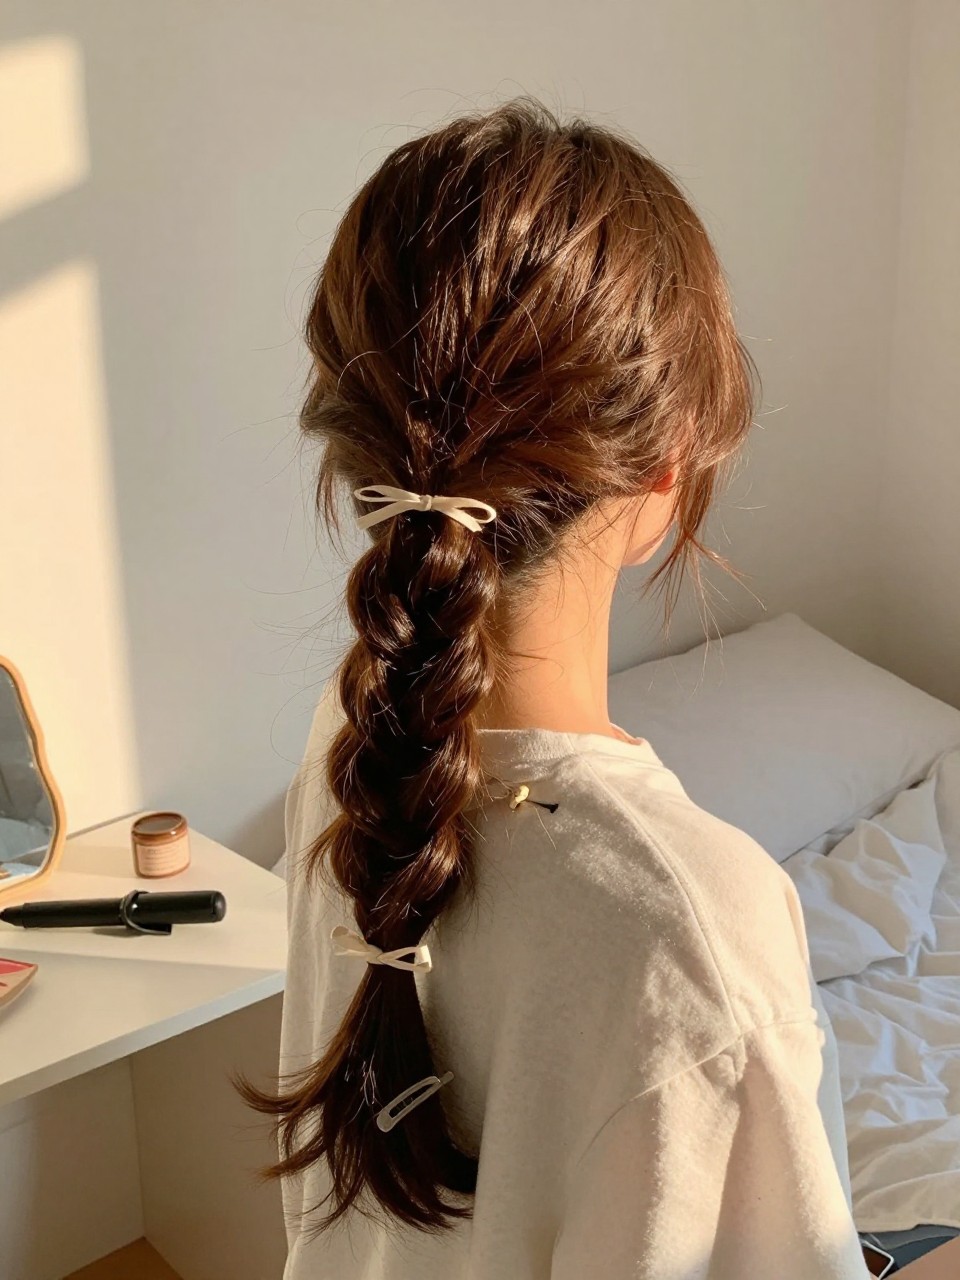
This braid feels romantic and a little playful, while still looking neat enough for a wedding. It’s perfect for garden weddings, beach weddings, or relaxed summer venues. It works best for longer hair and holds up well through dancing.
What you need
- Hair elastic (to secure the ponytail and braid end)
- Texturizing spray (adds grip so the braid looks fuller)
- Ribbon (optional, makes it feel wedding-ready)
- Light-hold hairspray (keeps it soft but controlled)
How to style it
- Step 1: Add texturizing spray and pull hair into a mid or low ponytail.
- Step 2: Braid the ponytail loosely and secure the end with an elastic.
- Step 3: Gently pull the braid apart a little to make it look fuller.
- Step 4: Tie ribbon around the base or the end and finish with light hairspray.
Quick tip
If your braid slips, add a tiny bit of dry shampoo before braiding for extra grip.


